Transaction screen without base transaction

From WorkWithPlus 12 you will be able to create a Transaction screen (to insert or update data) in a web panel without base transaction. In this way, you will be able to use all the Transaction's features as Is Required, Visible Conditional, etc. even if you are working with an SDT or variables.

This new feature is really useful when you want to insert data which is not associated to a particular database table. For example, if you want to insert data into many tables inside the same LUW (Logical Unit of Work) or if you need to insert data by using a REST service.

Transaction screen based on Business Component

You can create a Transaction screen based on an Transaction set as Business Component. For example, if you have the following Transaction:

GeneXus structure view of the Company Business Component object listing attributes CompanyId, CompanyName, CompanyDescription, CompanyLargeDescription, CompanyUrl, CompanyLogo, CompanyLocation and CompanyCreateDate with their types; a red arrow points from the object tab to the Business Component property, set to True, in the Properties panel.

And you need to create a Transaction screen based on it, you should create a new Web Panel, apply WorkWithPlus to it, and then select the "Transaction" template:
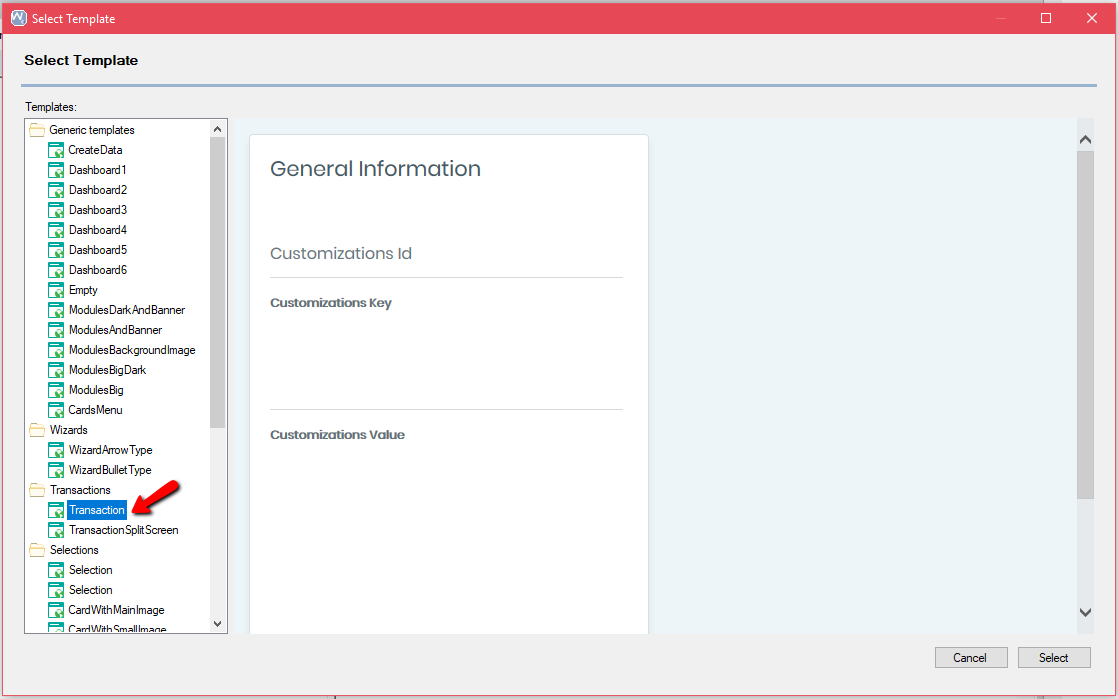
Select Template dialog for WorkWithPlus, with a left tree of Generic templates, Wizards, Transactions and Selections categories; a red arrow points to the Transaction template under Transactions, and the right preview shows a General Information panel with Customizations Id, Key and Value fields plus Cancel and Select buttons.

You will be able to define how this Transaction screen will be created. For this example you should select "Based on Business Component" and then select the desired Transaction:
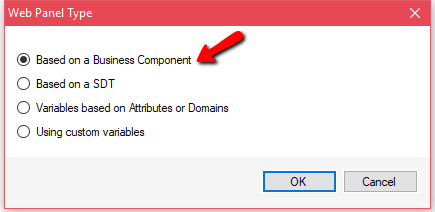
Web Panel Type dialog listing four radio options, Based on a Business Component, Based on a SDT, Variables based on Attributes or Domains, and Using custom variables, with a red arrow pointing to Based on a Business Component and OK/Cancel buttons below.

WorkWithPlus will automatically create all the instance based on the BC structure:
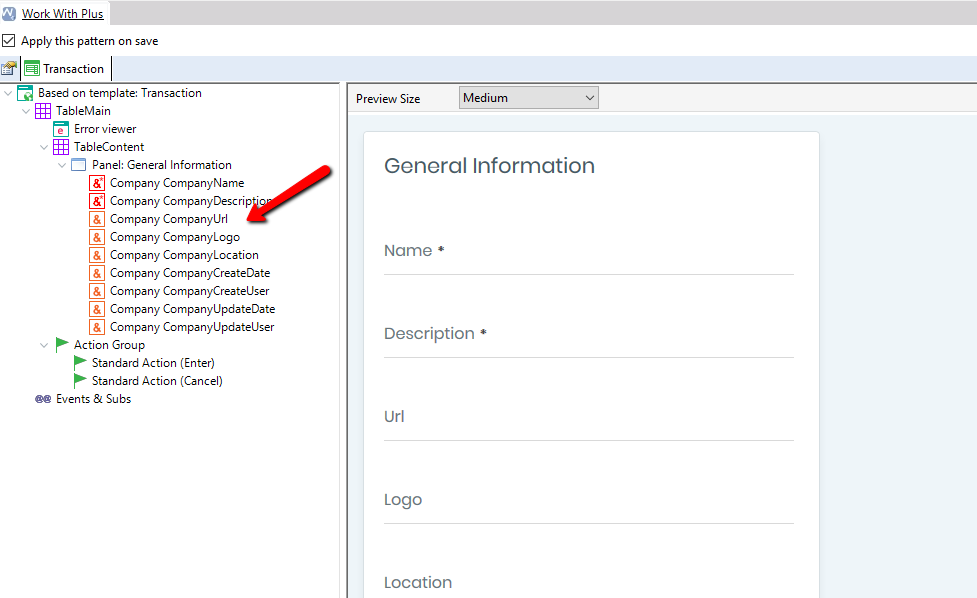
WorkWithPlus pattern tree titled Based on template: Transaction, bound to the Company Business Component, listing attributes CompanyName, CompanyDescription, CompanyUrl, CompanyLogo, CompanyLocation, CompanyCreateDate, CompanyCreateUser, CompanyUpdateDate and CompanyUpdateUser highlighted by a red arrow; the preview shows a General Information form with Name, Description, Url, Logo and Location fields.

Then, you will need to add the necessary code to develop the logic of the Web Panel and you can modify the instance as usual by adding new features and customizing the layout.

Transaction screen based on SDT

You can create a Transaction based on an SDT. For example, if you have the following SDT:

SelectionWithoutBaseImg001

And you need to create a Transaction based on it, you should create a new Web Panel, apply WorkWithPlus to it, and then select the "Transaction" template:

Select Template dialog for WorkWithPlus, with a left tree of Generic templates, Wizards, Transactions and Selections categories; a red arrow points to the Transaction template under Transactions, and the right preview shows a General Information panel with Customizations Id, Key and Value fields plus Cancel and Select buttons.

You will be able to define how this Transaction will be created. For this example you should select "SDT" and then select the desired SDT.
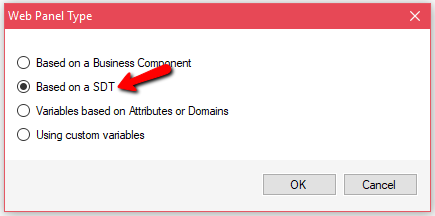
Web Panel Type dialog with the same four radio options as the Business Component variant, but with a red arrow pointing to Based on a SDT, and OK/Cancel buttons below.

WorkWithPlus will automatically create all the instance based on the SDT structure:
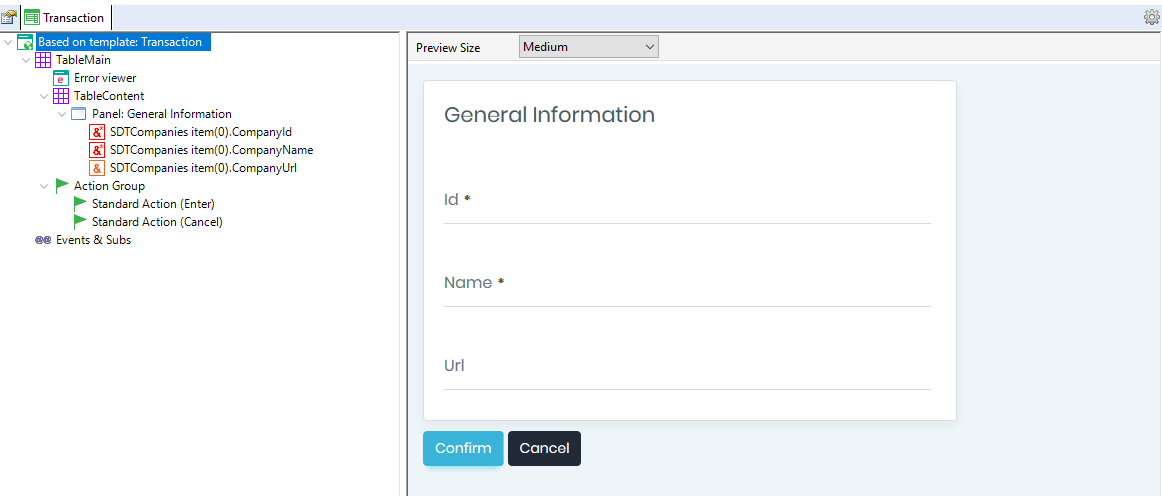
WorkWithPlus pattern tree titled Based on template: Transaction, with a General Information panel bound to SDTCompanies item(0) attributes CompanyId, CompanyName and CompanyUrl; the preview shows Id, Name and Url fields with Confirm and Cancel buttons.

Then, you will need to add the necessary code to develop the logic of the Web Panel and you can modify the instance as usual by adding new features and customizing the layout.

Transaction screen based on variables

You can create a Transaction scren based on variables.  In order to achieve it, you should create a new Web Panel, apply WorkWithPlus to it, and then select the "Transaction" template:

Select Template dialog for WorkWithPlus, with a left tree of Generic templates, Wizards, Transactions and Selections categories; a red arrow points to the Transaction template under Transactions, and the right preview shows a General Information panel with Customizations Id, Key and Value fields plus Cancel and Select buttons.

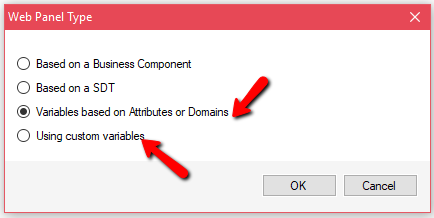
There are two possible options:

Web Panel Type dialog with the four standard radio options, and two red arrows pointing to Variables based on Attributes or Domains and Using custom variables, with OK/Cancel buttons below.

Variables based on Attributes or Domains

You should use this option if the screen will be generated by using variables based on Attributes or Domains:

SelectionWithoutBaseImg005

Using custom variables

You should use this option if you want to define the variables straightforward in the instance as follows:
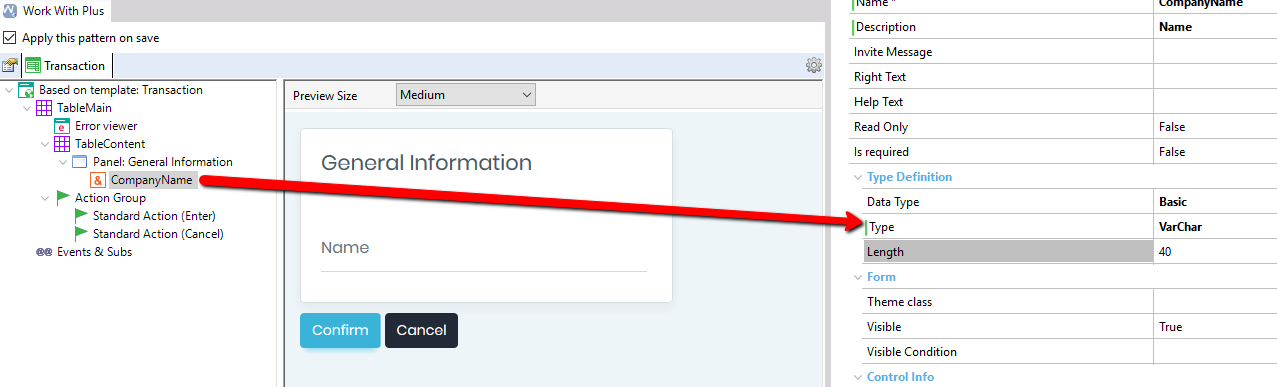
WorkWithPlus pattern editor with the CompanyName variable selected in the tree, a red arrow pointing to its Properties panel showing Name CompanyName, Description Name, and Type Definition Data Type Basic, Type VarChar, Length 40; the preview shows a General Information form with a Name field.

In both scenarios you will need to add the necessary code to develop the logic of the Web Panel and you can modify the instance as usual by adding new features and customizing the layout.