Update your KB to WorkWithPlus 12

Once you install WorkWithPlus 12, there are two possible scenarios:

Use WorkWithPlus 12 with the theme that you already have

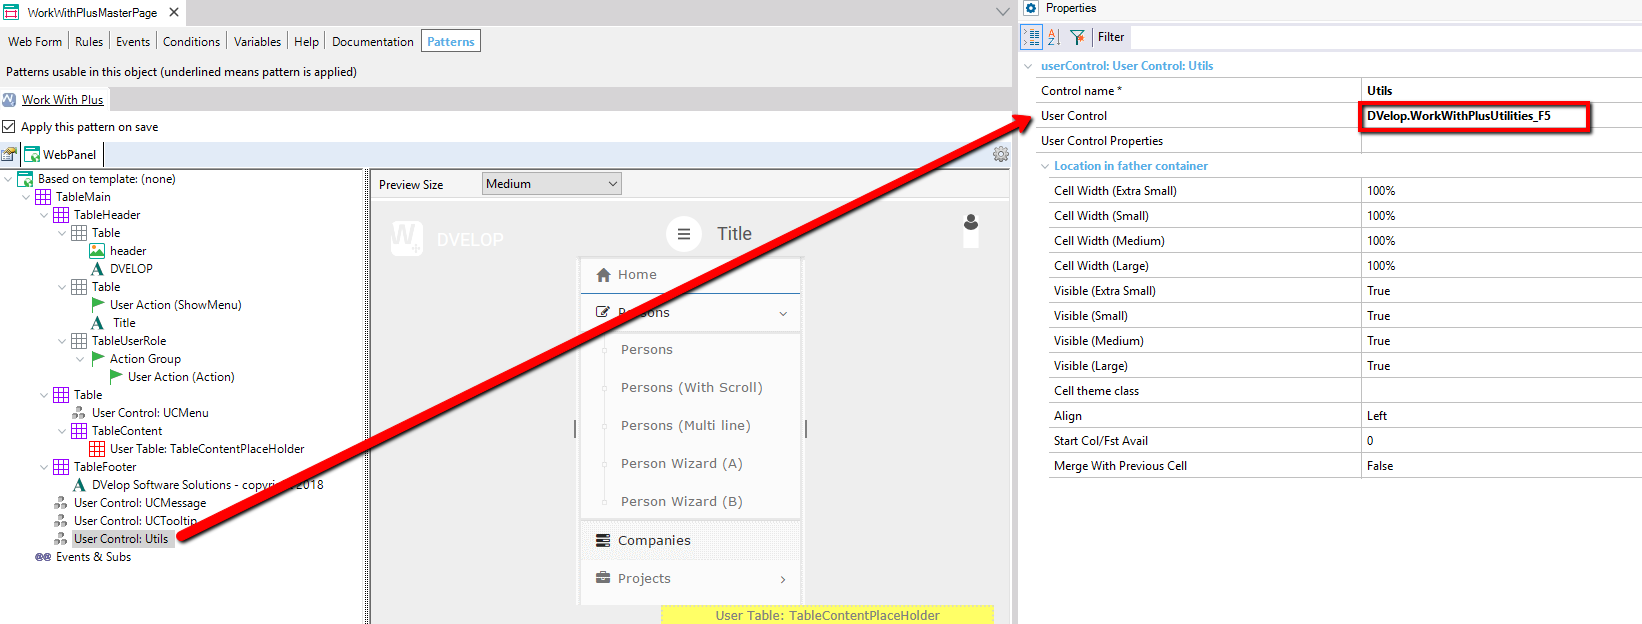
In this scenario, install the WorkWithPlus 12 setup, open your KB, and add the following User Control in your Master Page (according to the Font Awesome version that you want to use):
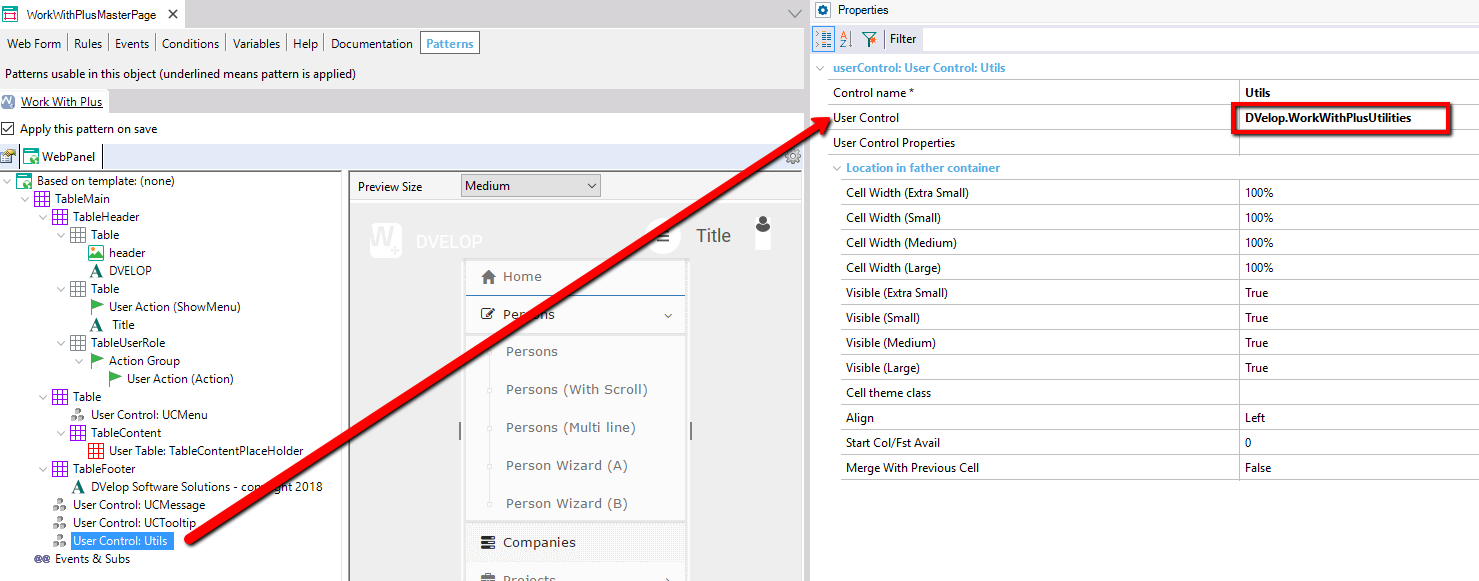
Keep using Font Awesome 4:

The WorkWithPlusMasterPage web form editor shows the object tree with 'User Control: Utils' selected in the TableFooter; the Properties panel lists User Control 'DVelop.WorkWithPlusUtilities', highlighted by a red arrow, alongside layout properties like Cell Width and Visible. The preview shows the DVELOP master page header and left navigation menu.

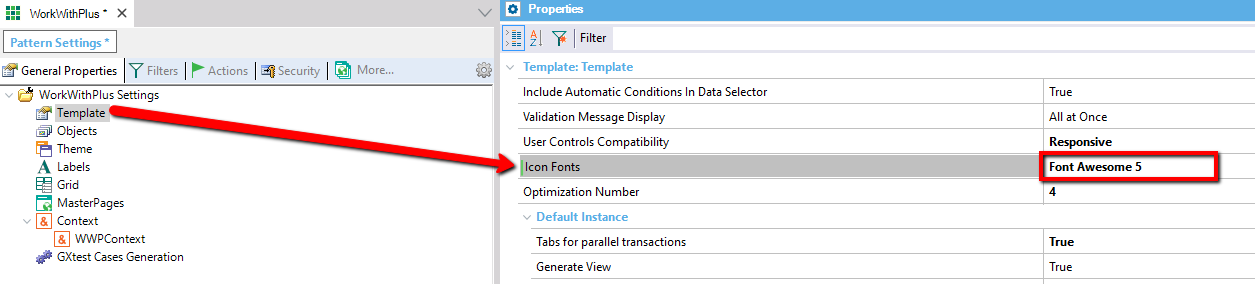
You should also set the following property:
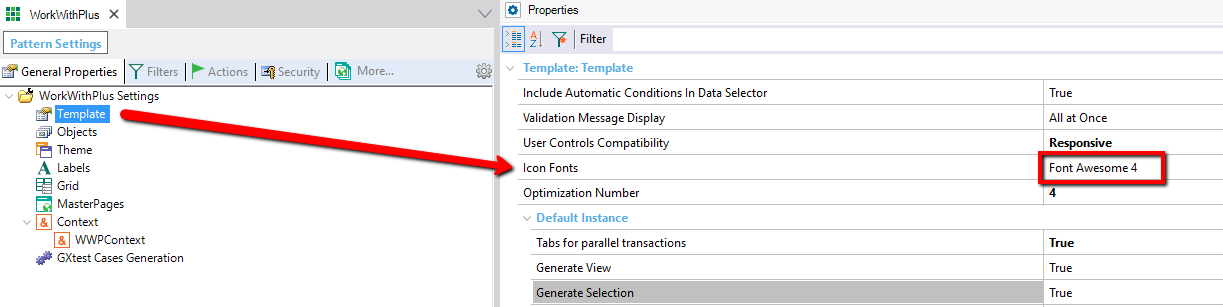
The WorkWithPlus Pattern Settings General Properties/Template node is selected, with the Properties panel showing the Template section; the 'Icon Fonts' property is set to 'Font Awesome 4' and highlighted with a red box, alongside Optimization Number and Default Instance settings.

Upgrade to Font Awesome 5:

The WorkWithPlusMasterPage web form editor shows the 'User Control: Utils' node selected in the TableFooter, with its Properties panel User Control field set to 'DVelop.WorkWithPlusUtilities_F5' (highlighted), linked by a red arrow to the tree. The preview shows the DVELOP master page header and navigation menu including Home, Persons, and Companies.

You should also set the following property:
The WorkWithPlus Pattern Settings General Properties/Template node is selected, with the Properties panel Template section showing 'Icon Fonts' changed to 'Font Awesome 5' and highlighted with a red box; the object tab title shows an unsaved-changes asterisk.

Important: If you are using Font Awesome 4, you can update to Font Awesome 5 according to the steps defined by Font Awesome: https://fontawesome.com/how-to-use/on-the-web/setup/upgrading-from-version-4

As explained on Font Awesome upgrade manual, you should include v4-shims.min.css to properly visualise your current icons. This file is already included in the KB resources under DVelop\Bootstrap\Shared\fontawesome_v5\css folder, you should include that css in the Master Page as follows:

Form.HeaderRawHTML += '<link rel="stylesheet" type="text/css" href="DVelop\Bootstrap\Shared\fontawesome_v5\css\v4-shims.min.css">'
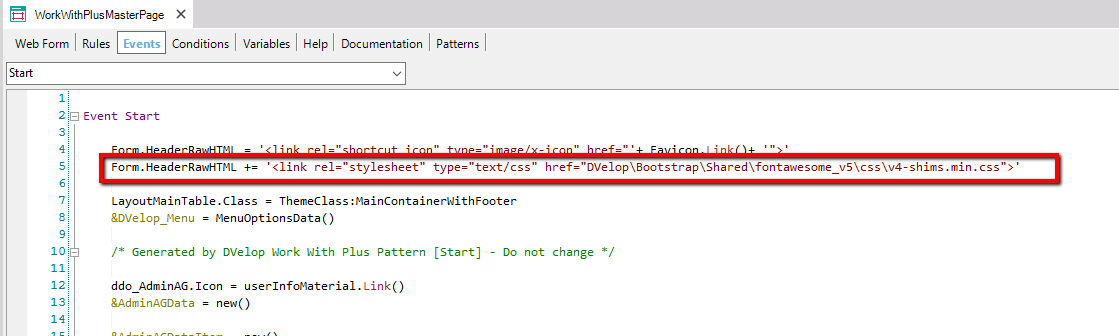
GeneXus WorkWithPlusMasterPage object on the Events tab (Start event): source code with a red box highlighting the line that appends a Font Awesome v4-shims stylesheet link (fontawesome v5 css v4-shims.min.css) to Form.HeaderRawHTML.

You also need to add the following class in the theme object:
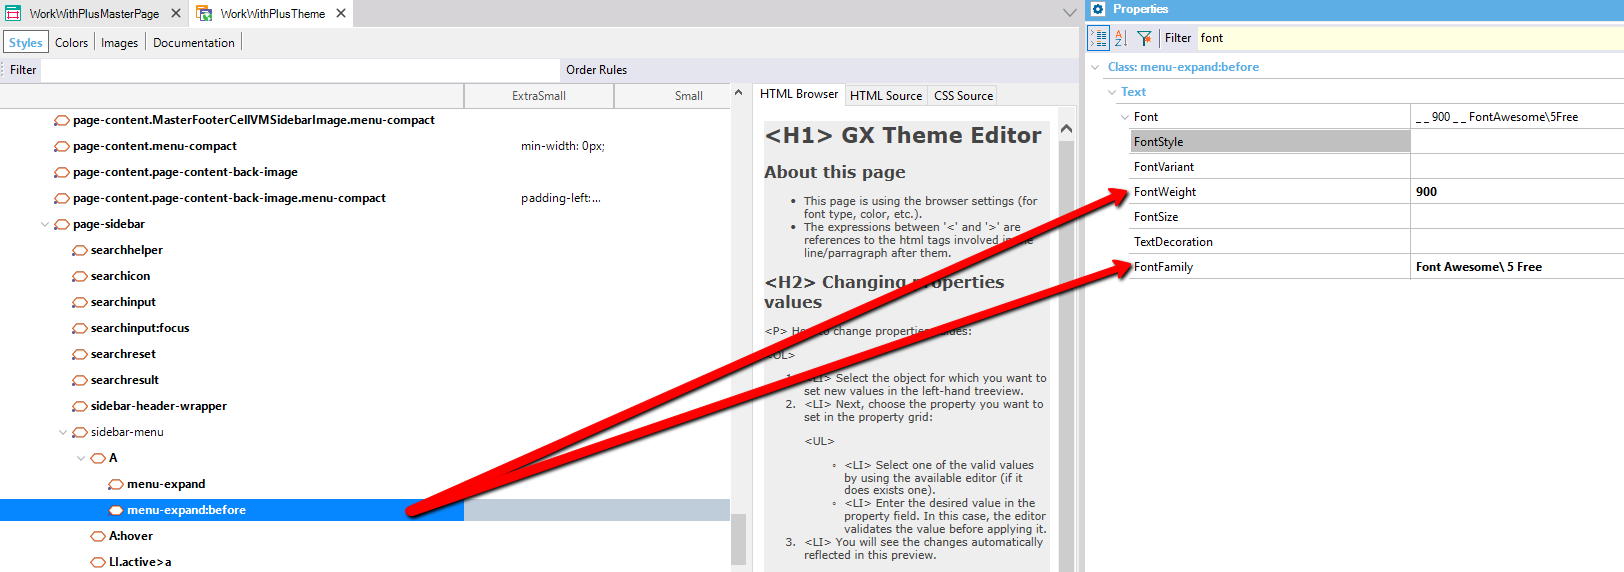
GeneXus GX Theme editor (WorkWithPlusTheme), Styles tab: the menu-expand:before class selected under sidebar-menu; red arrows point to its Font properties on the right, FontWeight 900 and FontFamily Font Awesome 5 Free, with an HTML Browser preview alongside.

You can check Font Awesome 5 icons at: https://fontawesome.com/icons?d=gallery.

When applying WorkWithPlus for the first time (for example, if you modify and save an instance), WorkWithPlus will import all the necessary resources so you can use the new features. After this process, you will be ready to use the new features!

If you don't want to add any new feature, just run your KB as you always do.

We always perform regression tests to ensure that the generated code within the versions remain the same, so you won't need to test again your screens.

Use  WorkWithPlus 12 and apply one of the new available designs

When you import a new theme from the "Design System Wizard", WorkWithPlus is going to replace the templates defined within the WorkWithPlus Settings so you will have to impact again the customizations made on them.

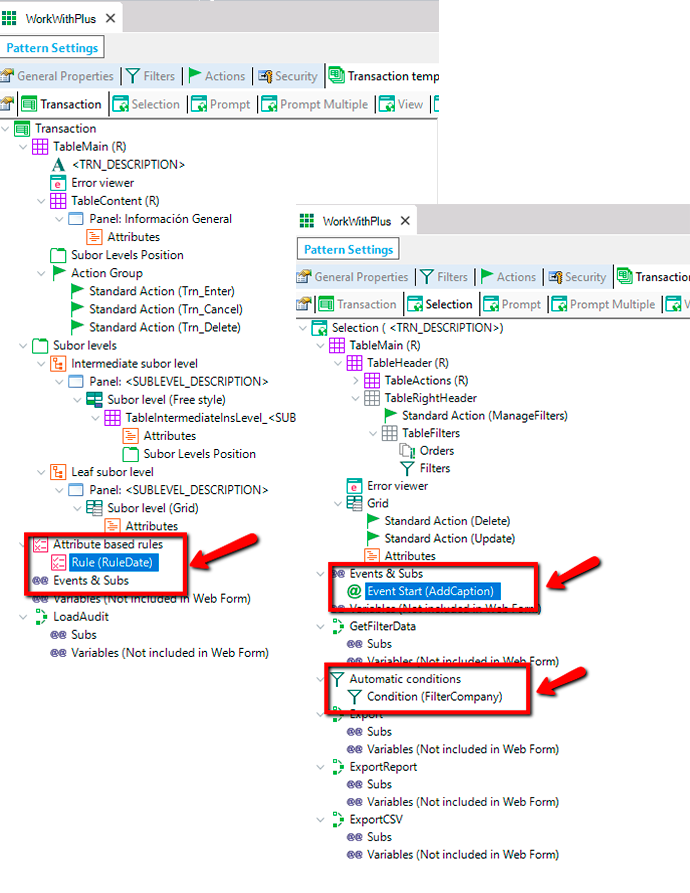
This customizations may include:

  • Event Blocks
  • Automatic Conditions
  • Automatic Rules
  • Customizations in the layouts of the screens
  • Etc.

WorkWithPlus Settings tree for the Transaction template (Main), with red arrows highlighting three nodes: Attribute based rules > Rule (RuleDate) under Events & Subs, Events & Subs > Event Start (AddCaption) under the TableHeader selection grid, and Automatic conditions > Condition (FilterCompany) below the filters.

In order to keep these customizations with the new theme we suggest the following steps:

Step 1: Mark All Instances As Updated

You should mark your actual instances as updated so you will be sure that the only changes that will be applied are the ones regarding the new theme. This process should be done for Transaction template: 

The WorkWithPlus Pattern Settings window, Transaction template (Main) tab, shows the gear-icon context menu open with 'Mark all Instances as Updated (Transaction template: Main)' highlighted, alongside 'Update Instances', 'List Objects based on this template', and Preview options; a red arrow points from the toolbar icon to the menu.

And also for each Web Panels template:

The WorkWithPlus Pattern Settings window, Web Panel templates tab, has the 'CreateData' template selected; its context menu shows 'Mark all Instances as Updated (WebPanel template: CreateData)' highlighted, along with 'List Objects based on this template', 'Update Instances', 'Delete Template', and Preview.

Step 2: Import the new design

Import the desired settings and design from the Design System Wizard according to your needs. Once the import process is finished you can go on with the next step.

Step 3: Impact changes made in WorkWithPlus Settings

Open the WorkWithPlus Settings, as you can visualize it has the new theme and layout applied:
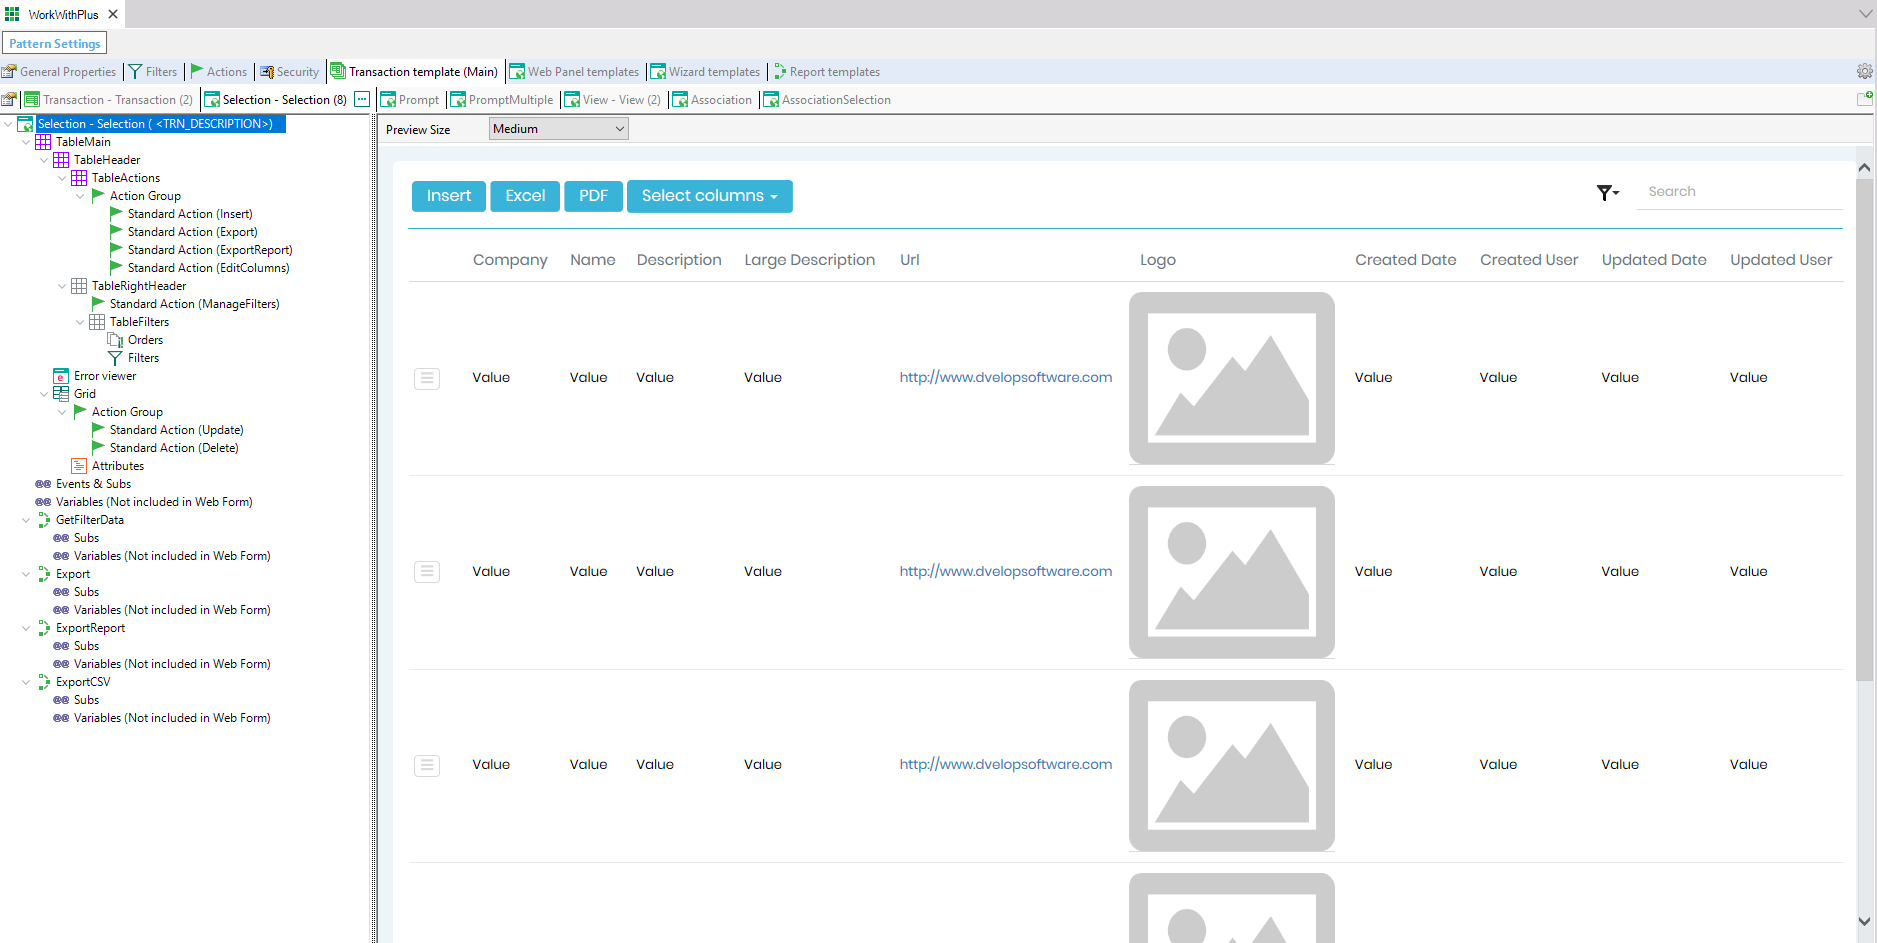
The Selection pattern preview for a WorkWithPlus web panel displays a data grid with Insert, Excel, PDF, and 'Select columns' toolbar buttons, a search box, and columns Company, Name, Description, Large Description, Url, Logo, Created Date, Created User, Updated Date, and Updated User, with sample 'Value' placeholder rows and a placeholder logo image.

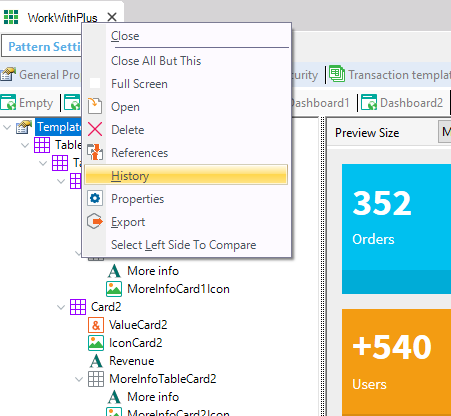
Open its History:

Right-click context menu on the WorkWithPlus settings tab/template node, listing Close, Close All But This, Full Screen, Open, Delete, References, History (highlighted), Properties, Export, and Select Left Side To Compare, used to view a template's revision history in the WorkWithPlus Settings editor.

Select the latest version before the importing process as follows:
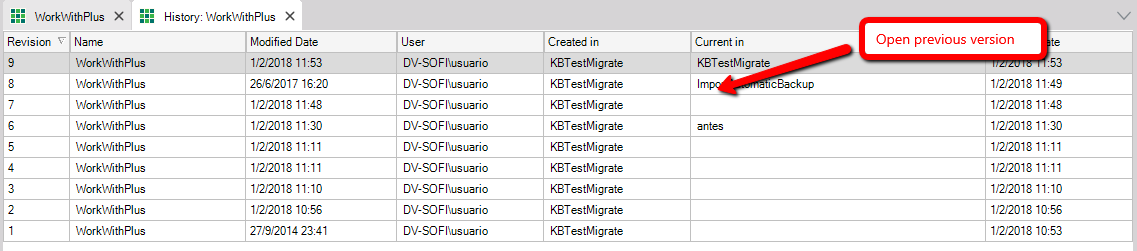
The KB object History view for WorkWithPlus lists revisions with columns Revision, Name, Modified Date, User, Created in, Current in, and Date, showing entries from revision 1 through 9. A callout labeled 'Open previous version' points to the 'Current in' column, indicating where to right-click a revision to open an earlier version.

You will need to copy the customizations from the History version to the current WorkWithPlus Settings:
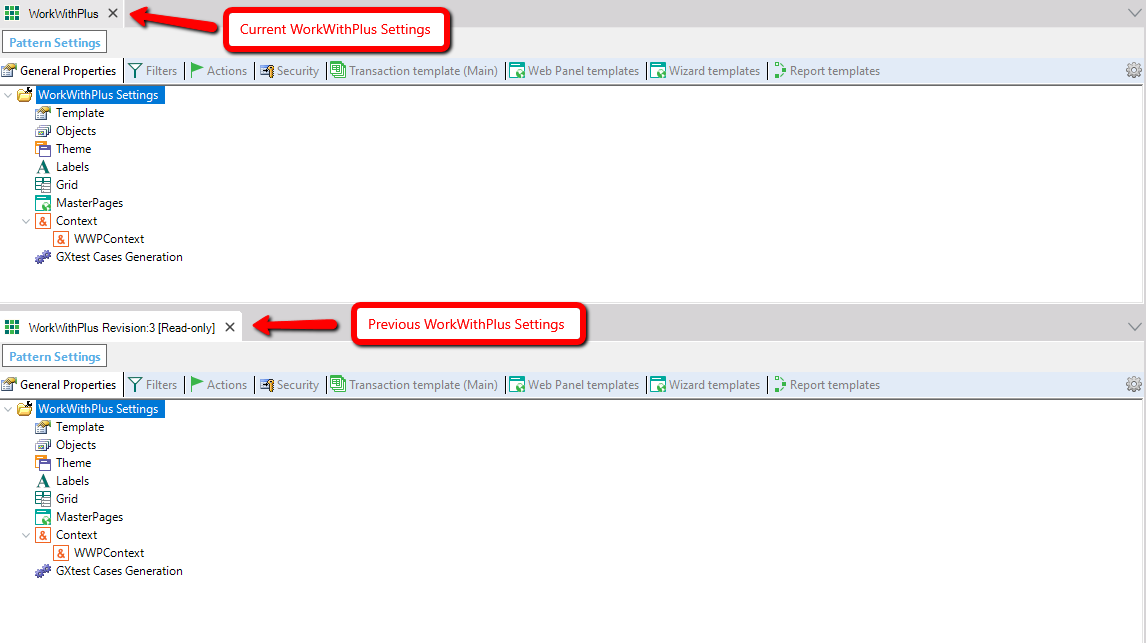
Two stacked WorkWithPlus Settings editor windows compare the 'Current WorkWithPlus Settings' tab against a 'WorkWithPlus Revision:3 <a href='Read-only'>Read-only</a>' tab labeled Previous WorkWithPlus Settings, both showing the same General Properties tree (Template, Objects, Theme, Labels, Grid, MasterPages, Context, WWPContext, GXtest Cases Generation) for version comparison.

You can copy and paste the nodes of Automatic Rules, Automatic Conditions, Event Blocks, etc. to do it faster. For the layout customizations you will need to copy the properties from the different nodes.

In this way, you will have the new theme and layouts with your previous customizations.

Important:

  • If you had customized the Object's name pattern or you are migrating from WorkWithPlus 9 or lower versions, you should also impact that changes in the new WorkWithPlus Settings. So, you can copy the names from the History version to the current WorkWithPlus Settings:
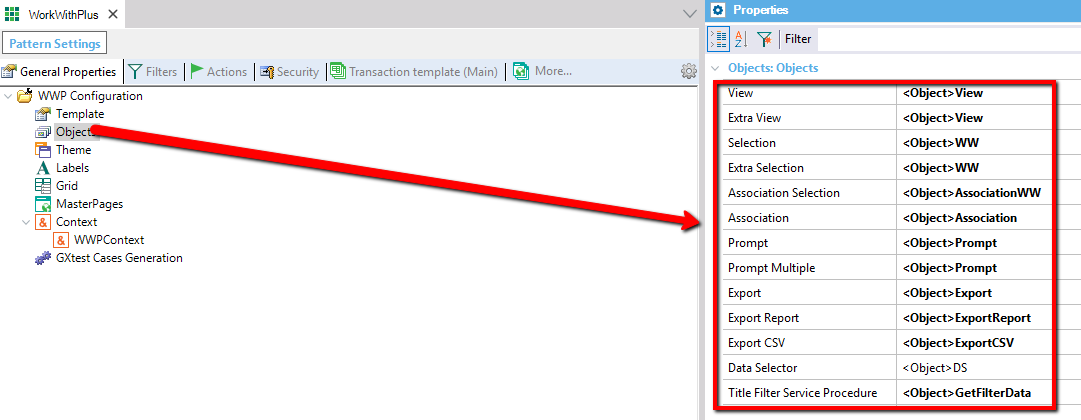
The WorkWithPlus pattern editor shows the Objects node selected in the tree, with the Properties panel listing generated object types: View, Extra View, Selection, Extra Selection, Association Selection, Association, Prompt, Prompt Multiple, Export, Export Report, Export CSV, Data Selector, and Title Filter Service Procedure, each mapped to its corresponding generated object name.

  • The templates which you have before run the "Design System Wizard" that are used and are not in the new version are mantained. So you will need to modify manually these templates to adjust the design to the new version design, to do that you can compare with the "Transacion" and "Selection" designs.
     
  • If you are migrating from WorkWithPlus 10 and you were using Conditional Formatting, you should rename the following classes:
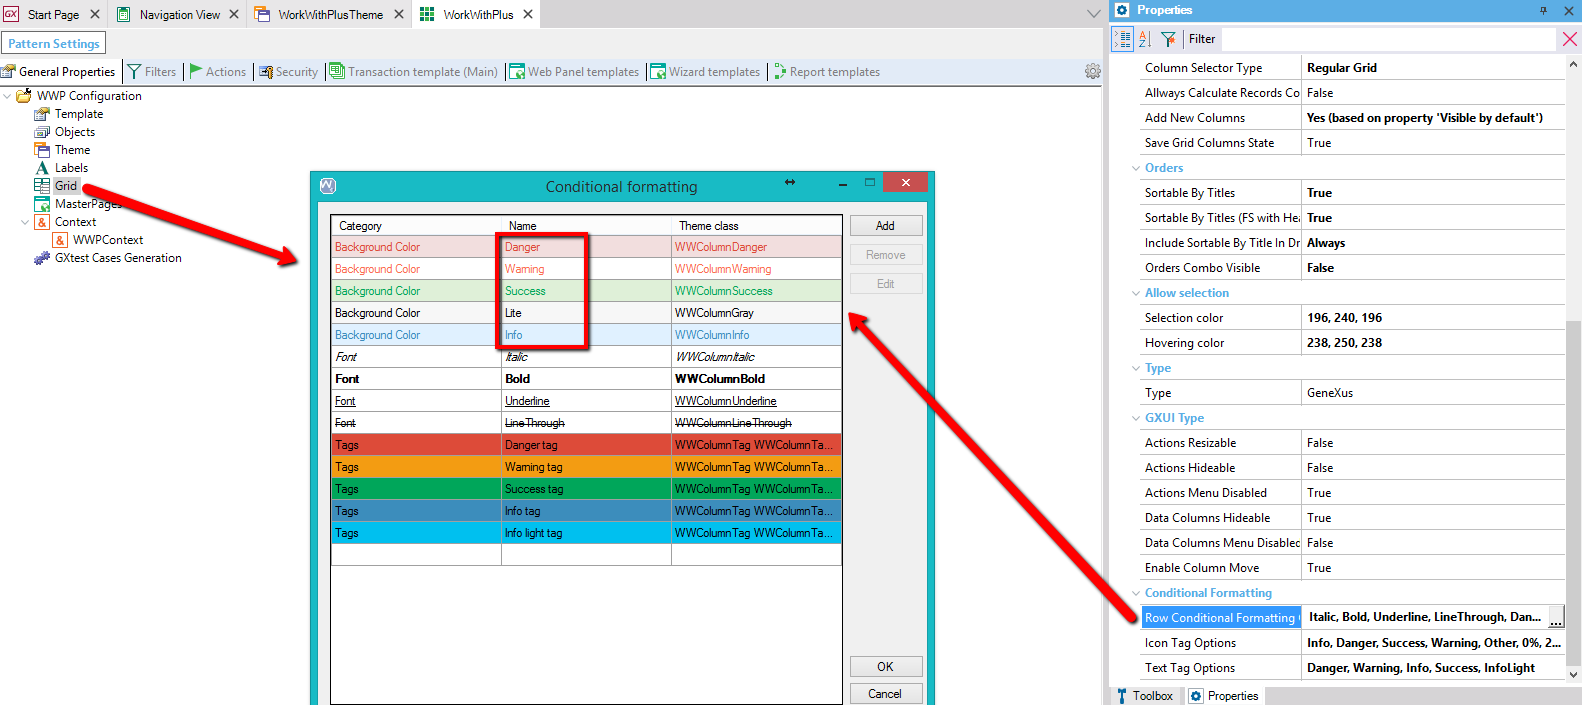
    WorkWithPlus Settings tree with WWP Configuration > Grid selected, Properties panel showing the Row Conditional Formatting property, and its Conditional formatting dialog open listing rows grouped by Category (Background Color: Danger, Warning, Success, Lite, Info; Font: Italic, Bold, Underline, LineThrough; Tags: Danger tag, Warning tag, Success tag, Info tag, Info light tag) each mapped to a WWColumn theme class, with Add, Remove, and Edit buttons.

    And set the names that you had in WorkWithPlus 10:
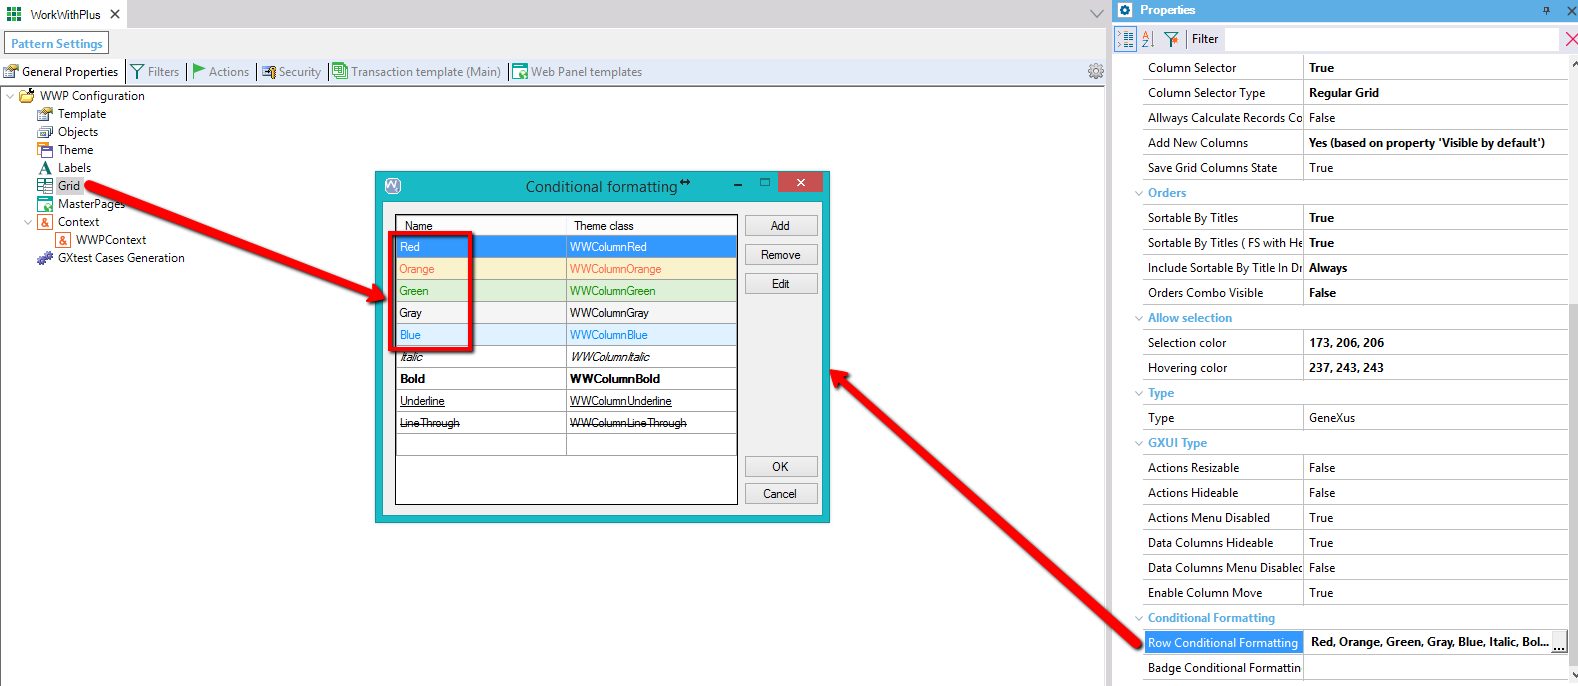
    WorkWithPlus Settings Grid node Properties panel with the Row Conditional Formatting dialog titled Conditional formatting open, listing Name/Theme class pairs Red, Orange, Green, Gray, Blue (highlighted) and Italic, Bold, Underline, LineThrough mapped to WWColumn theme classes, with Add, Remove, Edit, OK, and Cancel buttons.

Step 4: Update Instances

Update Instances in your Transaction templates and for each Web Panel template in order to impact the new theme in your instances:

The WorkWithPlus Pattern Settings window, Transaction template (Main) tab, shows the gear menu with 'Update Instances (Transaction template: Main)' highlighted, next to 'Add custom template settings...', 'List Objects based on this template', and 'Mark all Instances as Updated'.

According to the theme and settings that you have selected during the "Design System Wizard", some messages like the following may appear:
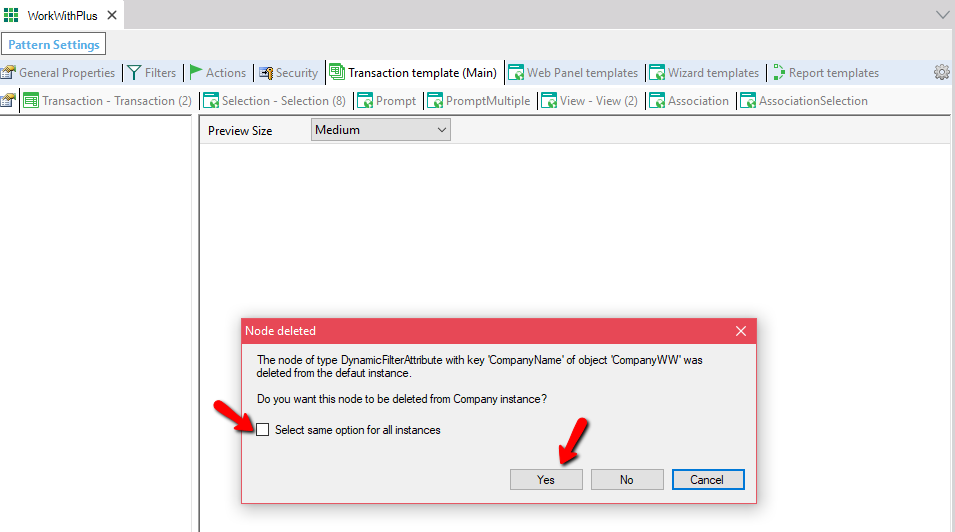
A 'Node deleted' dialog in the WorkWithPlus pattern editor states the DynamicFilterAttribute node with key 'CompanyName' of object 'CompanyWW' was deleted from the default instance, and asks whether to delete it from the Company instance too, with a 'Select same option for all instances' checkbox and Yes, No, Cancel buttons.

This messages ask you whether to delete some specific node from an instance or not. For example, the previous messages asks if you want to remove the "Dynamic Filters" of the Company Transaction as in the selected design the default filter is the "Full Text Search".

Once the "Update Instance" process is finished, if you open an instance, you will see that the new theme is applied but your previous customisations are still there:
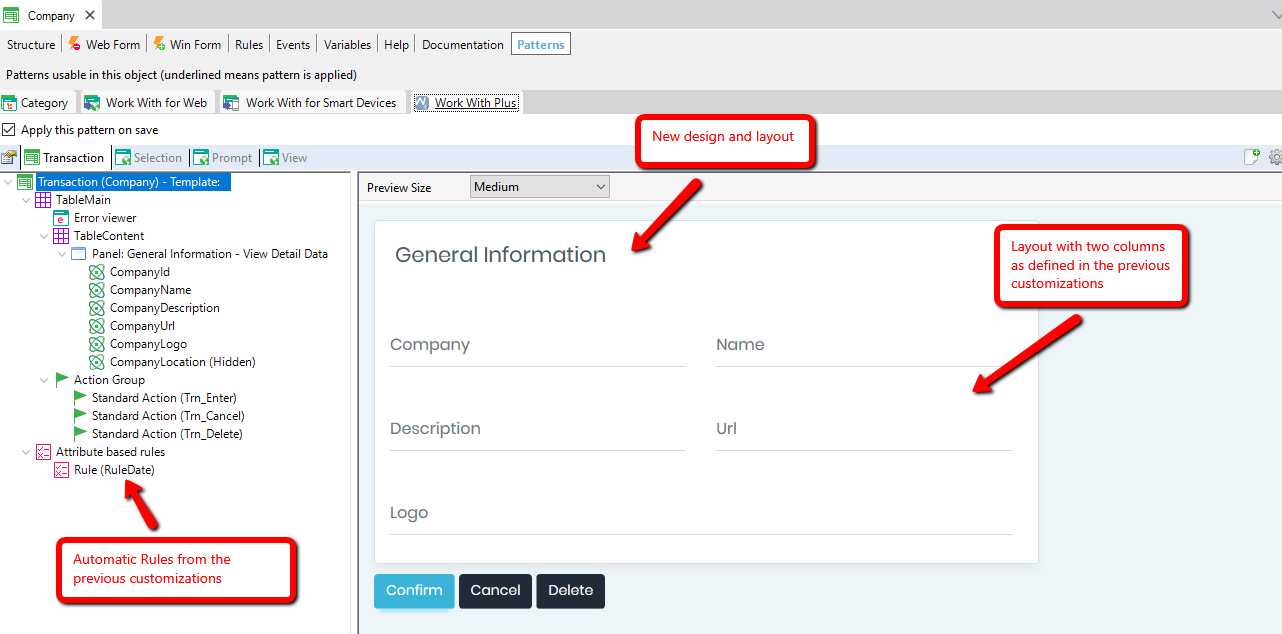
The Company transaction's WorkWithPlus pattern editor shows the View Detail Data panel tree and a preview of a 'General Information' form laid out in two columns (Company, Name, Description, Url, Logo) with Confirm, Cancel, and Delete buttons. Callouts note the new design and layout, the two-column arrangement from prior customizations, and an automatic Rule (RuleDate) carried over from those customizations.

Step 5: Recover your menu

If you are loading your menu data from the Data Provider "MenuOptionsData", you should recover its previous version ir order to display the same options you used to have.

Step 6: Run the application

Run your application and enioy the new design:-)
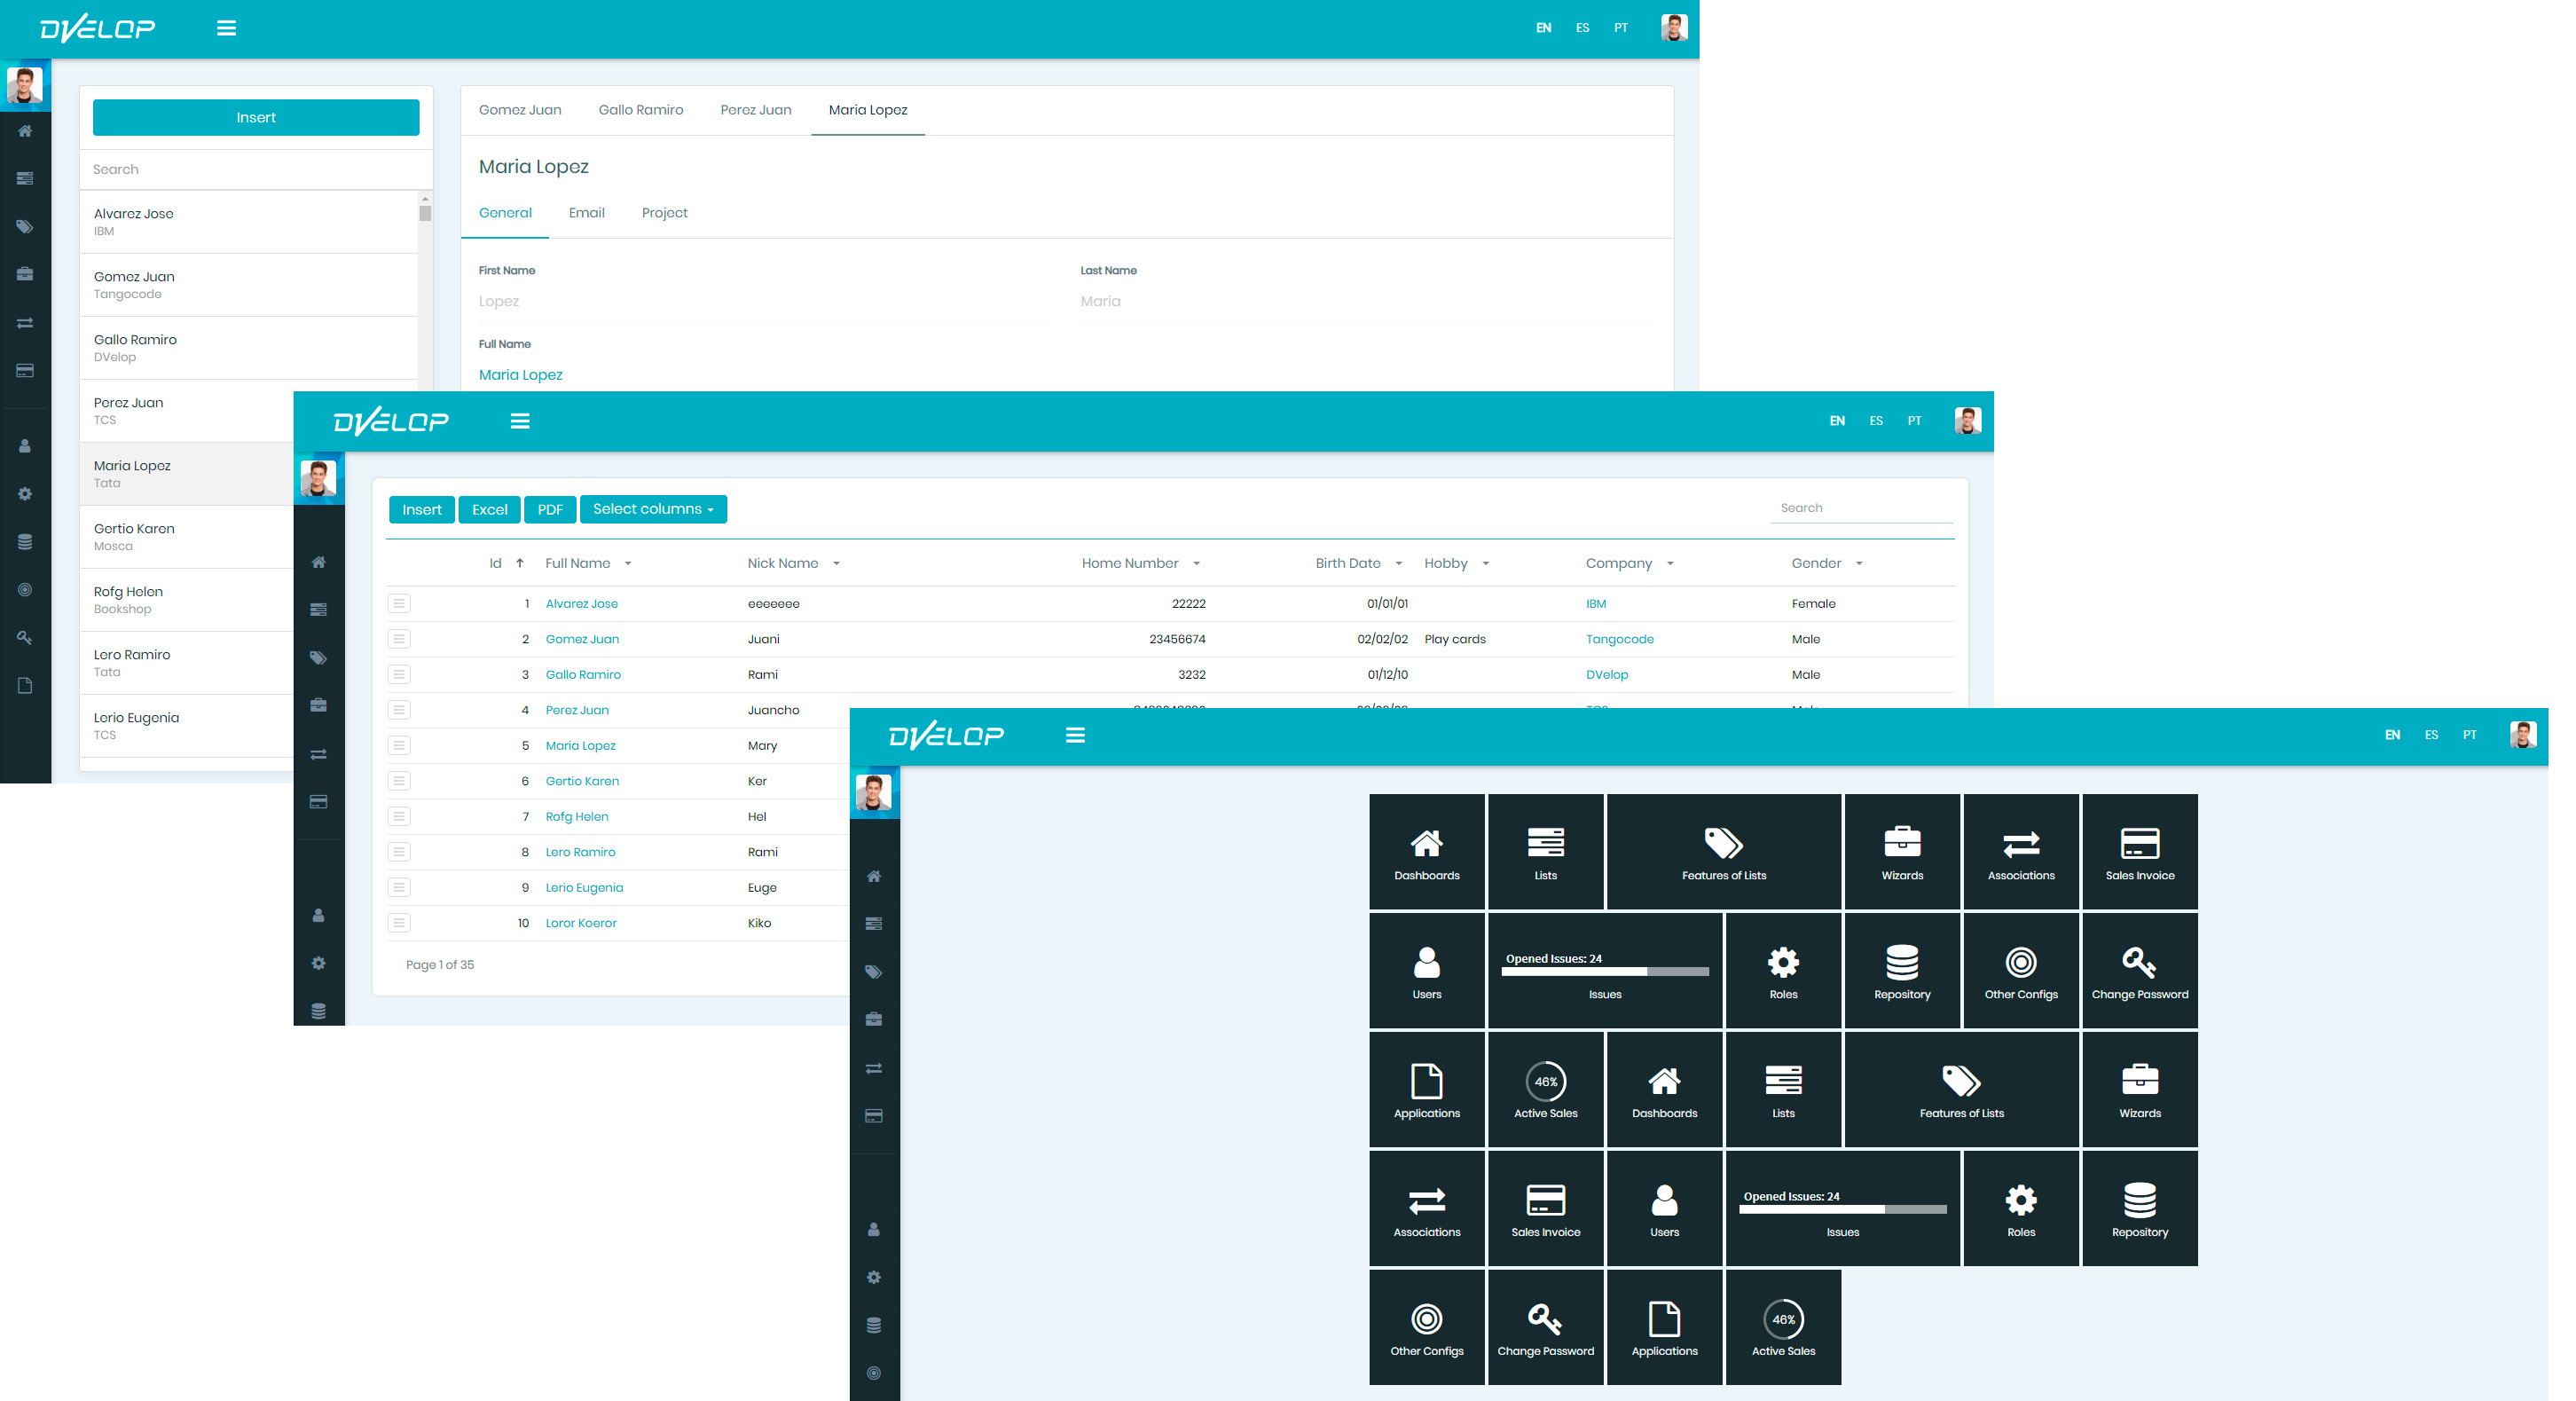
Three overlapping DVELOP-branded web application windows illustrate generated WorkWithPlus screens: a detail view for 'Maria Lopez' with General/Email/Project tabs and First Name/Last Name/Full Name fields, a grid listing with Insert, Excel, PDF, and Select columns actions over a paginated person table, and a dashboard-style menu of tiles (Dashboards, Lists, Features of Lists, Wizards, Associations, Sales Invoice, Users, Roles, Repository, Applications, Active Sales, Issues, Other Configs, Change Password).


Migrating from HTML to Responsive Web Design

If your Knowledge Base is still in HTML (not responsive), we strongly suggest to also read the following links: