Enabling the AI Assistant in your KB is straightforward. Simply follow these steps:
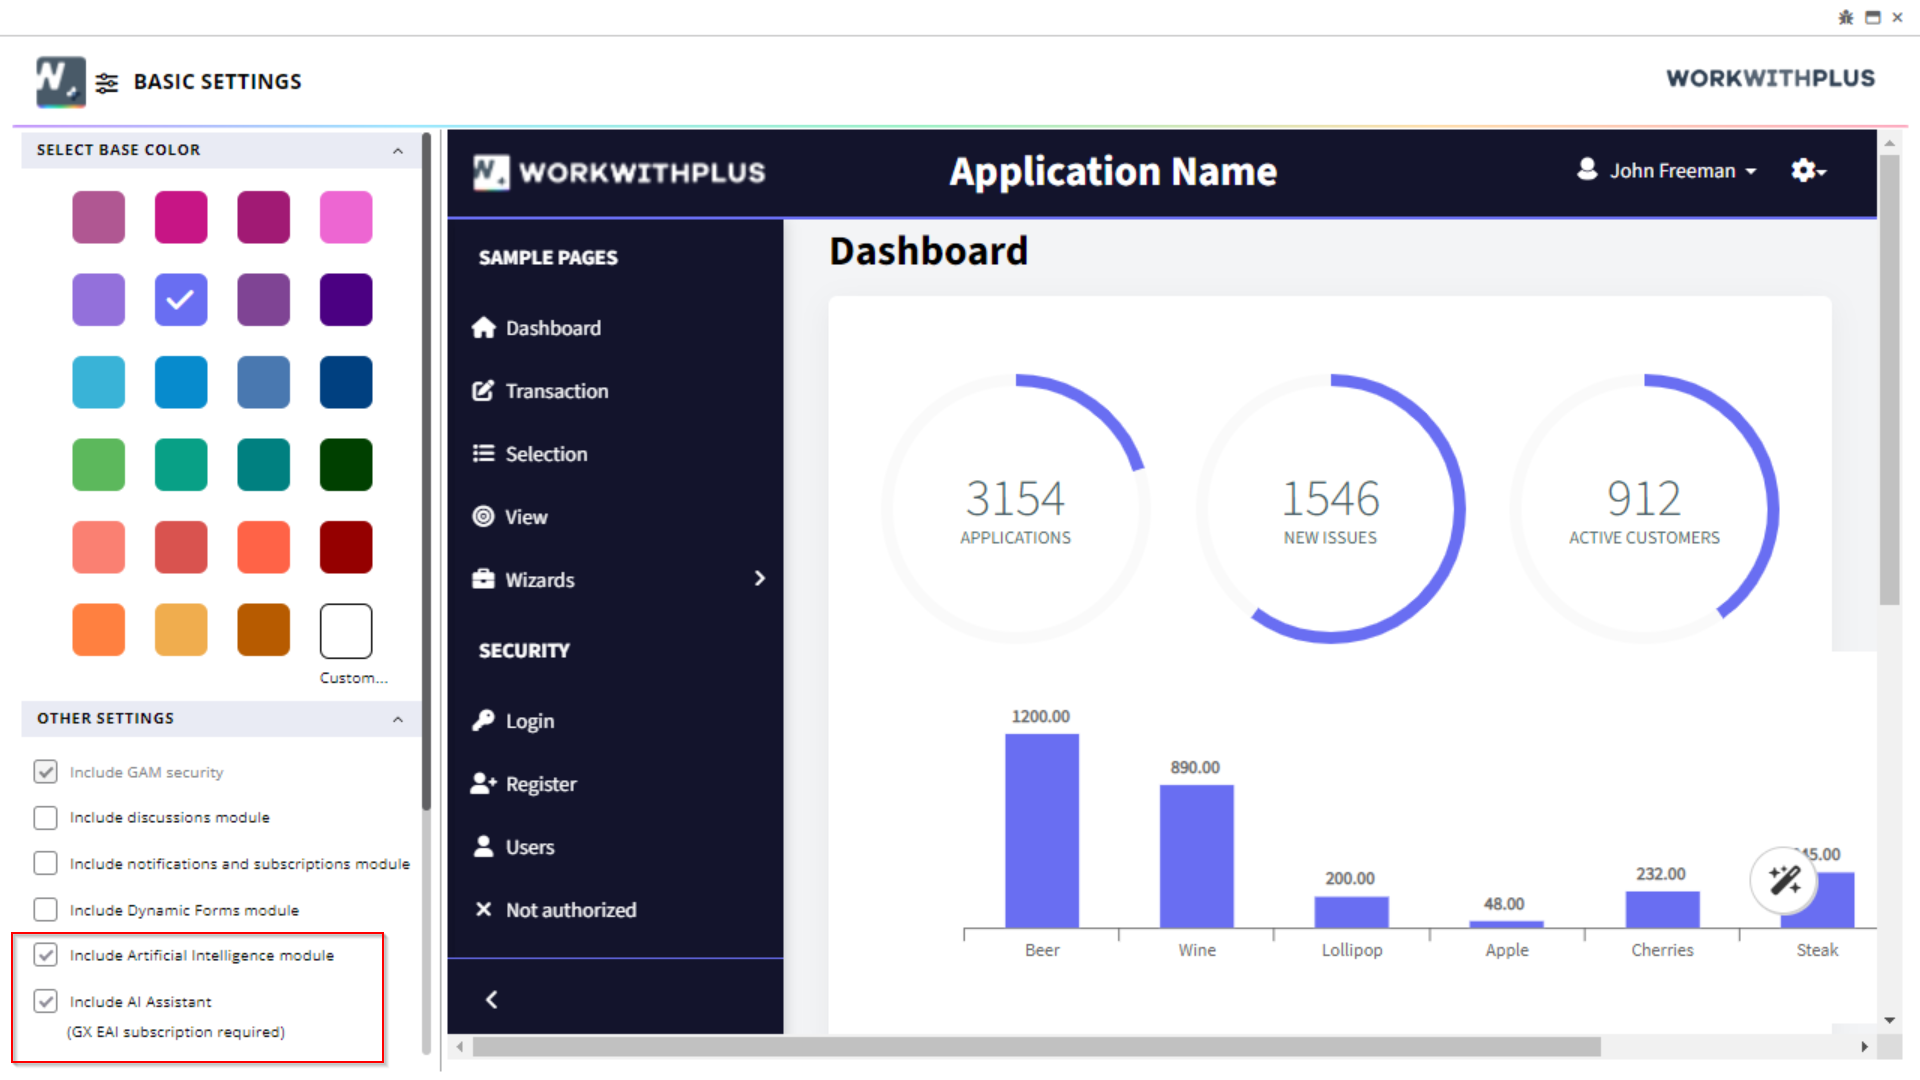
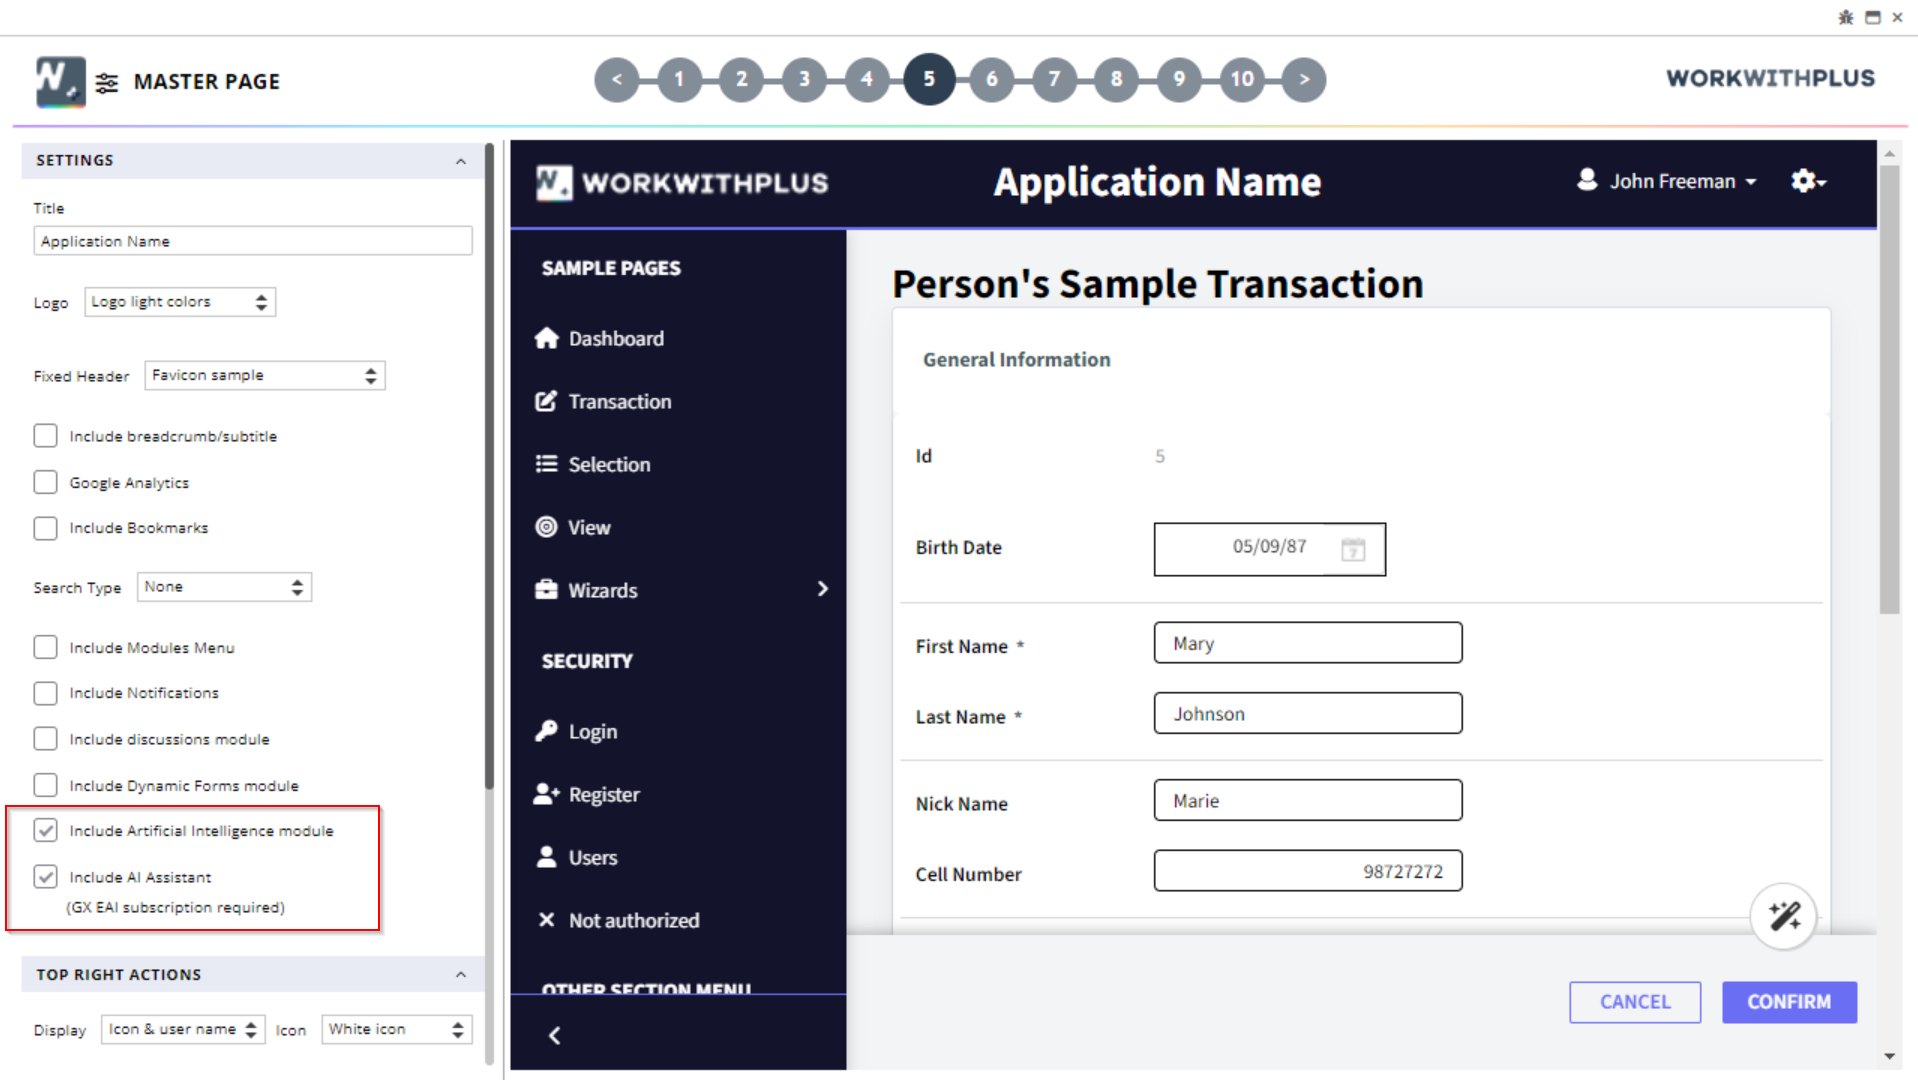
To enable the WorkWithPlus AI Assistant, you need to run the Design System Wizard and check the options 'Include Artificial Intelligence module' and 'Include AI Assistant'.
This can be done in the step 'Basic Settings' when you select a predefined Design System, or in Step 5 (Master Page) when you are modifying your current design system:
Basic Settings Step

Step 5 - Master Page

After you run the Design System Wizard enabling AI Module in the KB, a new node will be added in WorkWithPlus for Web Settings, so that you can set the default properties: AI integration
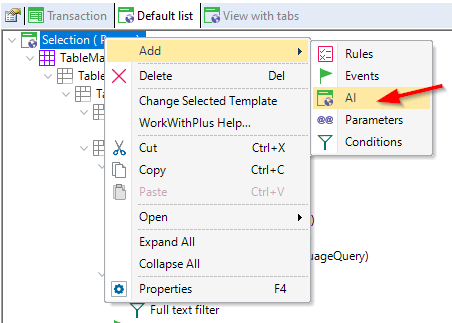
You should define which List objects will be included in the AI Assistant. As mentioned in the WorkWithPlus AI Settings, you can define the default value for all List objects. By default, WorkWithPlus will set this value as False, so that you have to configure it manually in each list that you want to include.
To include it, you need to make right click over the 'Selection' node > Add > AI:

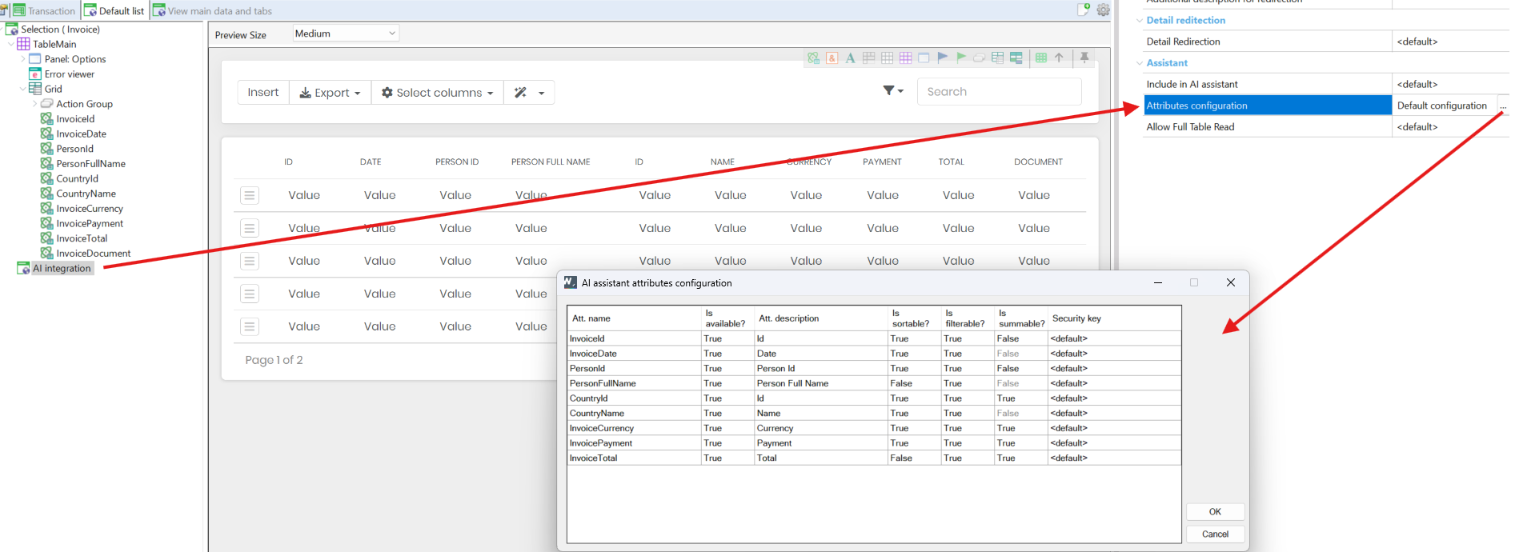
Once you define if your transaction will be available in the AI Assistant, you can configure your attributes in order to customize its behaviour.

The properties within AI Node are detailed in the following link
You can learn more in the following video:
AI Assistant uses WebSocket Protocol to send and receive messages, please make sure you have WebSocket Protocol enabled in IIS features.
How do I turn on this feature? Visit WebSocket Protocol
Once activated, restart the IIS server for the changes to take effect.
|