|
To enable WorkWithPlus AI Module in your KBs, you should run the Design System Wizard from the menu WorkWithPlus-->for Web-->Design System Wizard.
In the Design System Wizard, there is a new property named 'Include AI Module' in the step 'Basic Settings' and also in the step 'Master Page' within the 'Advanced Settings'. Just turn on this property as follows:
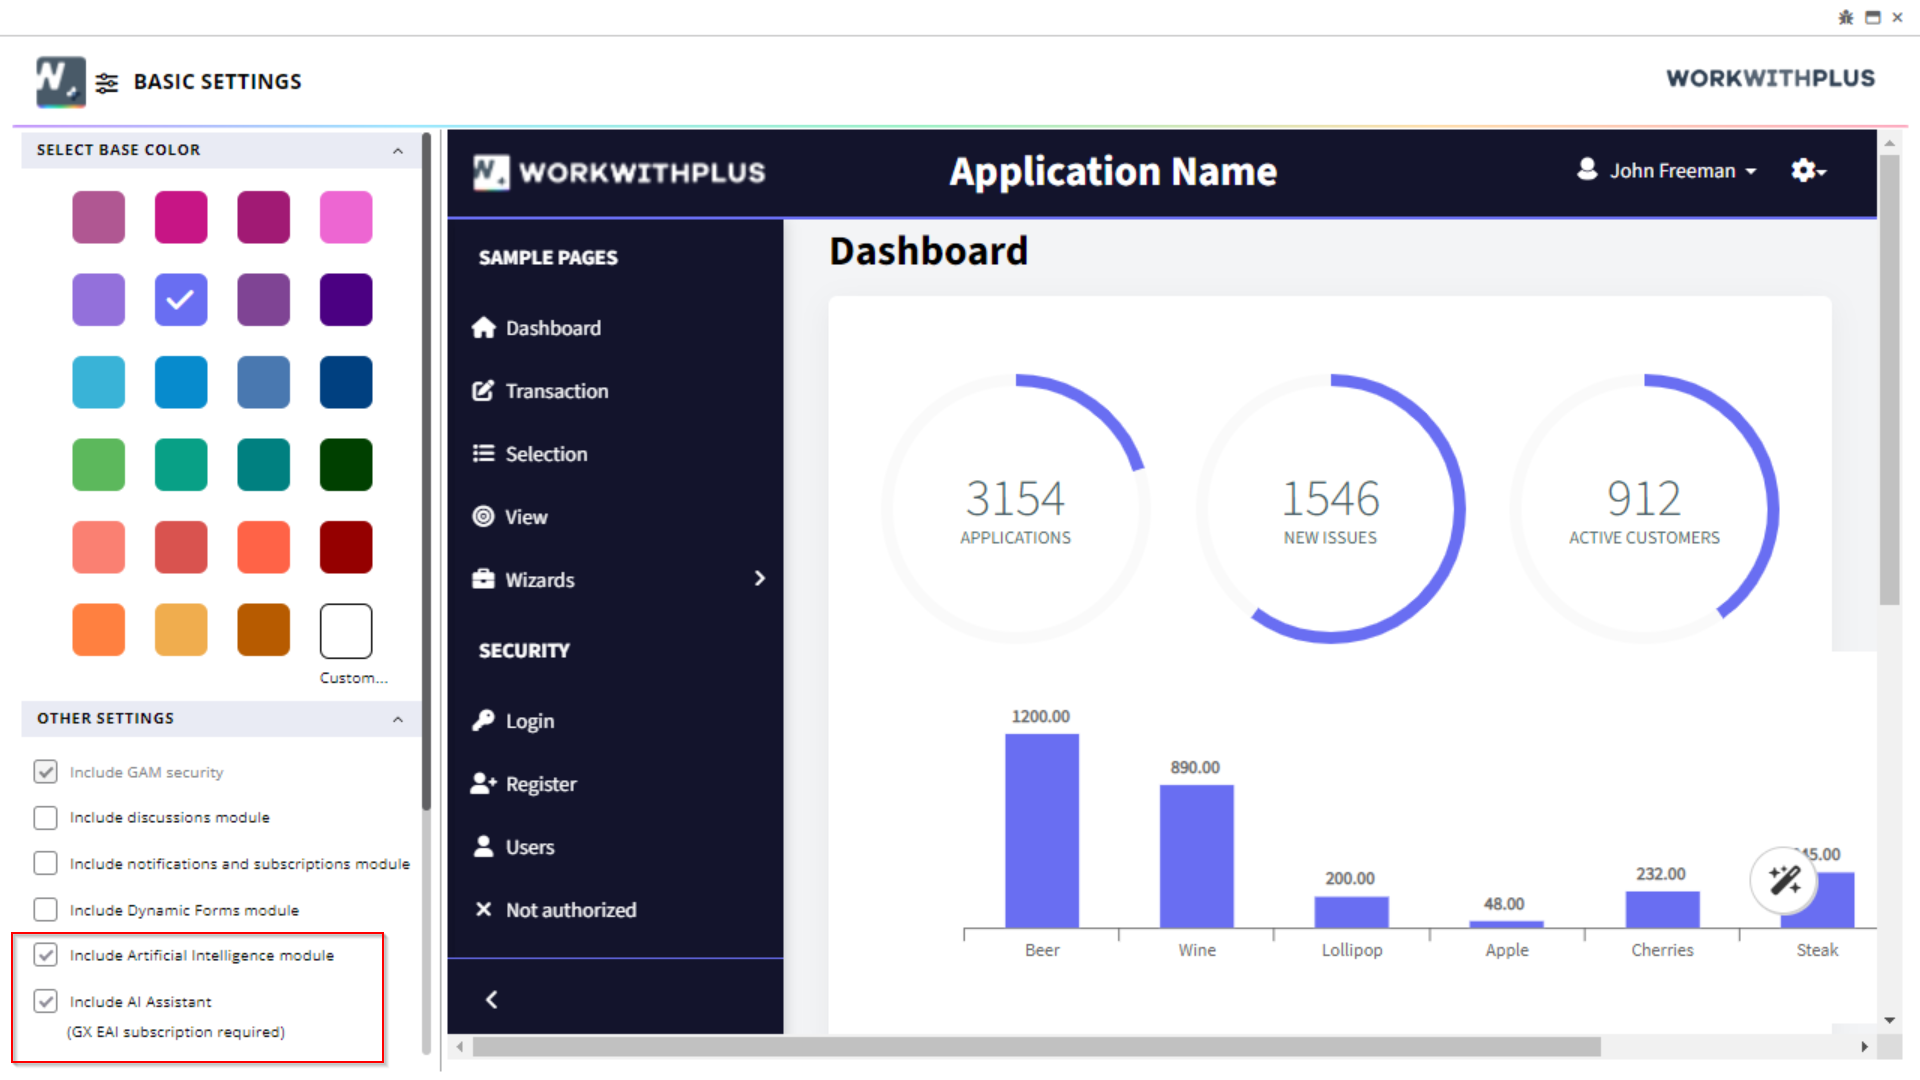
Once you enable the WorkWithPlus AI module, you can learn how to enable the AI Assistant here.
Note: If you are using the free development-only Globant Enterprise AI subscription, you can skip this step. Simply run your application and start enjoying the WorkWithPlus AI features!
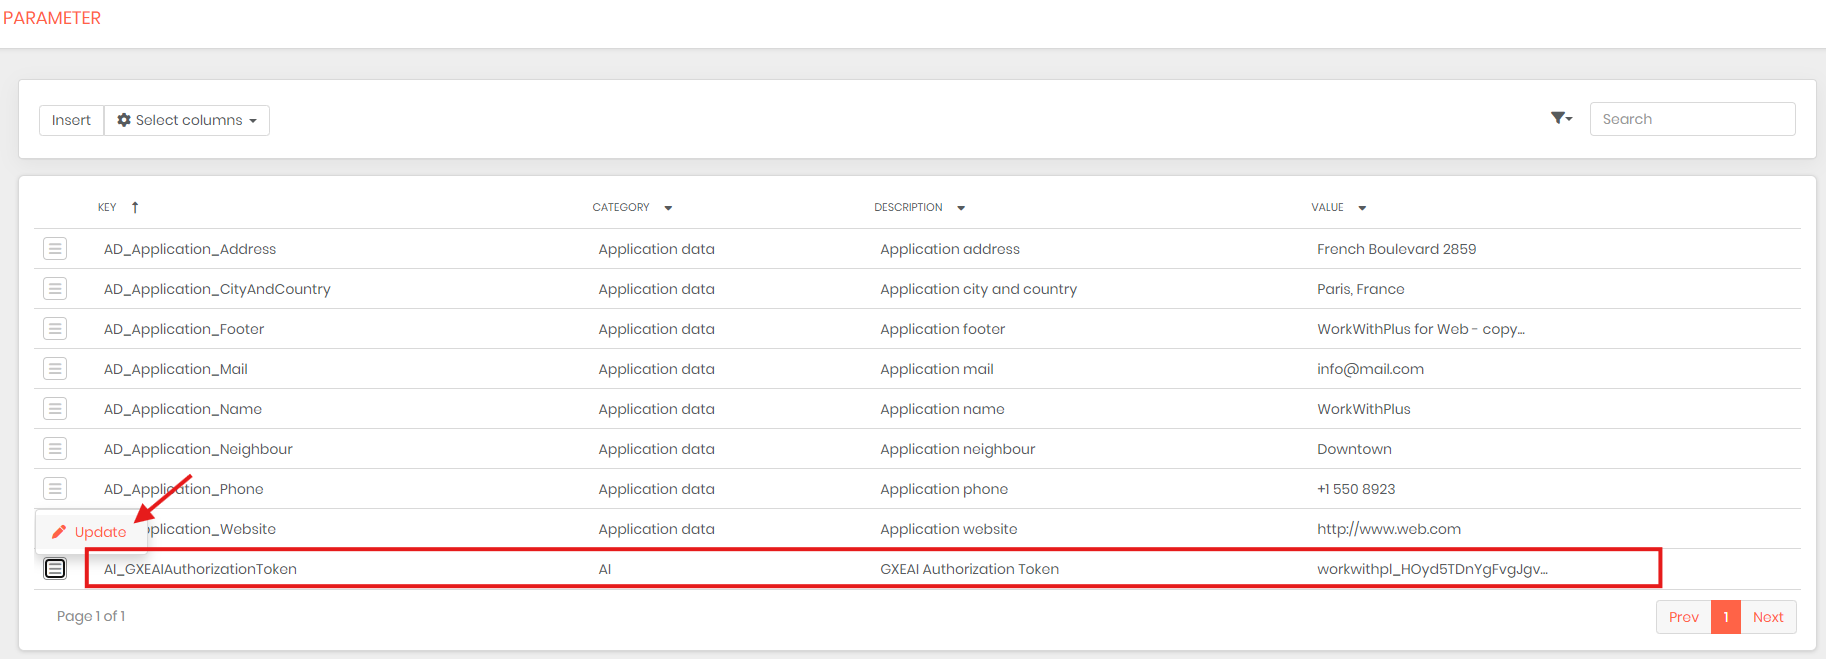
For developers with a paid special Globant Enterprise AI subscription for WorkWithPlus users, this step is mandatory.
After purchasing a plan, you can configure it dynamically within your KB Parameters table. This flexibility allows you to either share a single plan across all your clients or assign individual plans to each client, depending on your requirements.
To configure your subscription, access the Parameters table and update the token provided with your Globant Enterprise AI purchase:
|