Hierarchical Editor

WorkWithPlus for Web and for Native Mobile shares the same hierarchical editor and real-time preview:
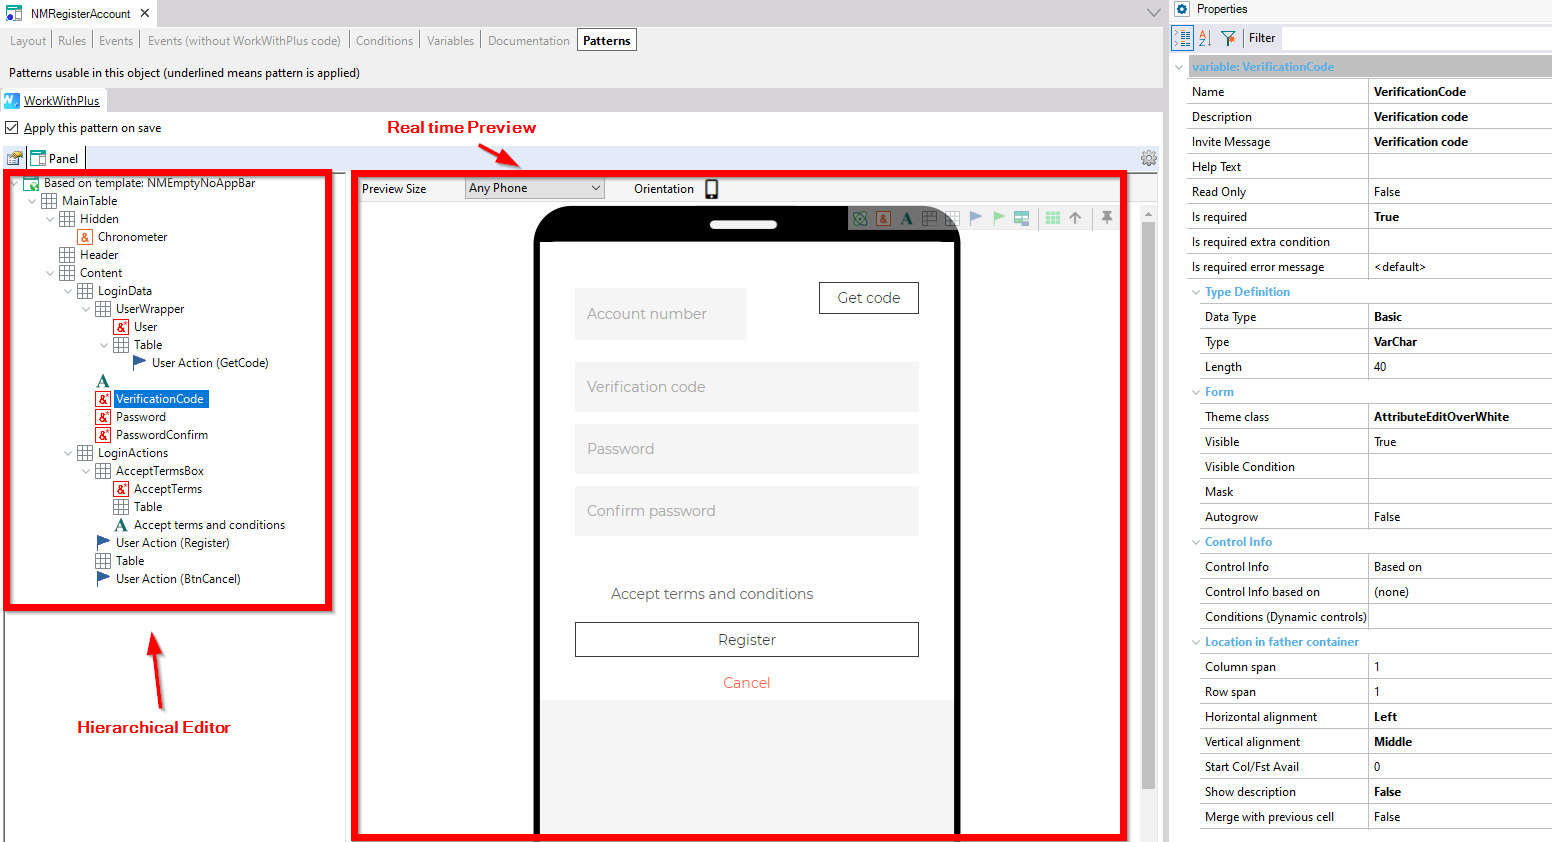
The NMRegisterAccount panel with the WorkWithPlus pattern applied shows the hierarchical editor tree (MainTable, Hidden, Header, Content, LoginData, LoginActions with AcceptTermsBox, User Action Register/BtnCancel) labeled "Hierarchical Editor", alongside a real-time mobile preview labeled "Real time Preview" showing an Account number field with Get code button, Verification code, Password and Confirm password fields, an Accept terms and conditions checkbox, and Register/Cancel buttons. The Properties panel shows the selected VerificationCode variable with Type VarChar, Length 40, and Theme class AttributeEditOverWhite.

The real-time preview has an option that sets the type of dispositive and the orientation. Allows you to make changes in the layout and visualize the modifications at the moment.

As well as working with WorkWithPlus for Web, the hierarchical tree has a table as the main node, and the children are displayed in the layout from left to right and from top to bottom.

In order to add elements to the layout, you have two options:

  • Make right click over the container that you want to add the element -> Add -> Select the element:
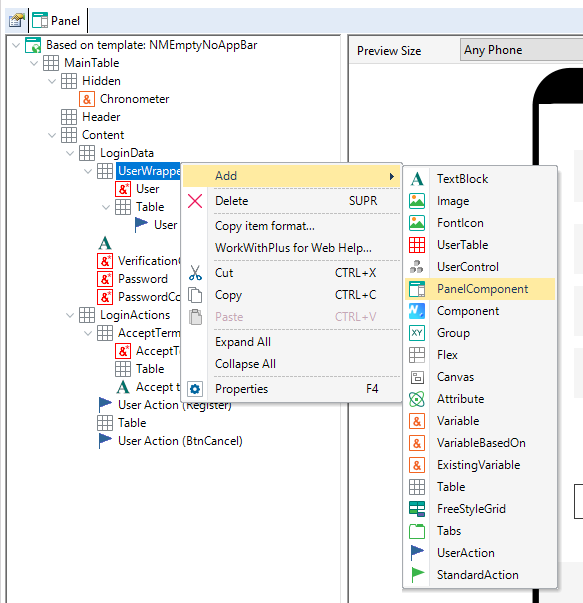
    WorkWithPlus Panel editor tree (Based on template: NMEmptyNoAppBar) shows a mobile login layout with MainTable, Hidden, Chronometer, Header, and Content nodes expanded to LoginData with UserWrapper, User, Table, VerificationCode, Password, PasswordConfirm, and LoginActions; a right-click context menu on UserWrapper is open showing Add submenu options including TextBlock, Image, FontIcon, UserTable, UserControl, PanelComponent, Component, Group, Flex, Canvas, Attribute, Variable, Table, Tabs, UserAction, and StandardAction.
     
  • In the IDE of the preview drag the element in the desired position:
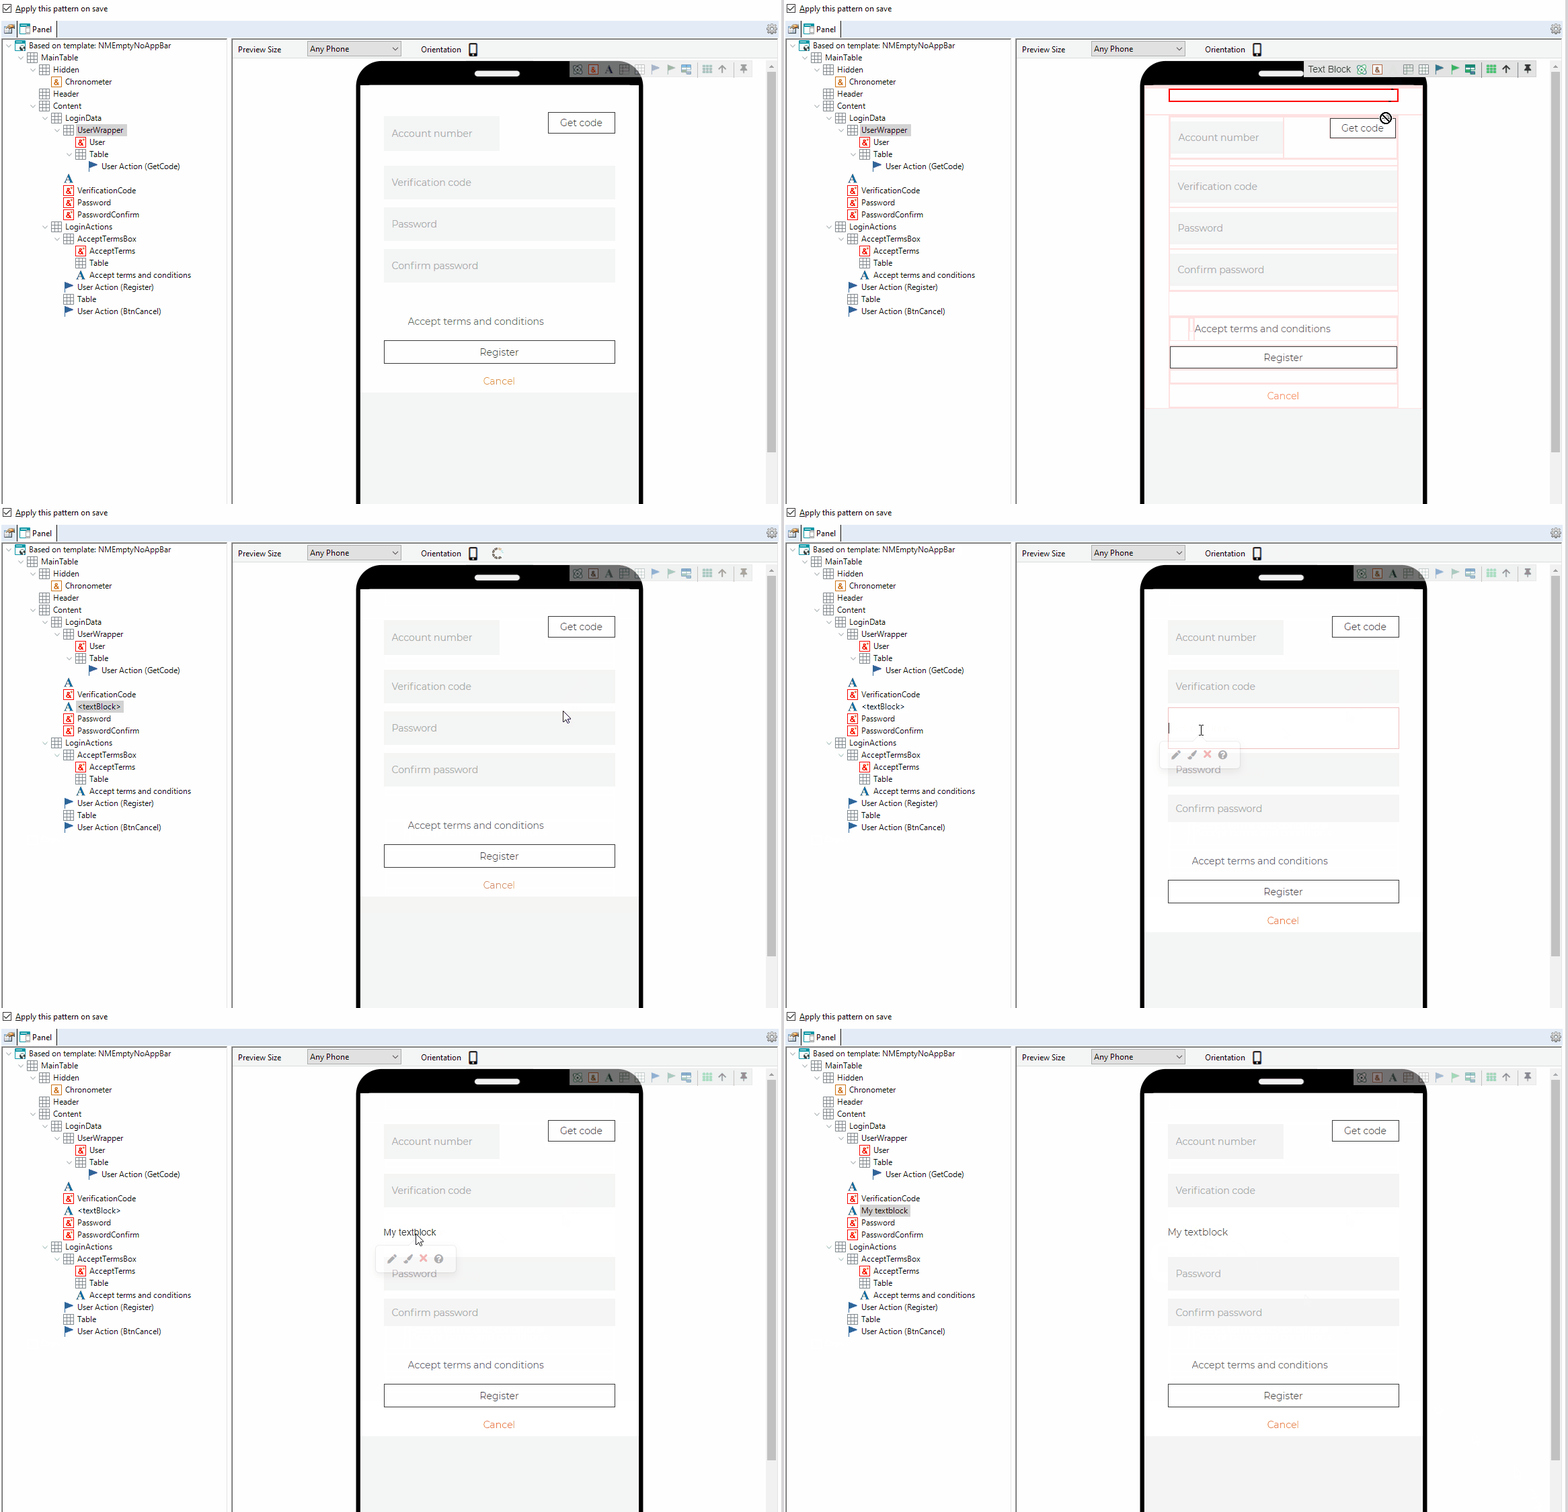
    WorkWithPlus Panel editor shows the same login pattern tree (Based on template: NMEmptyNoAppBar) alongside a live mobile preview rendering the LoginData form with Account number field and Get code button, Verification code, Password, Confirm password fields, an "Accept terms and conditions" checkbox, and Register and Cancel buttons; "Apply this pattern on save" is checked above the tree.


If you want to read more information about the WorkWithPlus IDE and its real-time preview, follow this link: Smart IDE