WorkWithPlus for BI can be used from WorkWithPlus's cloud or locally in our own environment. To install it locally you will need the following requirements:
- A computer where virtualization enabled
- Virtual Box 5 Setup
- The virtual machine (.ova file) that is provided with your WorkWithPlus for BI license
Once you have accomplished the previous requirements, you should follow these steps:
Execute Virtual Box setup in order to install it.
Download the virtual machine .ova file.
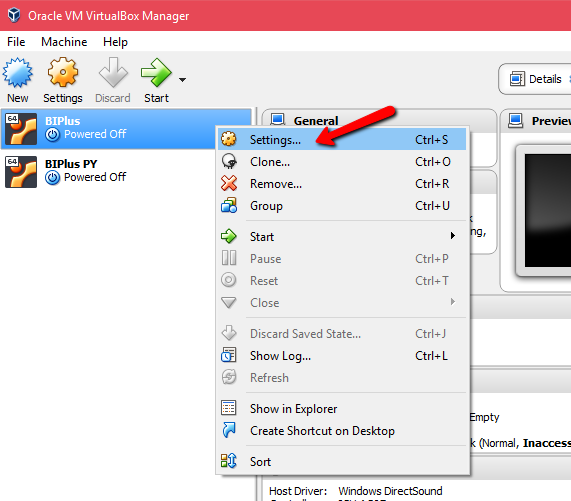
Create a new Virtual Box machine using the File --> Import Appliance option, and selecting the .ova file downloaded in the previous step.
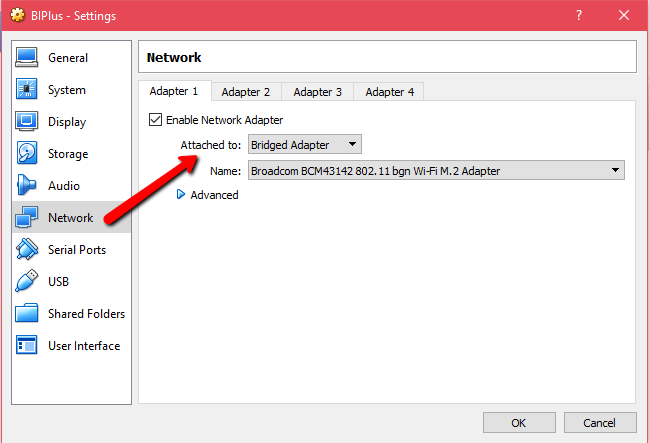
Set up the network settings as follows:
Start the virtual machine and you will visualize an IP address:
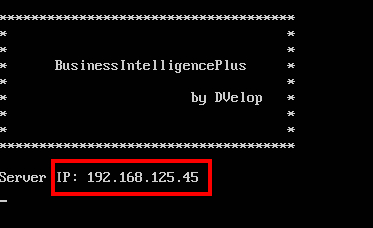
Important comment: when running the virtual machine, a services layer is created in order to interact with WorkWithPlus for BI's engine. This IP should be reachable from the computer where GeneXus is running(in order to create cubes) and from the server where the application is deployed (in order to query and visualize the created cubes)
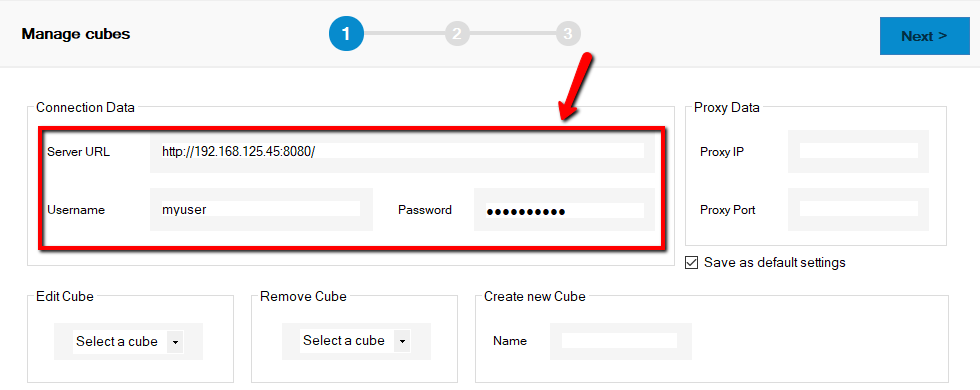
Create the cube as explained in Create a new cube by using the IP provided on the previous step and your username/password:
The designed cube will be created locally in the virtual machine. This means, that the cube structure, its metadata, and the data loaded into the cube will be stored in the virtual machine.
|