|
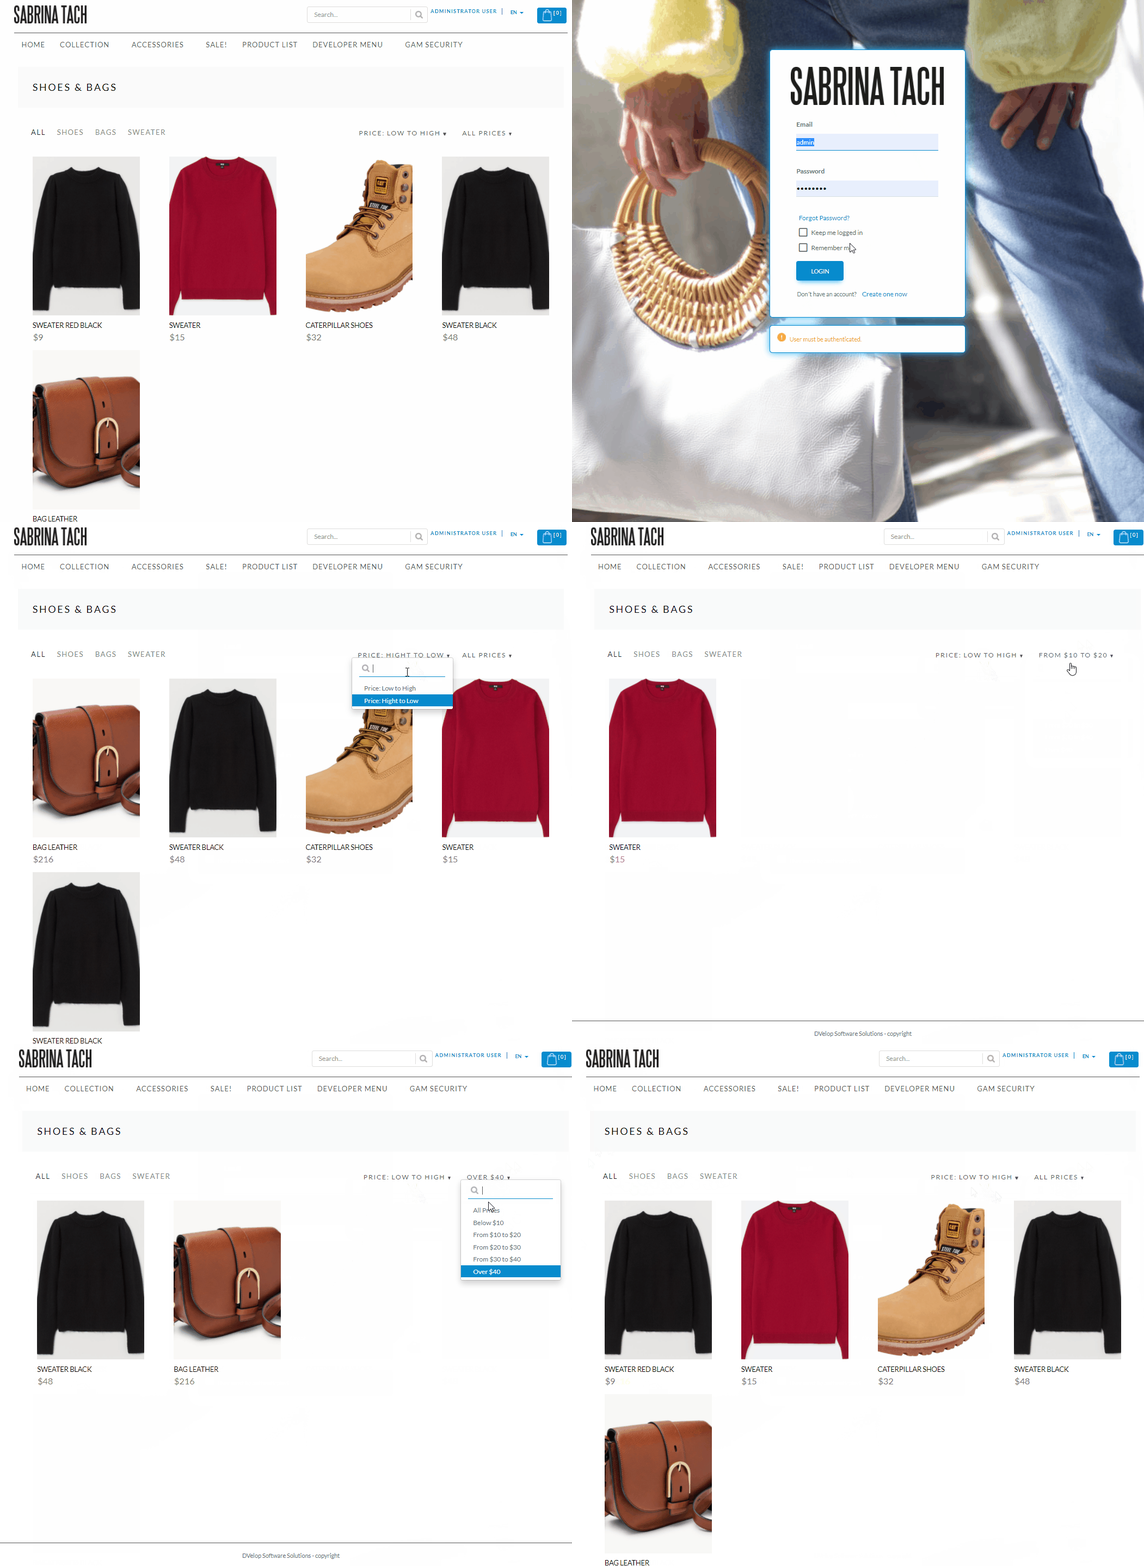
When we have the need to show products with images, names and prices, in WorkWithPlus we have a template called 'Products list with filters'.
In which we can show a list of products with filters, price ranges, order them from highest to lowest, least to highest and by category.
But the filters are not pre-established to use due to the multiple scenarios that can arise when creating a screen with these characteristics.
That is why in this How To, you will learn how to use the filters of the template 'Products list with filters' when it is based on a transaction.
We will use a transaction called Product, since it is a typical scenario to display with this screen.
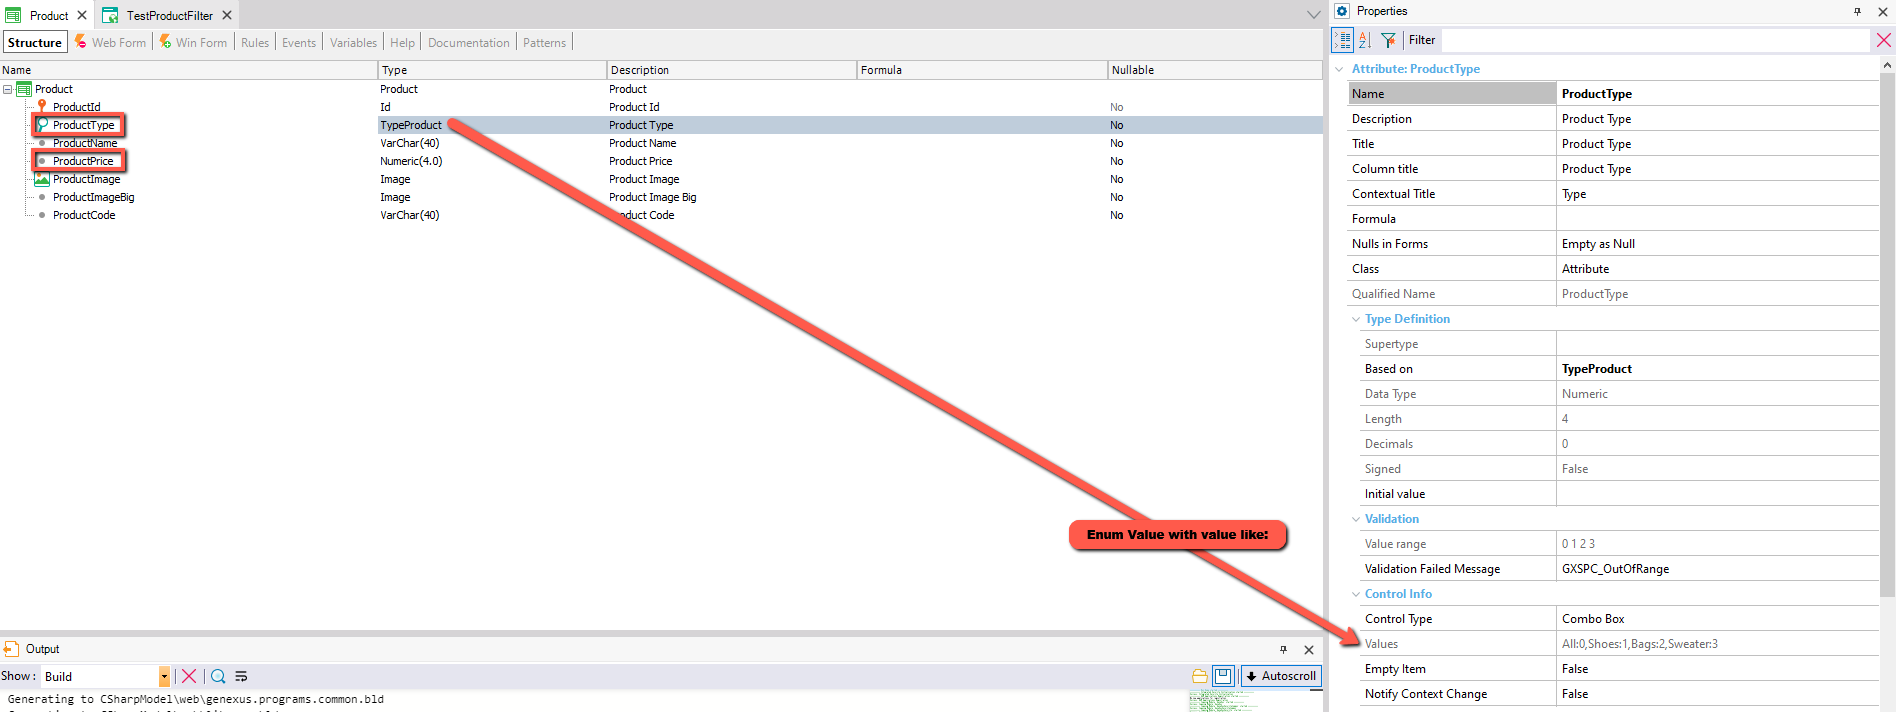
First you must have at least two attributes, price and type of the product, depending on what you want to show, but in this case we will work with a Product transaction.
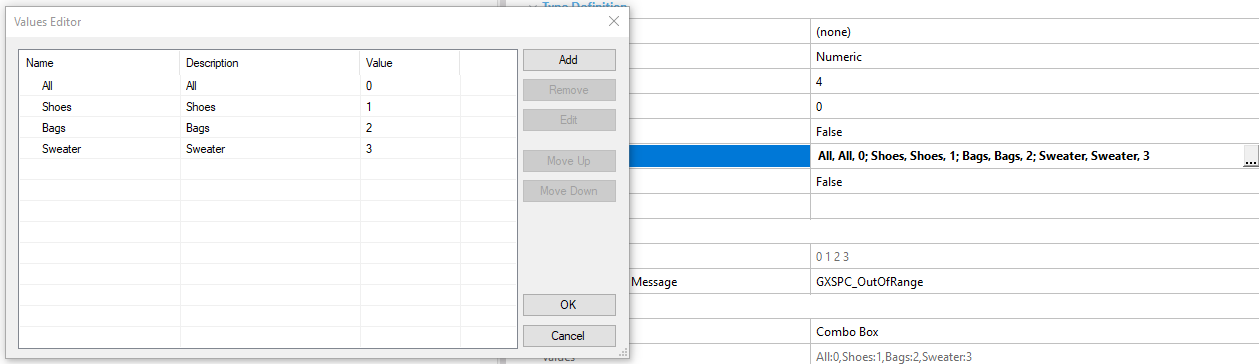
For the ProductType data type, we need to create an enumerated domain with the following values (you can use whatever you need, this is just an example):
The transaction will look something like this:
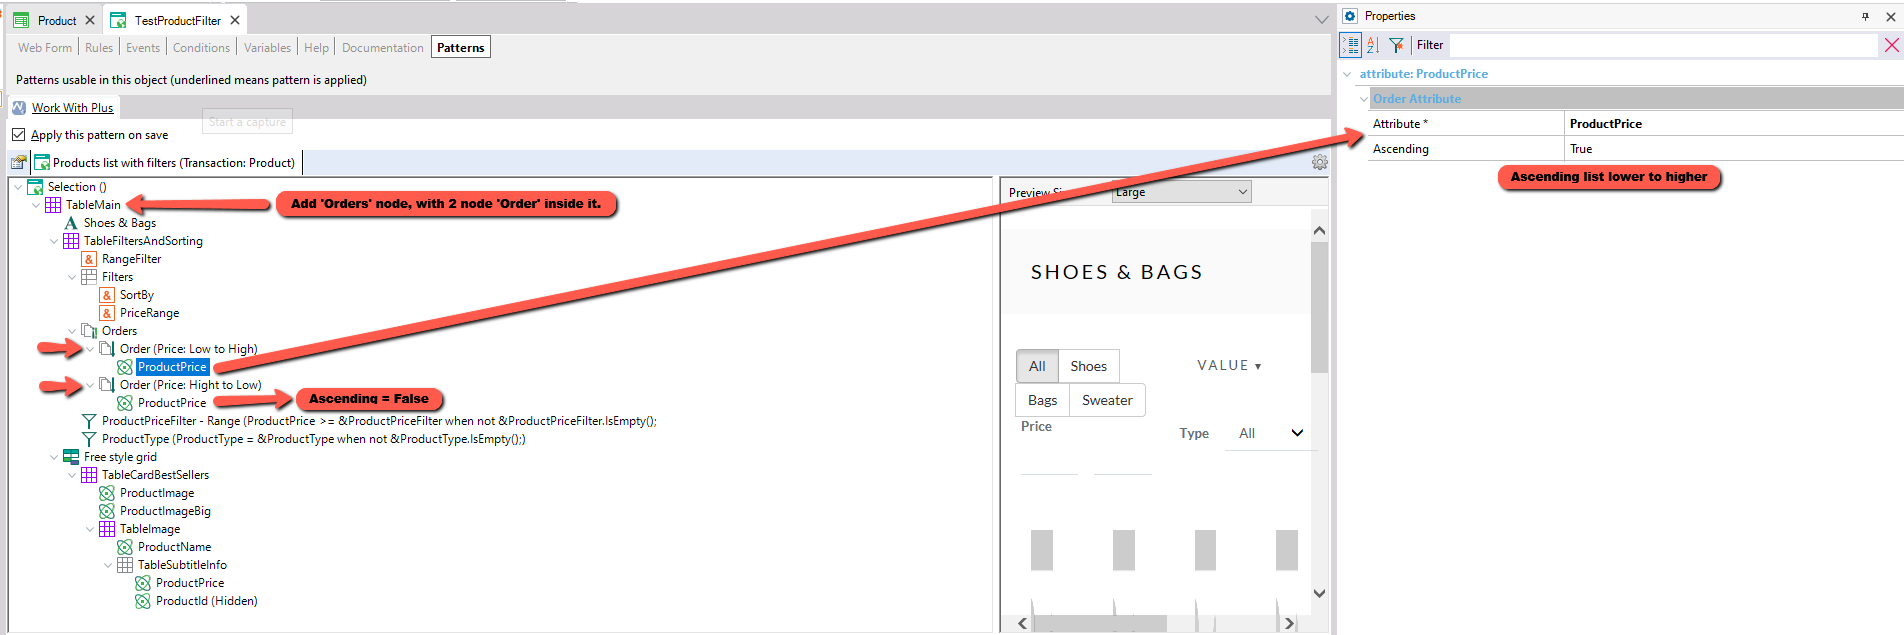
In the template that creates WorkWithPlus by choosing 'Product list with filters', inside TableMain we add the Orders node and within it, two Orders, which we will use to sort the records in ascending and descending order, sorting them by price.
To the variable &RangeFilter we change the property Data type: Based On and Domain / Attribute / SDT: TypeProduct.
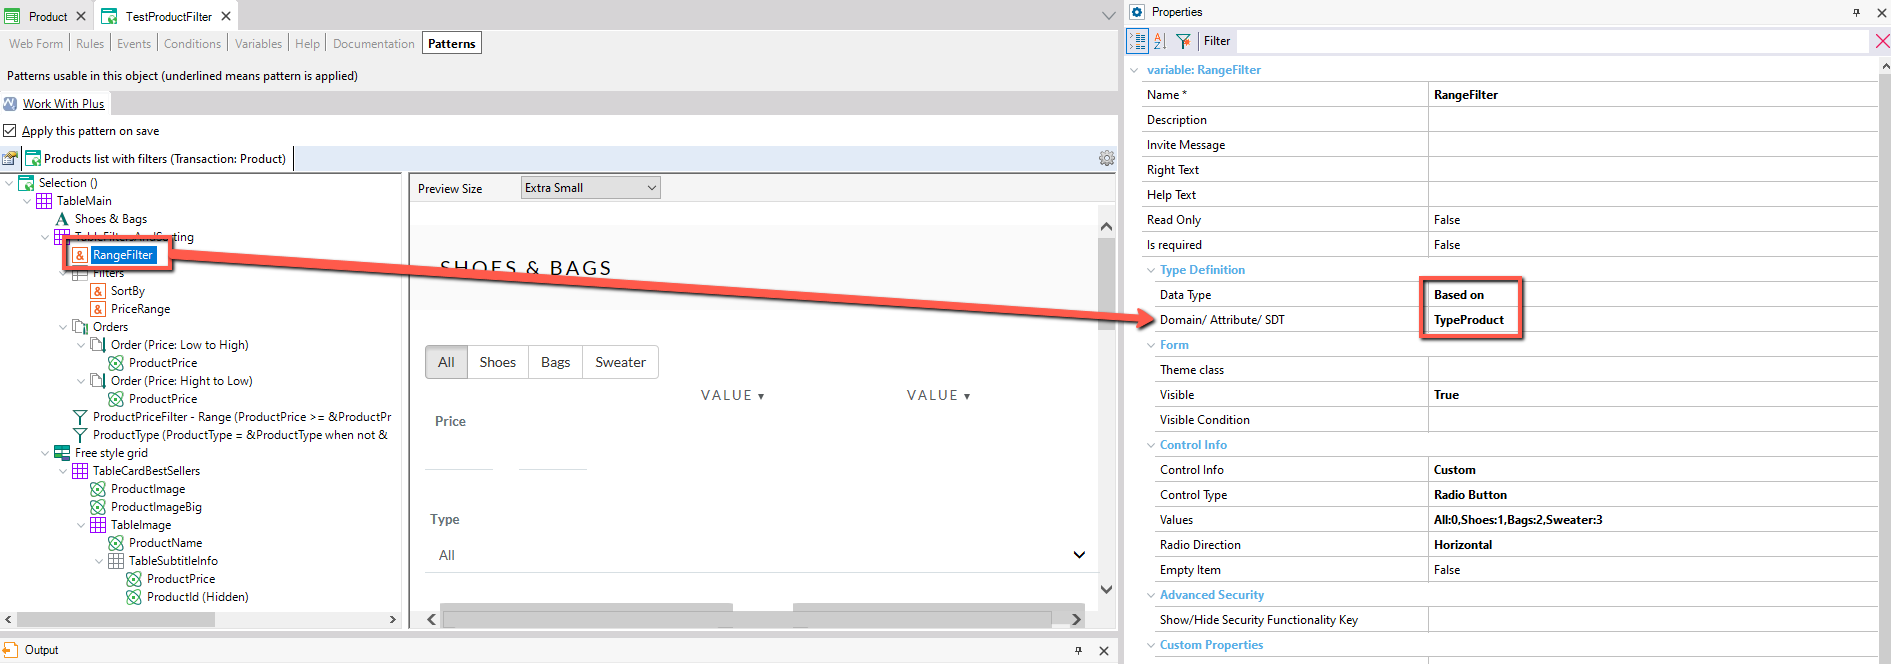
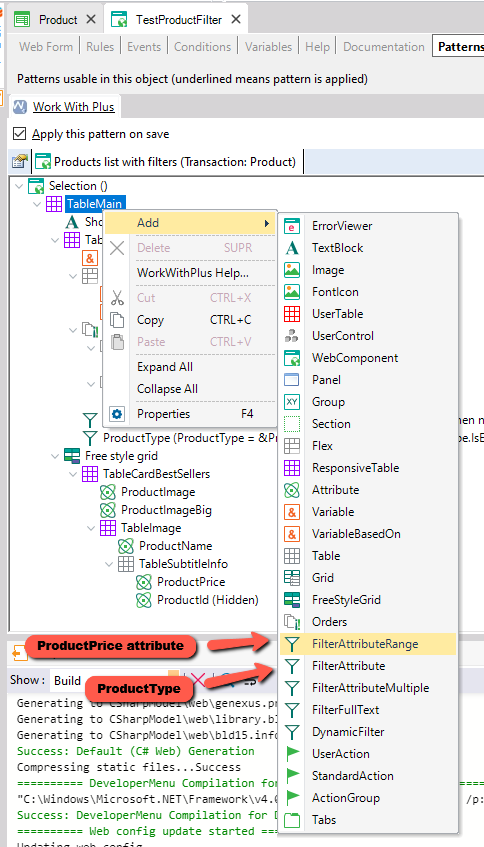
Then you will need to add two filters. One by range and one for attribute only.
We filter the ProductPrice attribute by range and ProductType a filter by attribute as in the following image:
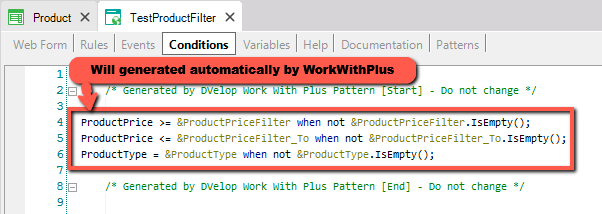
This will cause WorkWithPlus to automatically generate conditions and create variables based on these attributes that we will use later:
When creating these orders and filters, they will be added on screen, which we do not want, therefore we will hide them.
You look in the WebForm for the name of the table that contains the filters and you can see that the variable &ProductType is also present, we will also hide it.
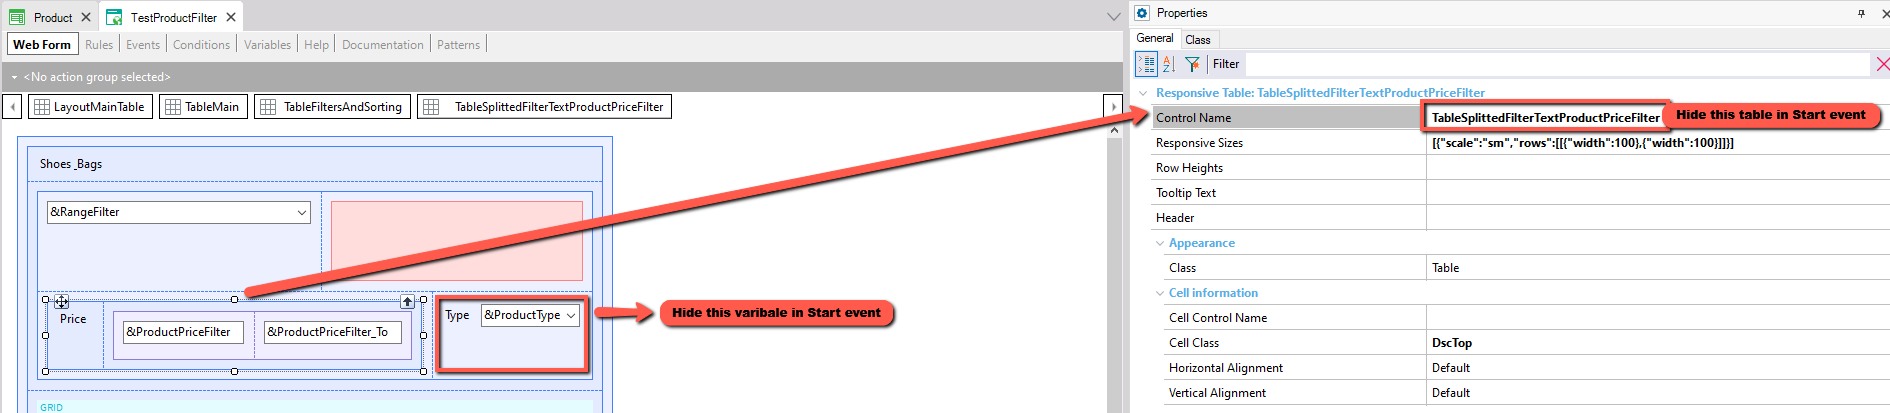
To hide them, we do it in the Start event with the name of the table of the filter by range and the ProductType variable.
We will also initialize the value of &PriceRange as empty, so that it takes the value of the enumerated 0, therefore it shows all the products and &SortBy with 1, so that it starts in an Ascending way.
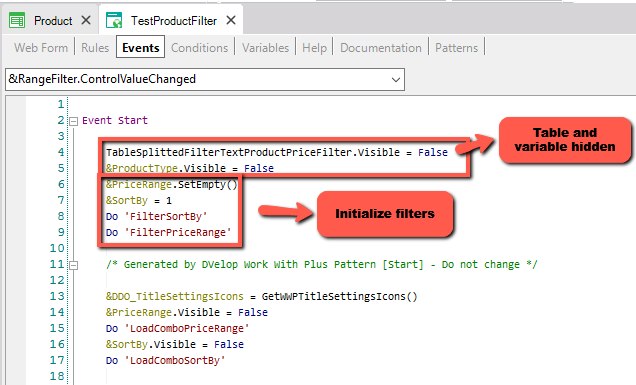
Here the code:
    TableSplittedFilterTextProductPriceFilter.Visible = False
    &ProductType.Visible = False
    &PriceRange.SetEmpty()
    &SortBy = 1
    Do 'FilterSortBy'
    Do 'FilterPriceRange'
You will also notice that he is calling two Sub's,
Do 'FilterSortBy' and Do 'FilterPriceRange'.
We call them so that when initializing the values, it already filters when entering the screen.
We proceed to create the subroutines:
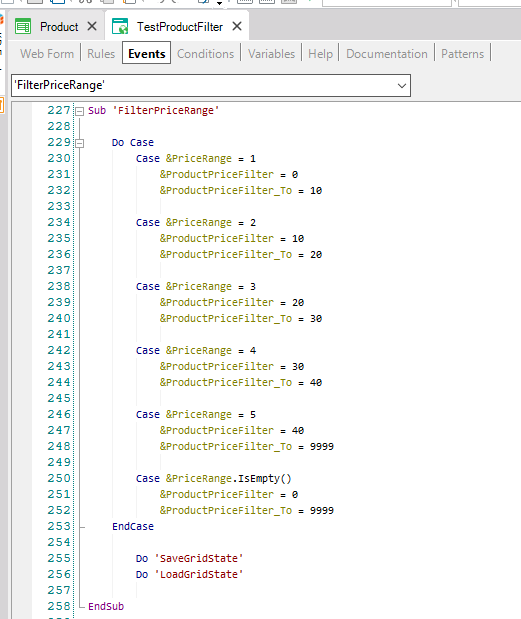
Code:
Sub 'FilterPriceRange'

    Do Case
        Case &PriceRange = 1
            &ProductPriceFilter = 0
            &ProductPriceFilter_To = 10

        Case &PriceRange = 2
            &ProductPriceFilter = 10
            &ProductPriceFilter_To = 20

        Case &PriceRange = 3
            &ProductPriceFilter = 20
            &ProductPriceFilter_To = 30

        Case &PriceRange = 4
            &ProductPriceFilter = 30
            &ProductPriceFilter_To = 40

        Case &PriceRange = 5
            &ProductPriceFilter = 40
            &ProductPriceFilter_To = 9999

        Case &PriceRange.IsEmpty()
            &ProductPriceFilter = 0
            &ProductPriceFilter_To = 9999
    EndCase

        Do 'SaveGridState'
        Do 'LoadGridState'

EndSub
&RangeFilter.ControlValueChange event, since the template creates it as a RadioButton:
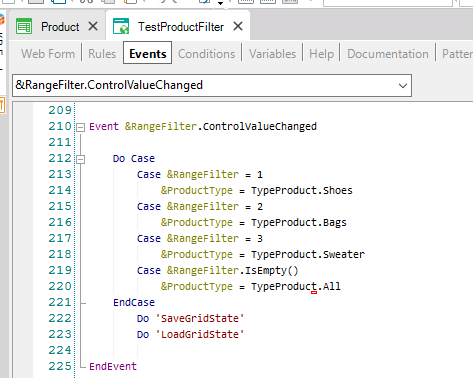
Code:
Event &RangeFilter.ControlValueChanged

    Do Case
        Case &RangeFilter = 1
            &ProductType = TypeProduct.Shoes
        Case &RangeFilter = 2
            &ProductType = TypeProduct.Bags
        Case &RangeFilter = 3
            &ProductType = TypeProduct.Sweater
        Case &RangeFilter.IsEmpty()
            &ProductType = TypeProduct.All
    EndCase
        Do 'SaveGridState'
        Do 'LoadGridState'

EndEvent
And the subroutine to filter by the variable &SortBy:
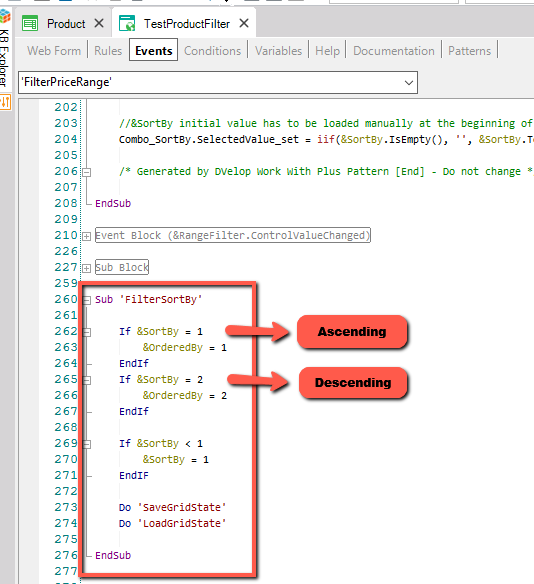
Code:
Sub 'FilterSortBy'

    If &SortBy = 1
        &OrderedBy = 1
    EndIf
    If &SortBy = 2
        &OrderedBy = 2
    EndIf

    If &SortBy < 1
        &SortBy = 1
    EndIF

    Do 'SaveGridState'
    Do 'LoadGridState'

EndSub
Finally, we call the PriceRange and SortBy subroutines in their respective OnOptionClicked event, so that when a value is chosen, it effectively filters it.
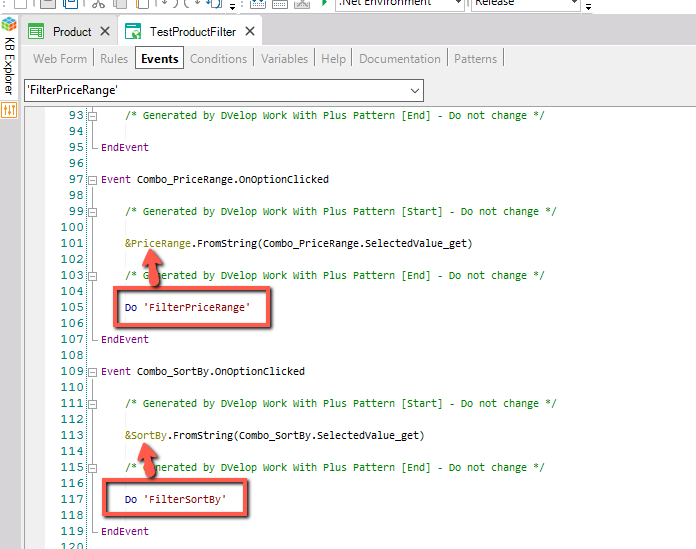
The subroutines created by WorkWithPlus:
Do 'SaveGridState'
Do 'LoadGridState'
They must be present for you to assign the values of our variables to those created by WorkWithPlus, in this way it uses the conditions created automatically.
|