Create a MultiTenant application

Comment: As of WorkWithPlus for Web 14 Upgrade #1, WorkWithPlus for Web supports a simple way of creating MultiTenant applications, with several benefits and automatic behaviours. You can read about this feature in the following link.

If you are using previous WorkWithPlus for Web versions, you can develop an application Multi-tenant performing a series of steps, in which we will achieve that the Company transaction is associated with all the others.

Create a transaction called Company, with PK CompanyId and a name attribute called CompanyName as in the following image:
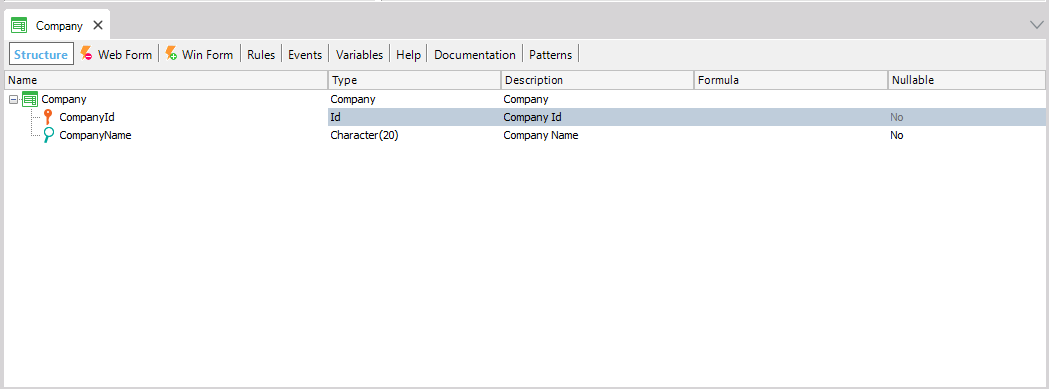
GeneXus Structure editor for the Company transaction shows two attributes: CompanyId of type Id (key, non-nullable, description "Company Id") and CompanyName of type Character(20) (description "Company Name", non-nullable).

Next, we search the SDT WWPContext and add CompanyId with Type: Attribute:CompanyId:
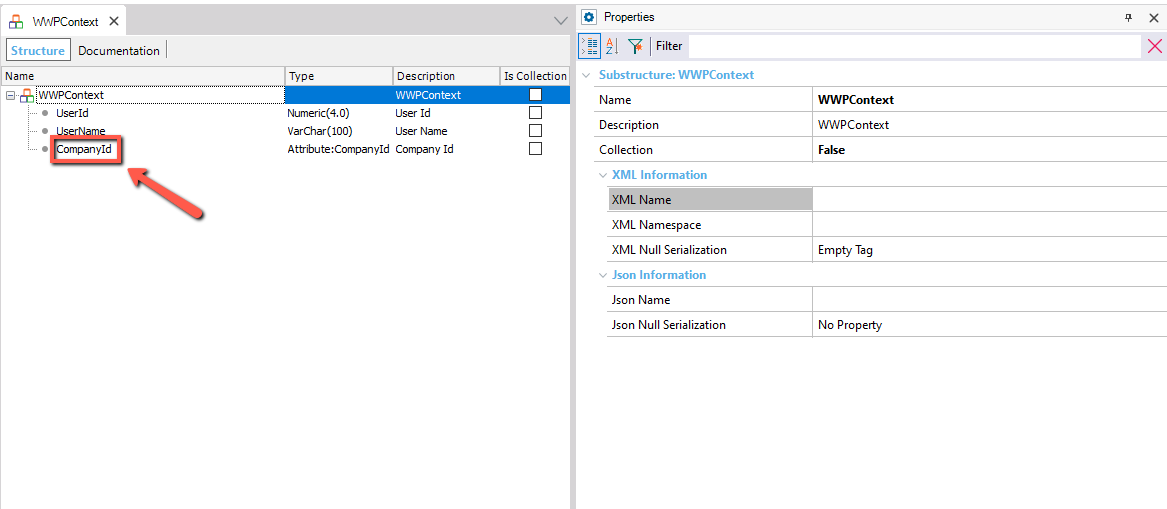
GeneXus Structure editor for the WWPContext data type lists members UserId (Numeric 4.0), UserName (VarChar 100), and CompanyId (Attribute:CompanyId, description "Company Id"), with CompanyId highlighted by a red box and arrow. The Properties panel on the right shows the Substructure: WWPContext details, including Collection False and XML/Json Information settings.

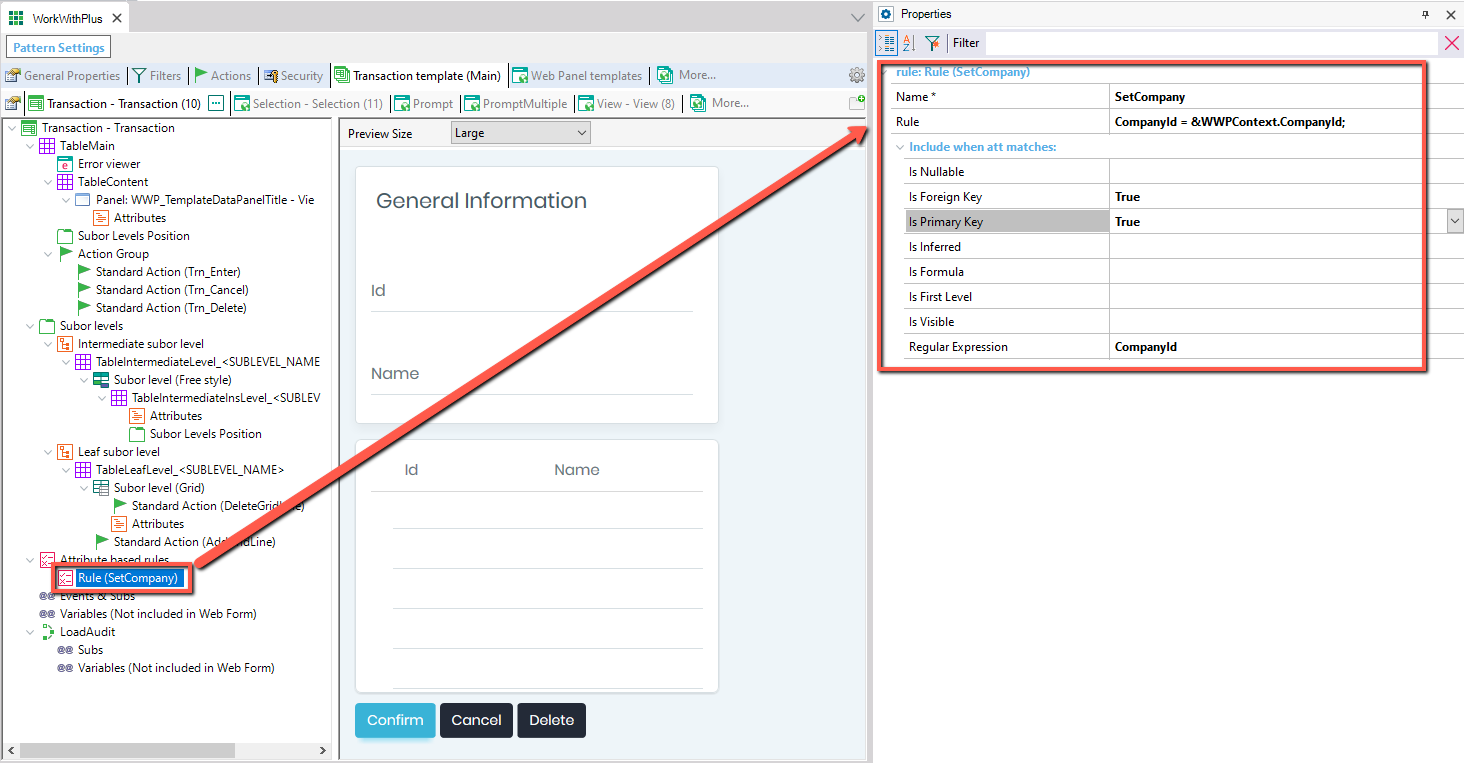
Now, open WorkWithPlus (Settings) > Transaction template > Transaction, add a rule inside 'Attribute based rules' called 'SetCompany':
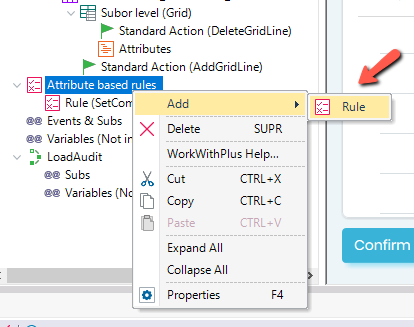
WorkWithPlus pattern tree context menu on the "Attribute based rules" node shows a right-click Add submenu with "Rule" highlighted, plus other menu options Delete, WorkWithPlus Help, Cut, Copy, Paste, Expand All, Collapse All, and Properties. Tree nodes above include Subor level (Grid) with Standard Actions DeleteGridLine/AddGridLine, Attributes, and a LoadAudit node with Subs and Variables.

With these properties:

WorkWithPlus Pattern Settings editor, Transaction template tab, shows the "Rule (SetCompany)" node selected under Attribute based rules in the tree, linked by a red arrow to its Properties panel: rule Name "SetCompany", Rule expression "CompanyId = &WWPContext.CompanyId;", and "Include when att matches" settings Is Foreign Key True, Is Primary Key True, Regular Expression CompanyId. The center preview shows a General Information form with Id and Name fields and Confirm/Cancel/Delete buttons.


The following steps will be applied to the Selection template, but you can apply it to the other templates that are inside the Transaction template (Main), depending on the needs of your application.


Go to WorkWithPlus (Settings) > Transaction template > Selection and write the properties as in the following image:
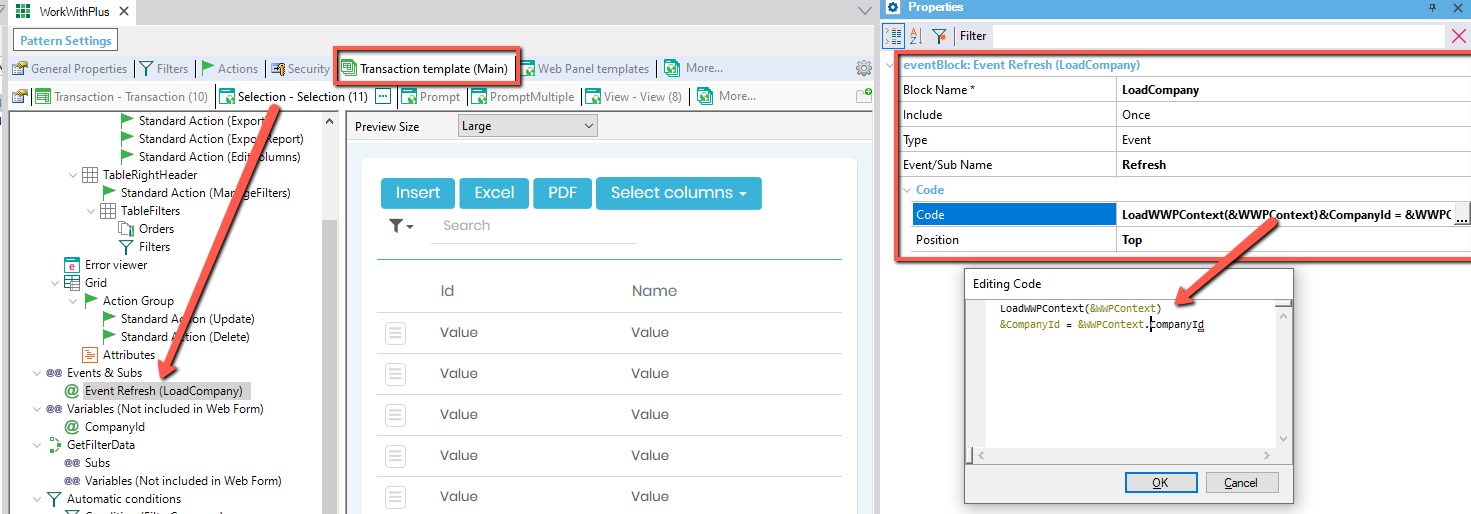
WorkWithPlus Pattern Settings editor, Selection template tab, shows "Event Refresh (LoadCompany)" selected under Events & Subs in the tree, with Properties panel eventBlock "Event Refresh (LoadCompany)": Block Name LoadCompany, Include Once, Type Event, Event/Sub Name Refresh, and a Code property opening the "Editing Code" dialog containing "LoadWWPContext(&WWPContext)" and "&CompanyId = &WWPContext.CompanyId". The center preview shows a Selection grid with Insert/Excel/PDF/Select columns buttons and Id/Name sample rows.

Load:

LoadWWPContext(&WWPContext)
&CompanyId = &WWPContext.CompanyId


Now we must define some automatic conditions so that it can really be filtered by CompanyId:
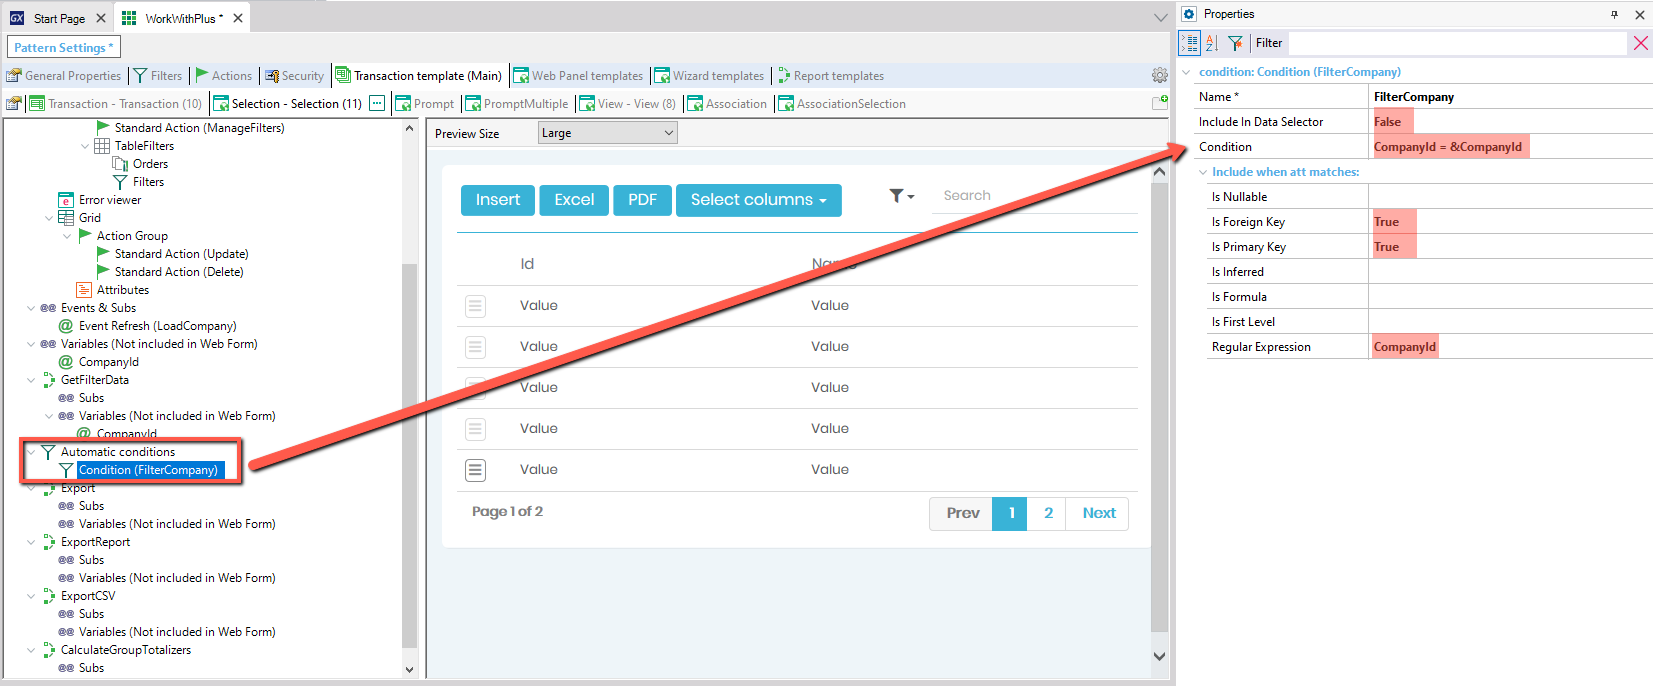
The WorkWithPlus Pattern Settings editor for a Transaction template shows the node tree with 'Automatic conditions > Condition (FilterCompany)' selected and a red arrow to the Properties panel, which shows Name FilterCompany, Condition 'CompanyId = &CompanyId', Is Foreign Key True, Is Primary Key True, and Regular Expression CompanyId. The grid preview on the left shows Insert, Excel, PDF, and Select columns toolbar buttons above a paged results table.


In Variables (not included in Web Form) parameter add CompanyId as variable.
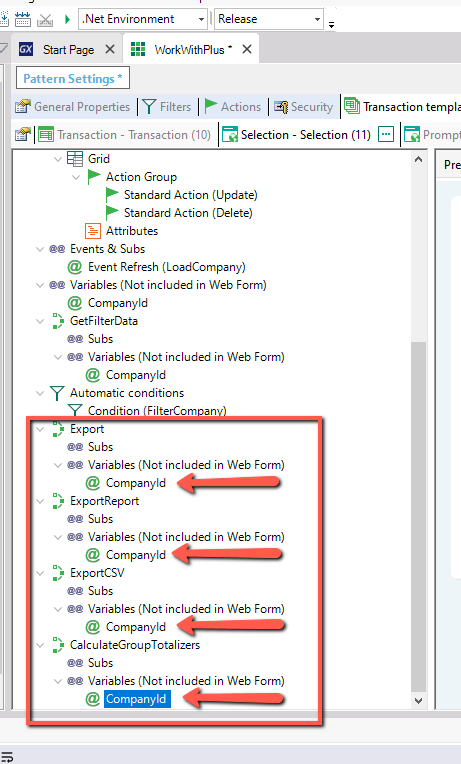
The WorkWithPlus pattern instance tree, zoomed on the node list below 'Automatic conditions > Condition (FilterCompany)', shows the Export, ExportReport, ExportCSV, and CalculateGroupTotalizers subroutines. A red box and arrows highlight the CompanyId variable listed under 'Variables (Not included in Web Form)' in each of these four subroutines.


Once these changes are made, when saving WorkWithPlus (Settings), do 'Update instances' to update all Transactions and Selections.
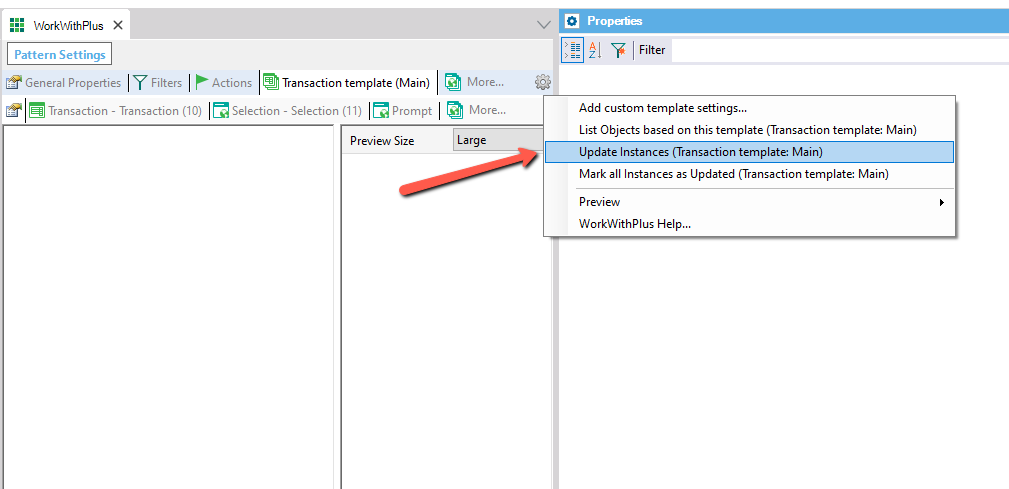
The GeneXus WorkWithPlus pattern editor shows the Transaction template (Main) tab with a right-click context menu open in the Properties panel. Menu entries are Add custom template settings, List Objects based on this template (Transaction template: Main), Update Instances (Transaction template: Main) highlighted, Mark all Instances as Updated, Preview, and WorkWithPlus Help, with a red arrow pointing at the Update Instances option.


Now it is necessary to add CompanyId in transactions that do not have it, change it to primary key so that a composite key is formed. Remember set 'Show in Default Form' = False.
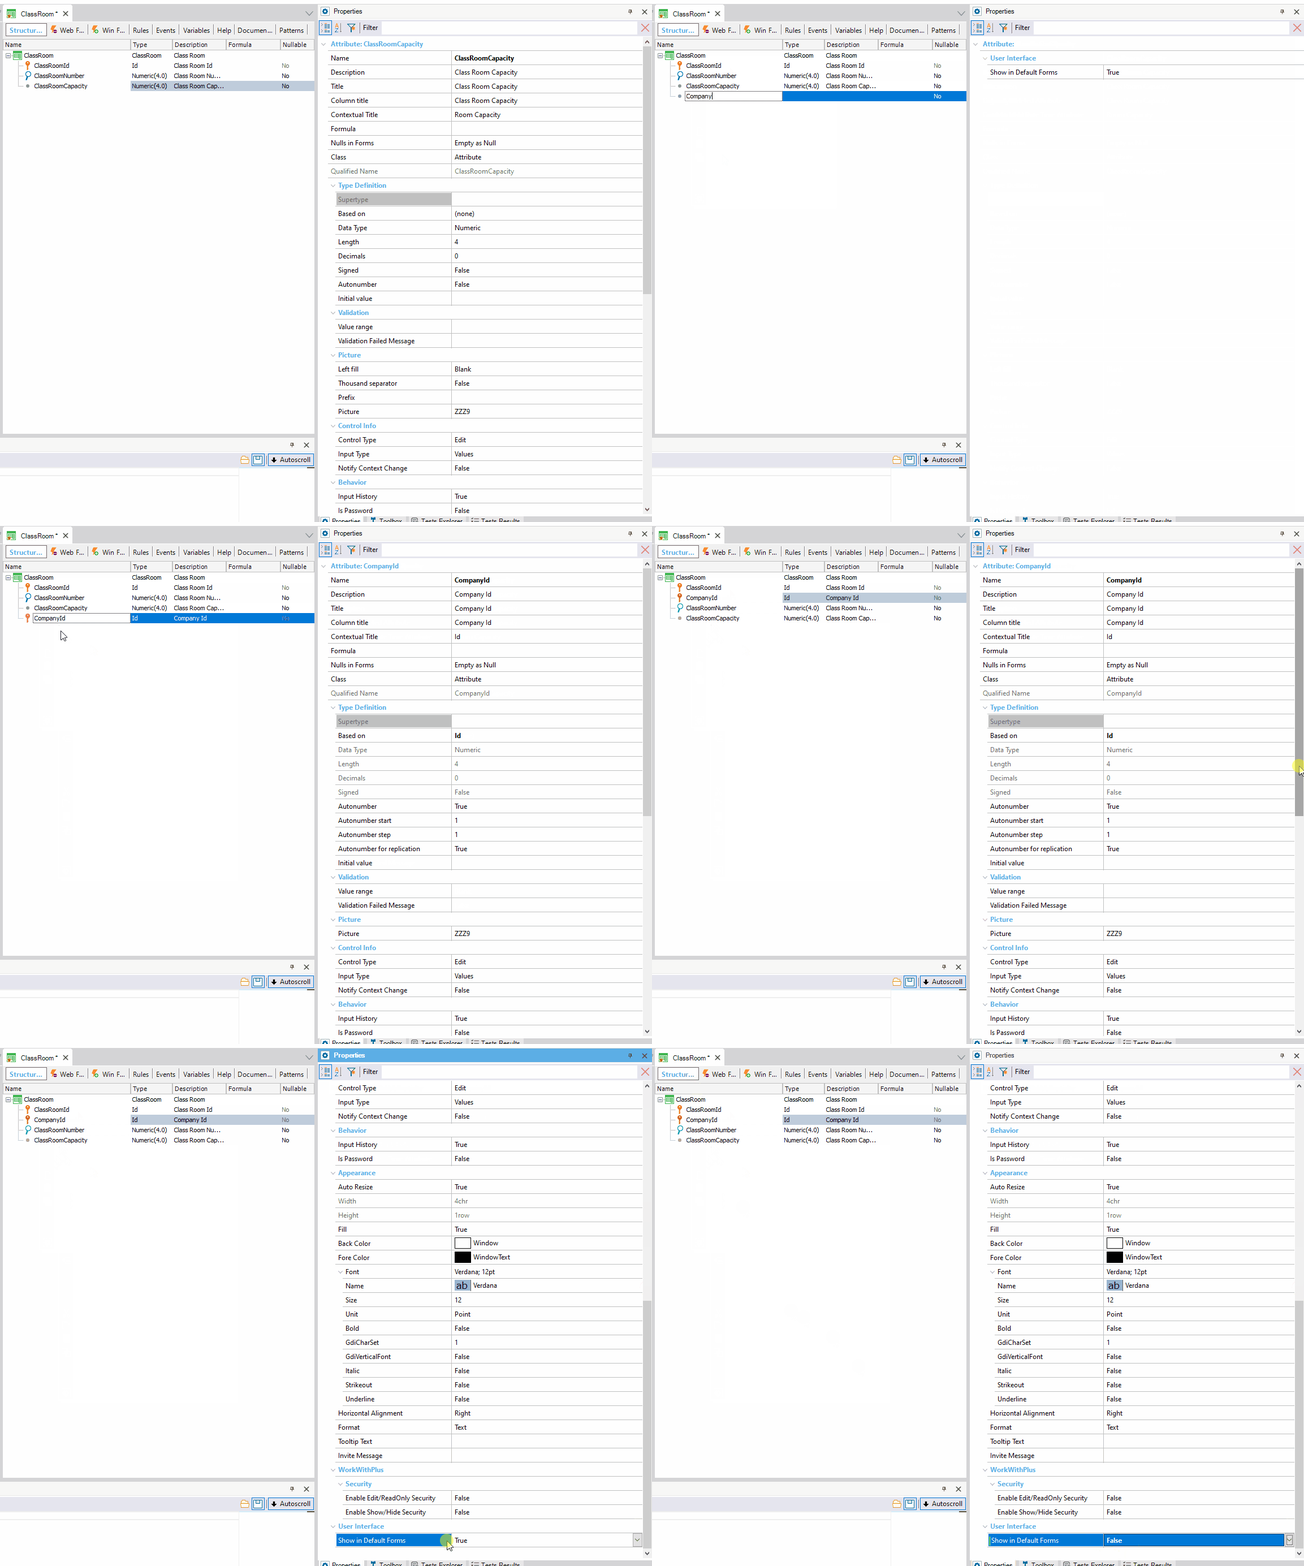
The GeneXus KB Explorer lists the ClassRoom transaction structure (ClassRoomId, ClassRoomNumber, ClassRoomCapacity) with the ClassRoomCapacity attribute selected. The Properties panel details it: Data Type Numeric(4), Title and Column title 'Class Room Capacity', Contextual Title 'Room Capacity', Picture ZZZ9, Control Type Edit, Input Type Values, and Input History True.


For everything to make sense, in the application login you should load the variable & WWPContext with & CompanyId, you can bring the data from GAM (using Extenibility of GAM) or by creating a new transaction which is inferred from the GUID of GAM and CompanyId.


As of WorkWithPlus for Web 14 Upgrade #1 see the following documentation: Multitenant Applications.