Required Attributes and Variables

WorkWithPlus provides the possibility to determine if an attribute or variable will be required. In other words, it will determine if user at runtime will be able to leave the field empty or not. You can also specify if an attribute or variable will be required due to a condition.

This functionality applies for both attributes and variables.In order to enable this option you have to set the Is Required property of the attribute or variable to 'true':
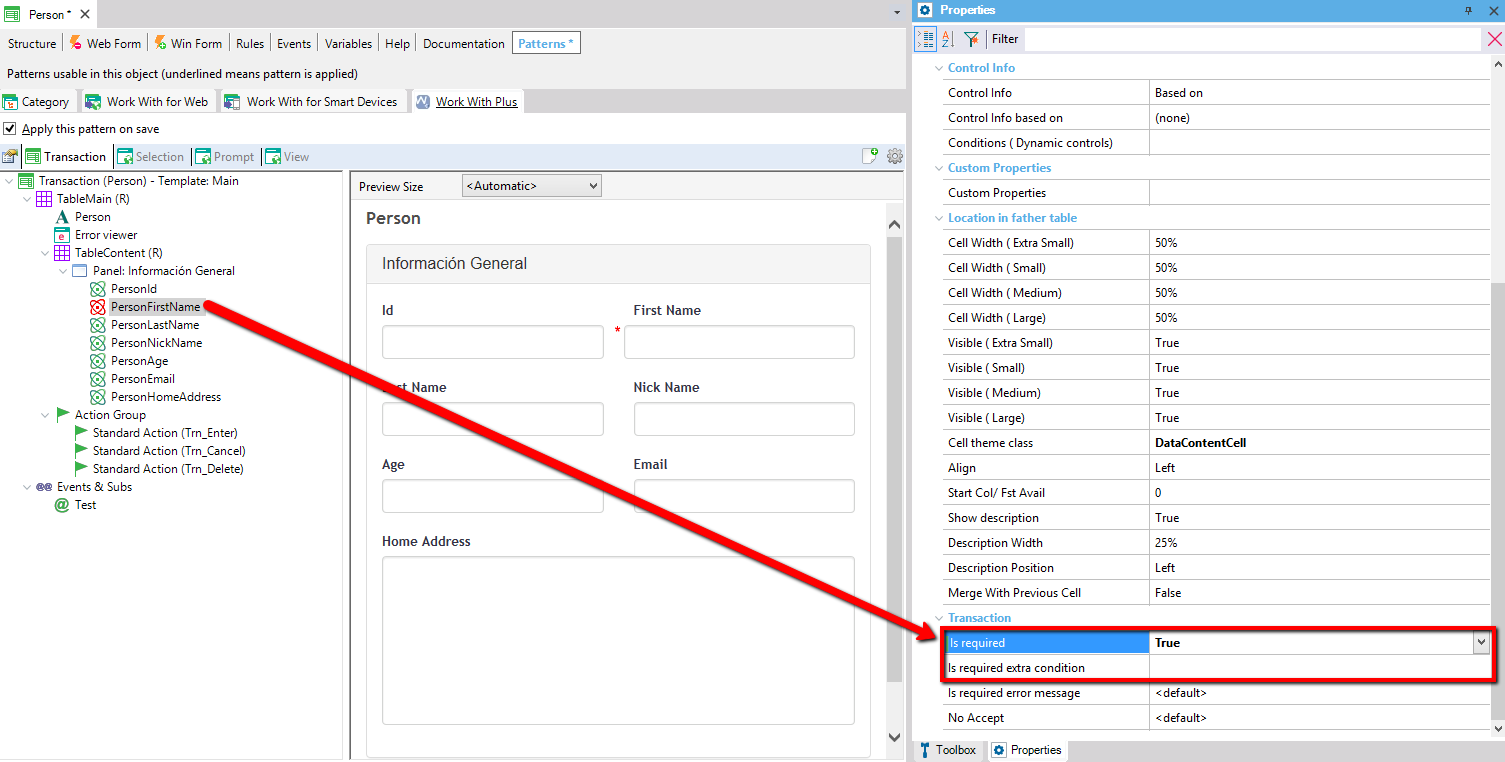
 

The Person Transaction object's Patterns tab with Work With Plus applied shows the pattern tree (TableMain, PersonFirstName selected, Action Group with standard Trn_Enter/Trn_Cancel/Trn_Delete actions) and a form preview of the Person transaction; an arrow points from PersonFirstName in the tree to the Is required property (True) highlighted in the Properties panel, corresponding to the required First Name field marked with a red asterisk in the preview.

Scenario 'Is Required'  in a Transaction

When you set an attribute as Is required, two things will happen. The first one is that WorkWithPlus will assign a different theme class to the required attribute, so that the user at runtime can distinguish the attributes that are required from the regular ones:
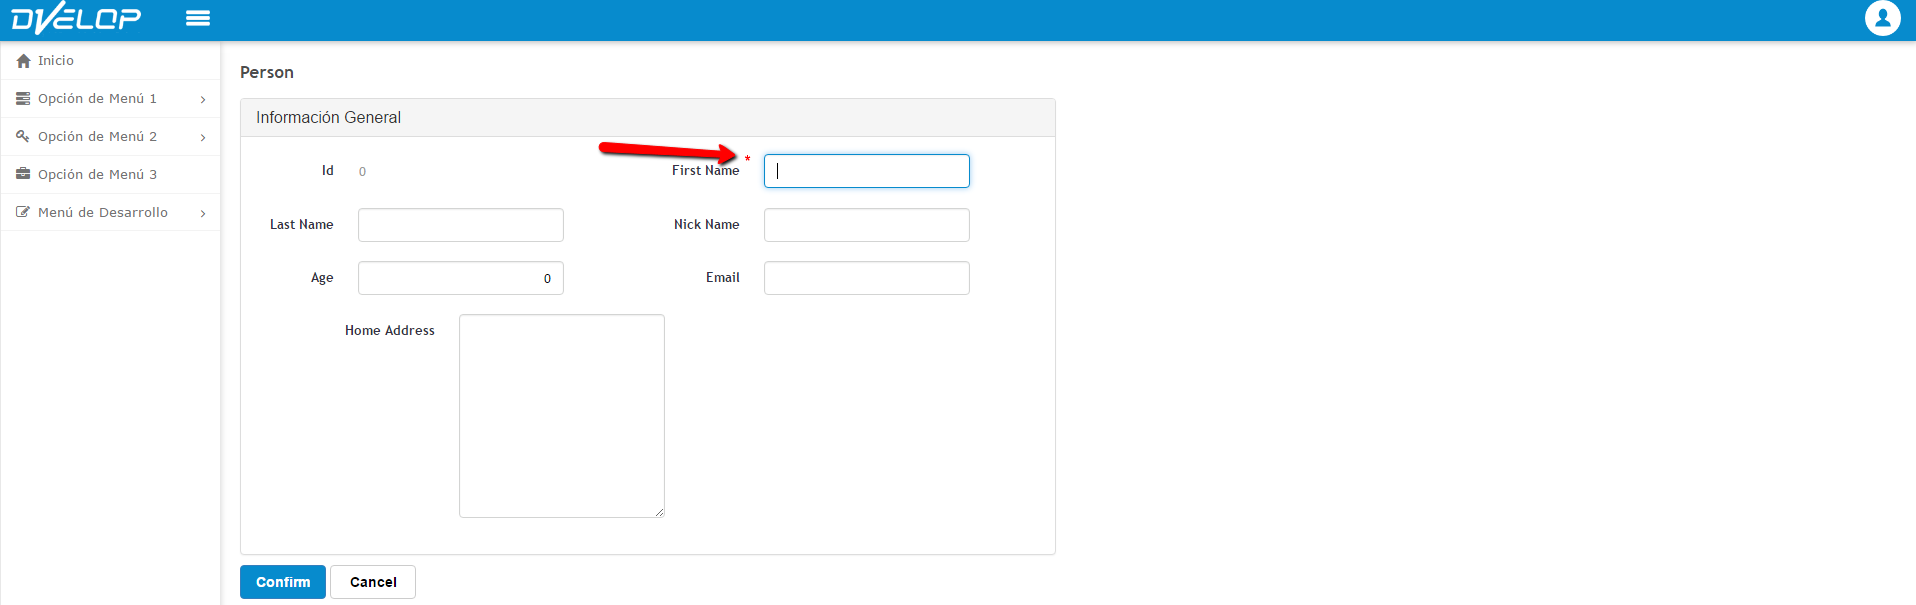
The running Person web form (Spanish menu: Inicio, Opción de Menú 1-3, Menú de Desarrollo) shows the Información General section with an arrow pointing at the required First Name input field, marked with a red asterisk, alongside Id, Last Name, Nick Name, Age, Email, and Home Address fields, and Confirm/Cancel buttons.

The second thing that happens is that WorkWithPlus will add an error rule for each required attribute:
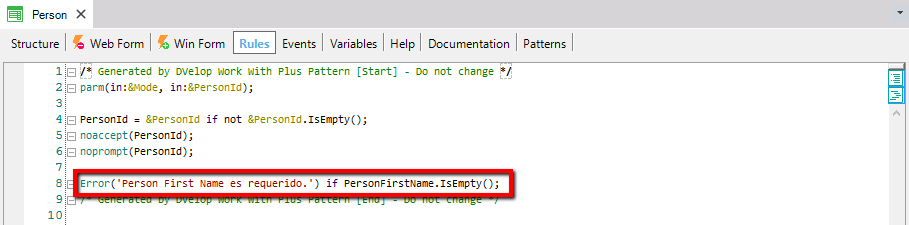
The Rules code editor for the Person transaction shows the WorkWithPlus-generated block between "Start" and "End" markers, with a highlighted line reading Error('Person First Name es requerido.') if PersonFirstName.IsEmpty(); illustrating the auto-generated required-field validation rule.

The message that is displayed for each required attribute is centralized in the WorkWithPlus Settings, within Labels node "Required Attribute':

The WorkWithPlus Settings editor shows the WWP Configuration tree with the Labels node selected, and the Properties panel listing General labels (Ordered By, All In Combo, Record Not Found) and the Transaction section's Required Attribute message template, set to "<Att_Description> es requerido.", pointed to by a red arrow.

So if you have a group of developers you don't need to agree wich message is going to be used for required attributes. You just have to set this property as true and then if you want to modify this message you only have to modify it once and all the messages of all the application will be updated automatically when building the apllication (or reapplying the pattern).This helps the developer to standarize the application as all the messages would be the same.

You can also set a condition to specify when the attribute or variable would be required and when not.

For example, if we want the person Home Address to be required when the PersonIsHomeAddressRequired attribute is True we should add the following condition:
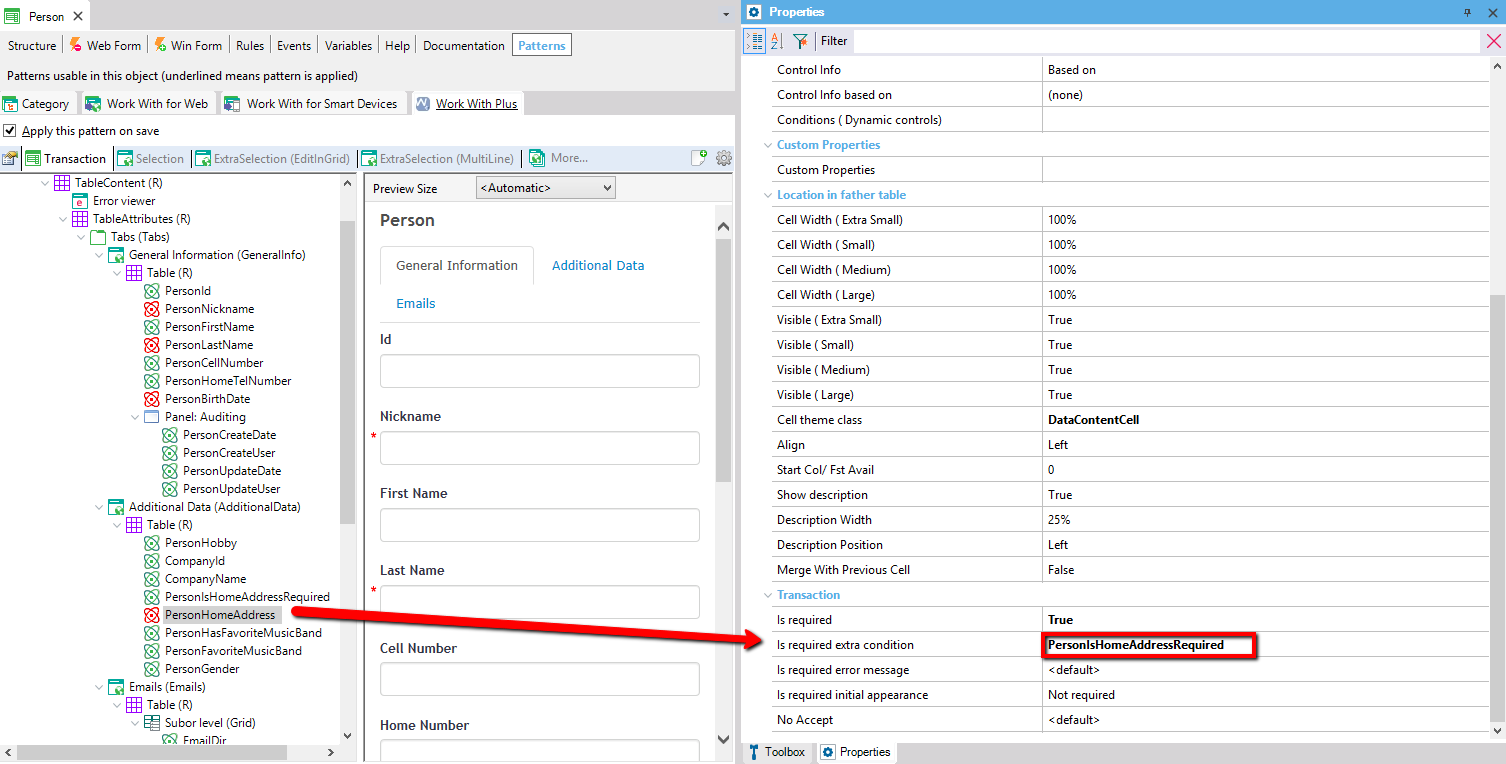
The Person transaction's Patterns tab shows the WorkWithPlus instance tree with attribute PersonHomeAddress selected; the Properties panel highlights "Is required extra condition" set to PersonIsHomeAddressRequired, alongside "Is required" = True, showing conditional required-field configuration.

In this way, the error rule will be triggered only if the PersonIsHomeAddressRequired is True:
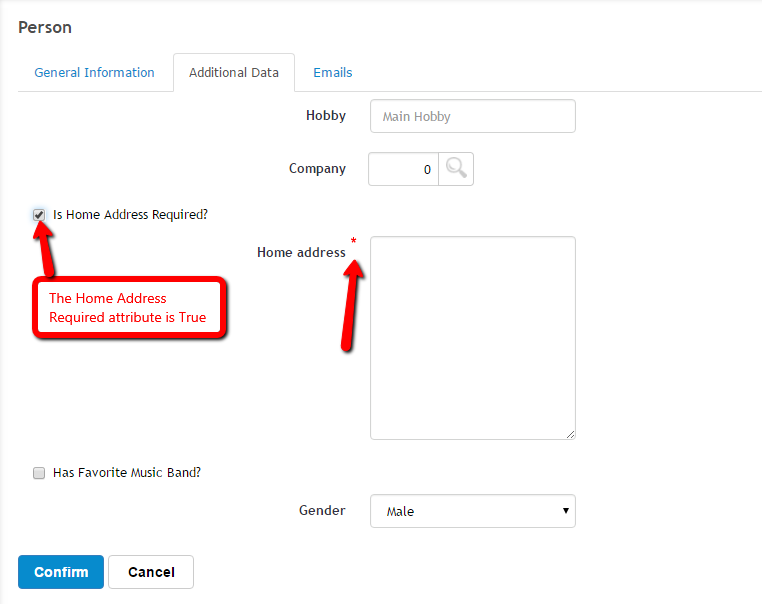
The generated Person web form's Additional Data tab shows a checked "Is Home Address Required?" checkbox and a required Home address textarea marked with an asterisk, annotated with a callout explaining that checking the box makes the Home Address attribute mandatory.

If you need to use a different error message for a specific attribute, you can set that message in the property 'Is required error message':
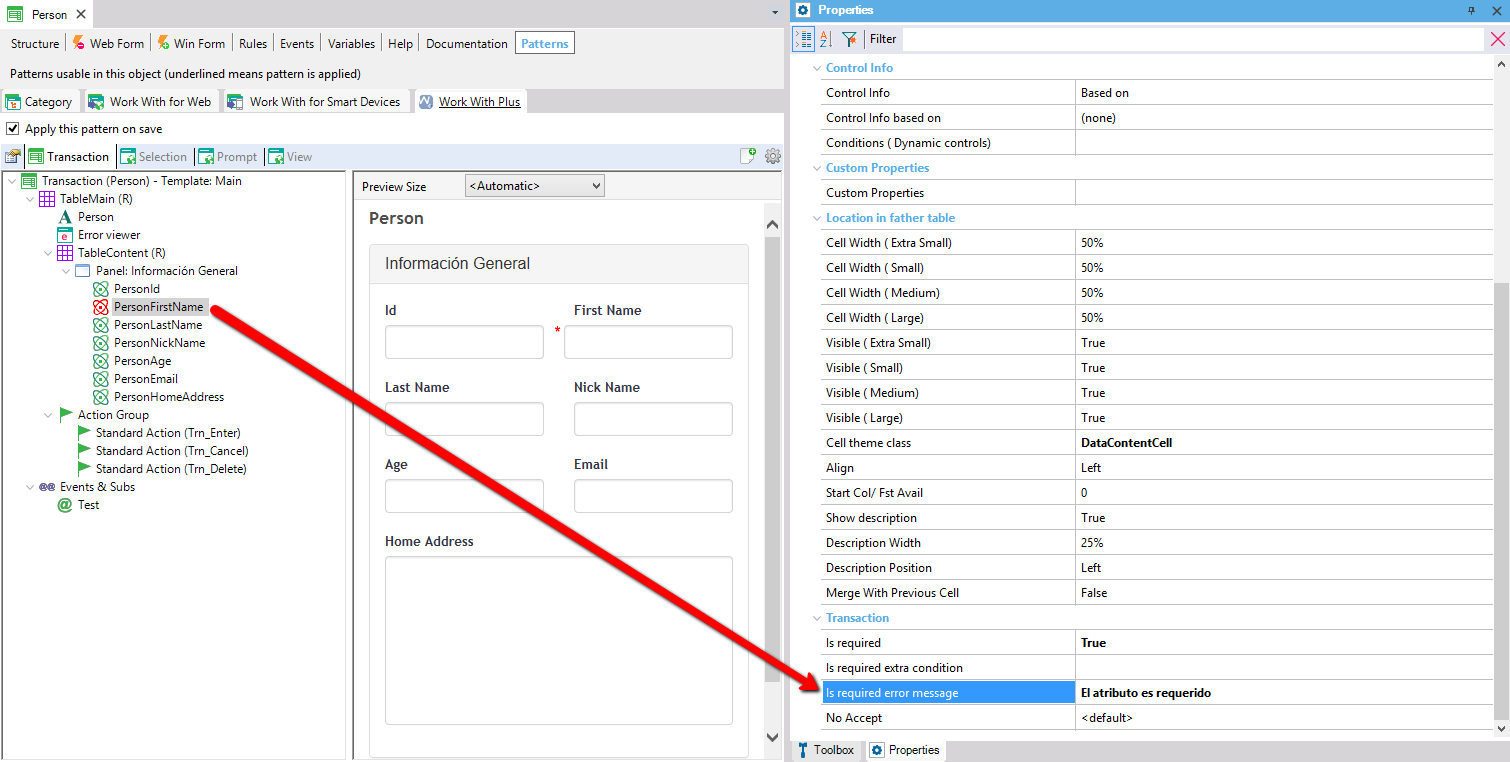
The Person transaction's Properties panel, with attribute PersonFirstName selected, shows the Transaction section's "Is required error message" property set to the custom text "El atributo es requerido", highlighted to indicate where a static required-field error message is configured.

The value <default> means that the message will be taken from the WorkWithPlus Settings --> 
Labels --> Required Attribute property.

You can also define a message by using a variable or procedure, if the message is written with the format as shown below:
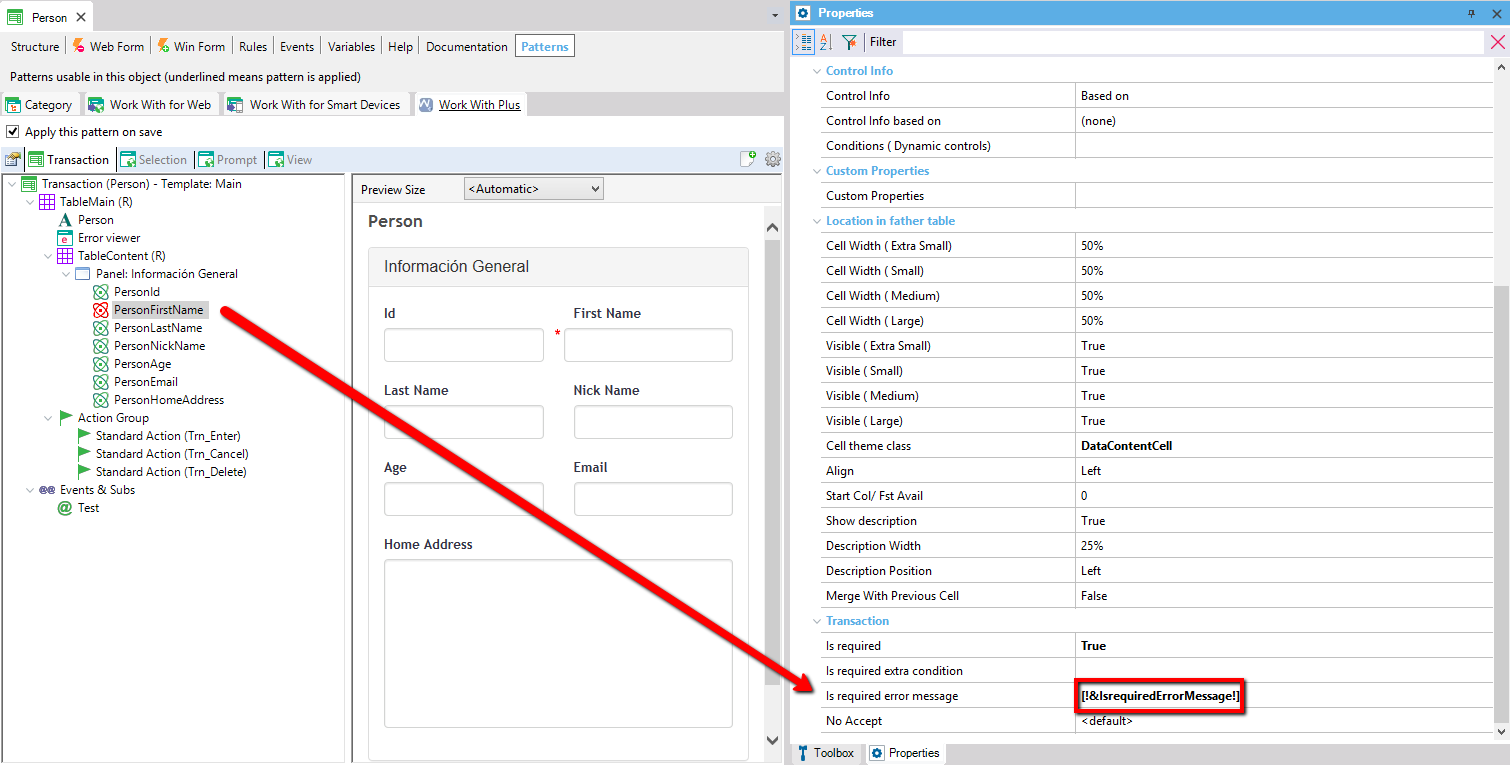
The Person transaction's Properties panel, with attribute PersonFirstName selected, shows the "Is required error message" property set to the expression <a href='!&IsrequiredErrorMessage!'>!&IsrequiredErrorMessage!</a>, highlighted, illustrating use of a variable to supply a dynamic required-field error message.

Scenario 'Is Required' in a Web Panel

When you have a variable in a Web Panel created based on a template, and you want to set it as required, you have to change its property 'Is Required' to True.
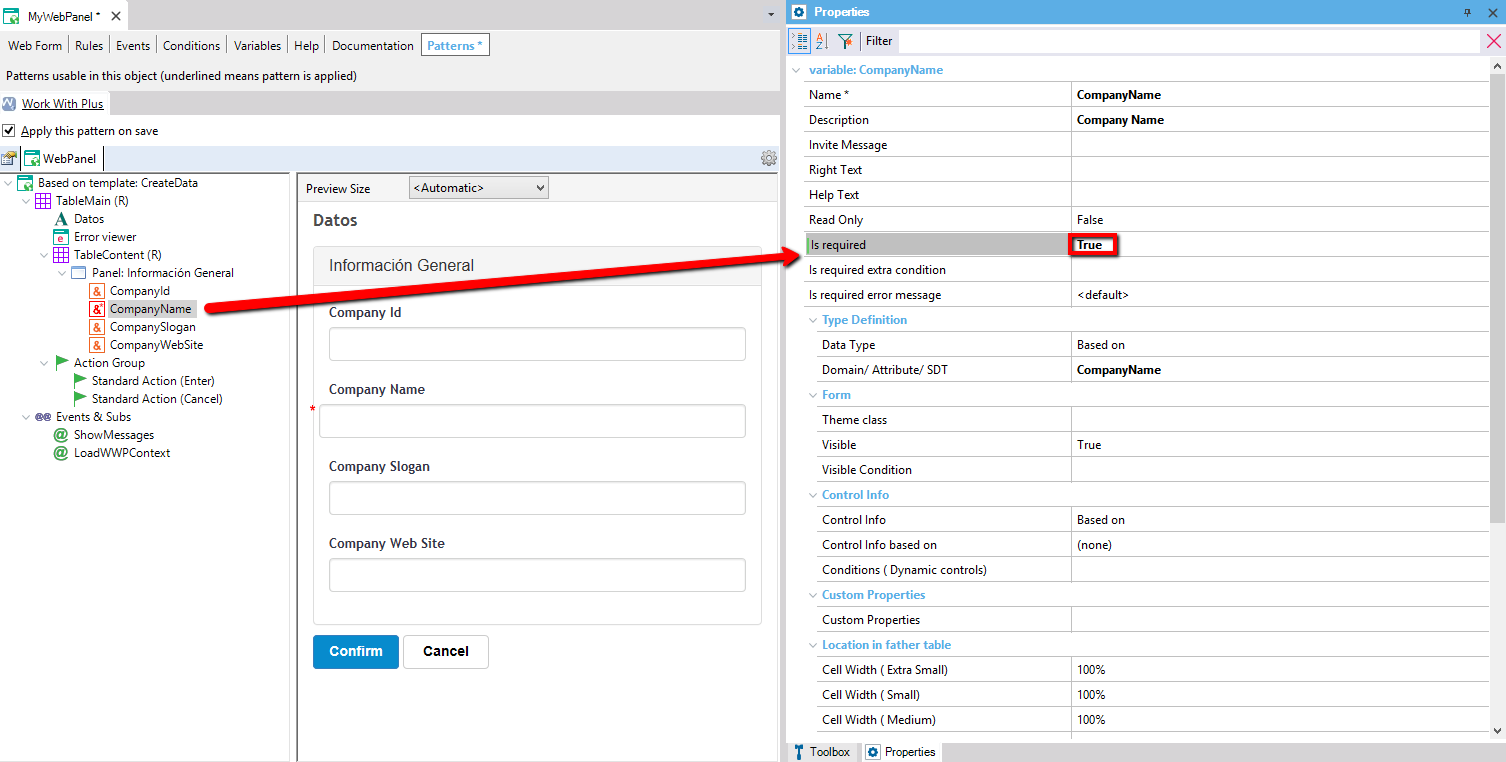
The MyWebPanel pattern editor shows the CompanyName variable selected in the tree, with the Properties panel's "Is required" property set to True, highlighted, alongside the generated form preview showing a required Company Name field.

It will assign the same Theme classes as it does on the Transaction scenario, but instead of adding an Error rule, it will create a subroutine where will check for all the variables that are required and display a message for each one that is empty. It will set in a boolean variable the result (if all the required fields are ok or not).
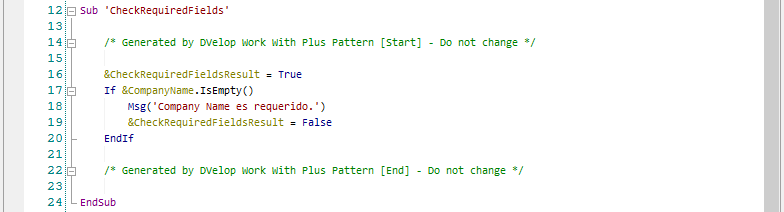
Generated GeneXus source code for the "CheckRequiredFields" sub shows the WorkWithPlus-generated block that sets &CheckRequiredFieldsResult = True, then checks If &CompanyName.IsEmpty(), shows Msg('Company Name es requerido.'), and sets the result variable to False.