This version makes a sensitive modification in the way you work with WorkWithPlus for Native Mobile, as you will have the same Dev Ex as WorkWithPlus for Web taking advantage of the editor and its real-time preview among many other features. So, instead of using the hierarchical editor provided by version 7, you will be working with instances and Components.
In consequence, if you were in a project using the power of the templates and hierarchical tree of version 7, if you install the new version these mechanisms are not provided any more in the same way, as you have the new IDE with its real-time preview and templates made with instances. You would have to run the Design System Wizard and create Panels using the new mechanism (the previous panels would remain as you did them but with no hierarchical tree). Therefore, migrating to the new version in an existing KB will depend on each scenario (for example, the status of the project).
If you prefer to remain using version 7 for a specific project, but you want to migrate to WorkWithPlus for Web 15, you need to follow these steps:
- Run WorkWithPlus for Web and Mobile 15 setup
- Run WorkWithPlus for Native Mobile 7 setup
If you prefer to migrate to WorkWithPlus for Native Mobile 15 you should consider the following:
When migrating to this version, the way you work changes, having a different structure and more similar to WorkWithPlus for Web in web panels, so it is necessary to redo the instance by importing the Layout design that you had previously created if you want to keep your old design, otherwise you can choose one of the available templates to use in this Panel.
Once WorkWithPlus for Native Mobile 15 is installed, it will need to be initialized. So if you enter a previously created Panel, it will be displayed like this:
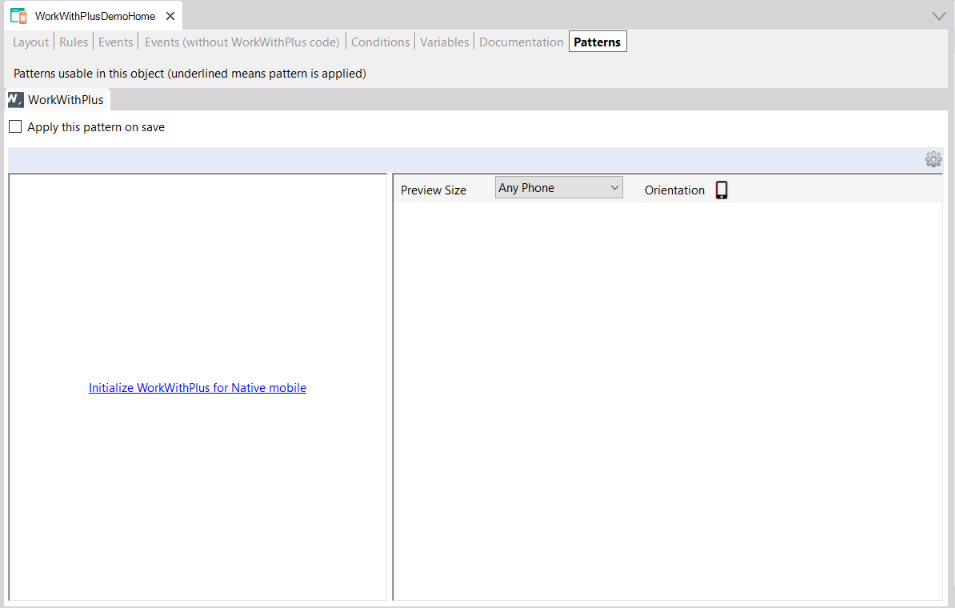
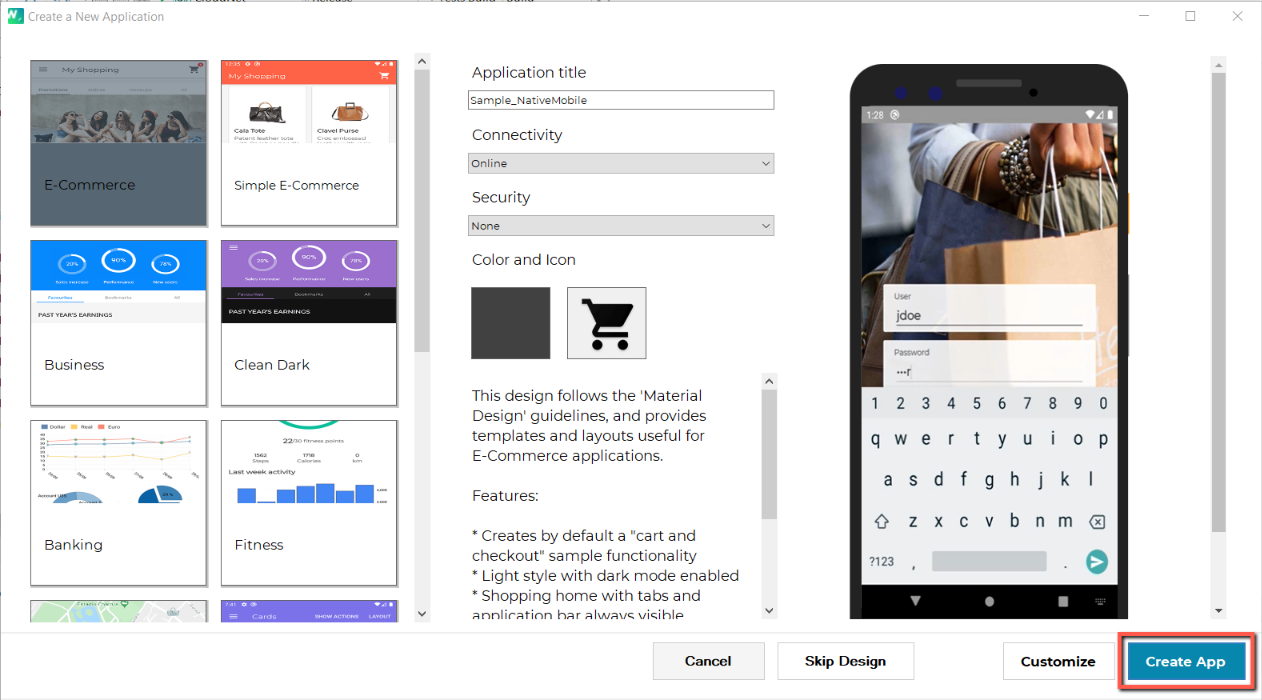
To initialize, you will need to run the Native Mobile Design System Wizard.
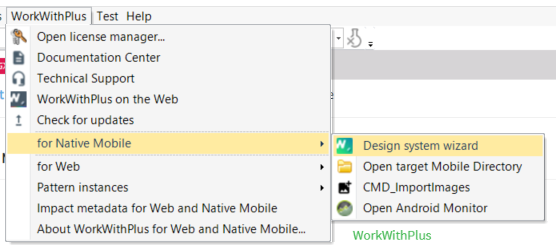
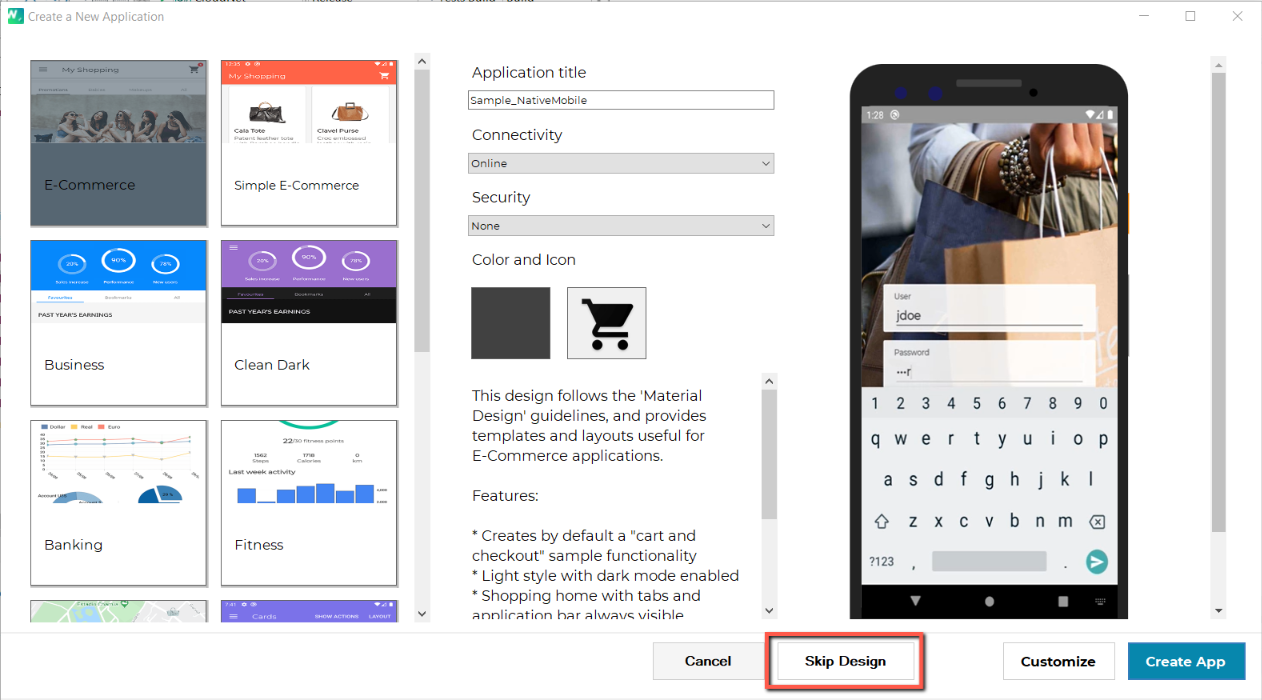
You have two options:
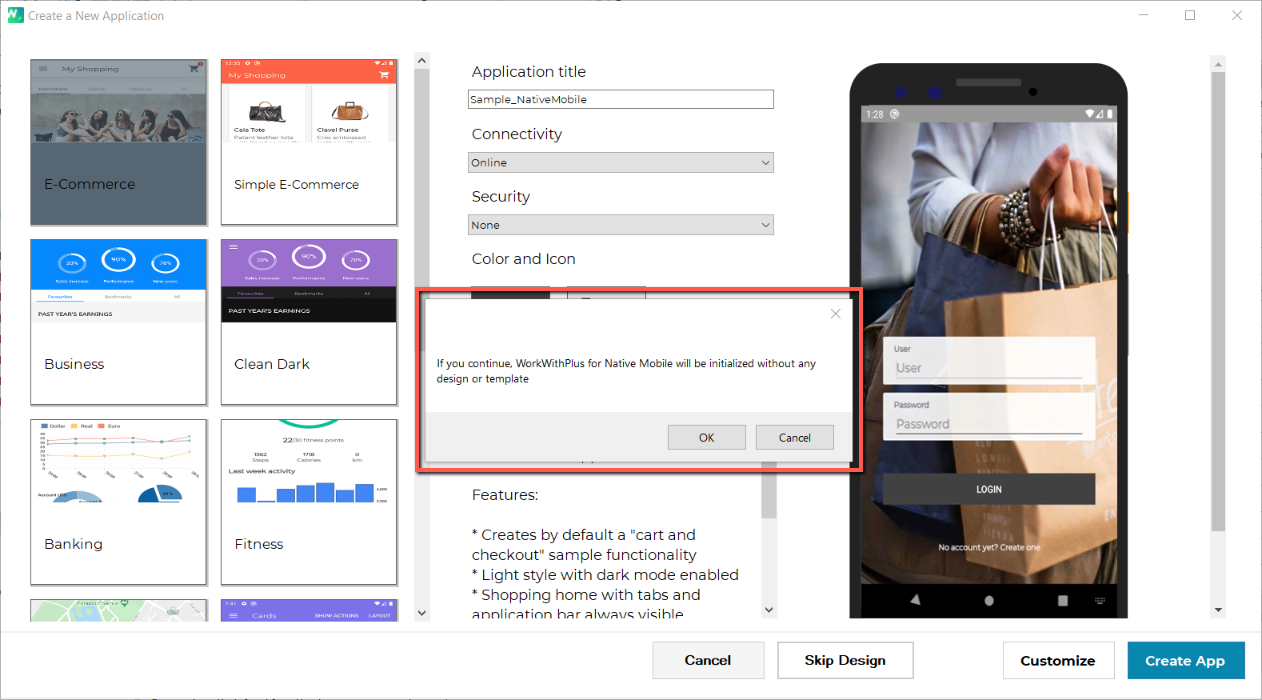
- The first is to press the Skip Design button, this will only initialize the WorkWithPlus Settings object for Native Mobile and import the Empty template.
A warning message will be displayed indicating that no templates or Design System will be imported.
- The second option is to create a new application, pressing the 'Create App' button, this, in addition to generating a new application, will import all the necessary templates, components and Design System objects, with their respective classes according to the design you have selected.
Once initialized, if you come from previous versions, the screens created previously that contain modifications in the layout, will be shown in the following way in the Pattern tab.
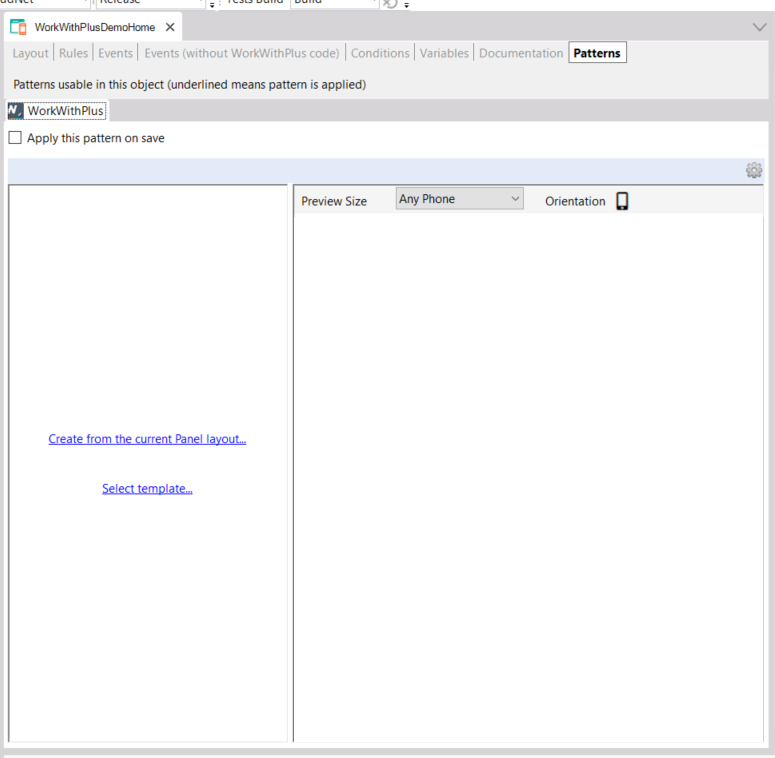
If you do not select any option, the Panel will look the same as it did in the previous version, since it will have the same modifications in the Panel Layout, but if you want to use the pattern, you can import the design that is in the Layout to be able to use the new IDE with the preview in real time. You do that by selecting the option ‘Create from the current Panel layout…’
The second option 'Select template...' will show you all the layouts available to apply to the Panel, but you will lose the previous layout when choosing and applying a template. These templates will only be available if you have run the Design System Wizard and created a new application, as pressing the 'Skip Design' button will not import any templates or components.
|